Introduction
The purpose of this user guide is to outline all features and functionality available in Primero/GBVIMS+. The GBVIMS+ Module is a data entry, reporting, and case management tool to help you collect, store and analyze information on gender-based violence survivors. There is a standard set of forms developed and endorsed by the GBVIMS Steering Committee that we recommend using. However, your Site Administrator may have to configure these forms specific to your location and needs. For any questions about the forms and information you have or need, please reach out to your Site Administrator.
Logging In
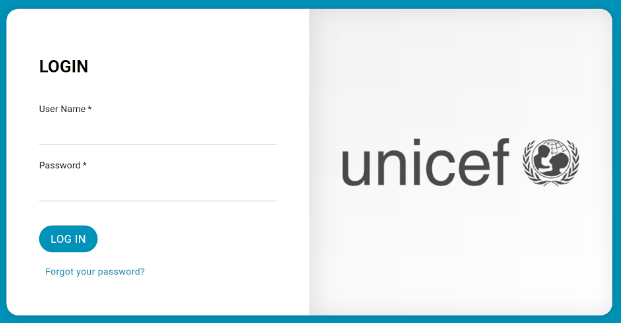
When logging into Primero, you’ll see Username and Password fields. Click on the Username line and type in the unique username provided to you by your System Administrator. Then enter your password in the field below and click LOG IN. If you have forgotten your password, you must contact the system administrator who will provide you with a temporary password.
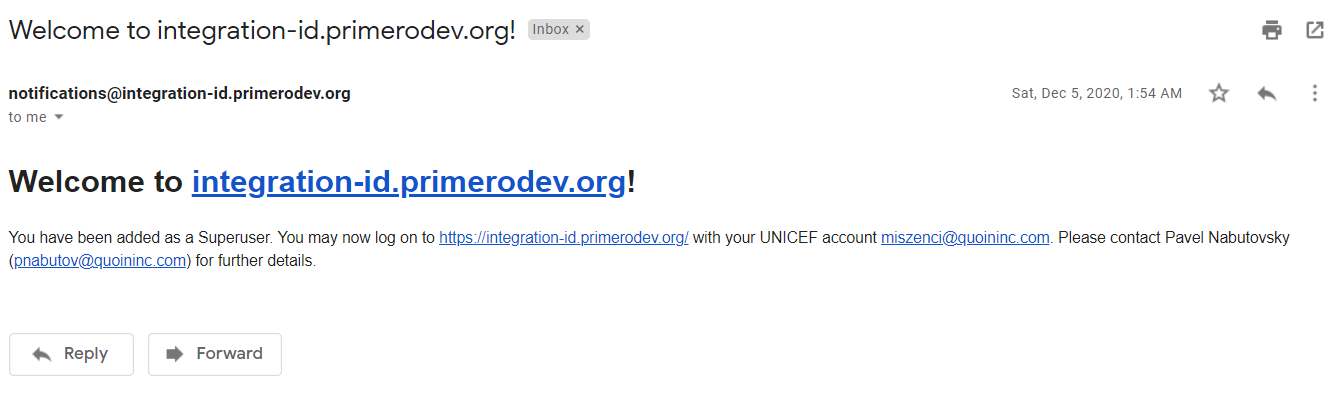
Alternatively, and depending on your organization, you may be able to link your organization’s account email to Primero and login with your organization’s email or username. If your organization has this ability, you should receive a confirmation email, as illustrated in the below image.
If your organizational account is linked with Primero, you will see a login page similar to the picture below. Select your organization and login with your standard credentials. If you do not have a linked organizational account, click “Log in with Primero username” to proceed as mentioned above.

Note that access to features and functionality varies depending on the user role you are assigned: Case Worker, Case Management Supervisor, etc.
The different type of users and their access vary depending on the implementation. A couple of the roles are defined below:
- GBV Case Worker: create and edit my own cases only
- GBV Case Management Supervisor: view only the cases which are managed by case workers under their supervision as defined by user groups
Navigating Primero
Navigation Menu
The Navigation Menu appears at the left side of your screen. You can access this menu from any page and navigate to your home page (or dashboard), Cases, Incidents, Reports (role dependent), and Exports. Your current page will be highlighted. See below:
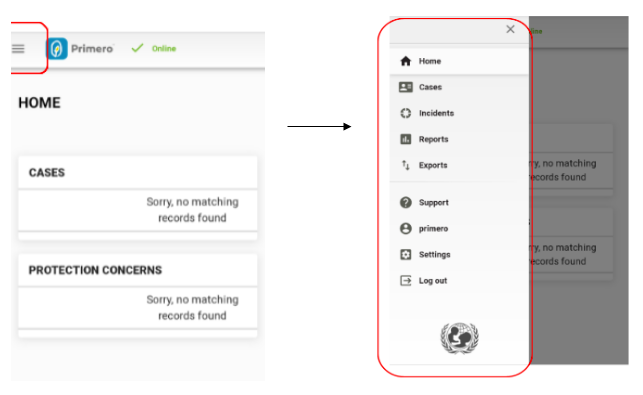
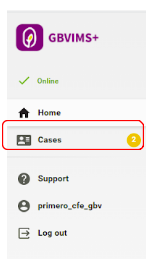
On smaller devices, such as tablets or phones, you will need to click or tap on the menu button to show the Navigation Menu because when the screen is too small, only logos will show. The menu button will appear at the top left of your screen. See the photo below:
Dashboard
The Dashboard, or Home Page, is where you can quickly find information about the records you manage in Primero. The type of information that appears here will vary based on your assigned role in Primero. For instance, GBV Case Workers, GBV Case Management Supervisors, and the GBV Organization Focal Point will each see dashboards that are tailored to the needs of their day-to-day work.
A few notes about dashboards:
- You can always get back to the dashboard by clicking on the “Home” link in the Navigation Menu.
- Clicking on any of the numbers in the dashboard sections below will take you to a list of the records which that number represents.
- In general, numbers in the dashboard represent records to which you have access. For example:
- If you are a case worker, you have access to only your own cases, and, therefore, numbers in the dashboard will reflect only those cases which you manage directly, or which have been referred to you.
- If you are a case management supervisor and have access to all the cases managed by users in your team (user groups), the numbers in your dashboard will reflect these cases.
- Administrator dashboards generally reflect all records in the system.
- Dashboard numbers also tend to represent only open records. Unless the dashboard explicitly mentions closed records, assume that it represents only open ones.
- Dashboard numbers also exclude disabled[1] records.
Case Worker Dashboards
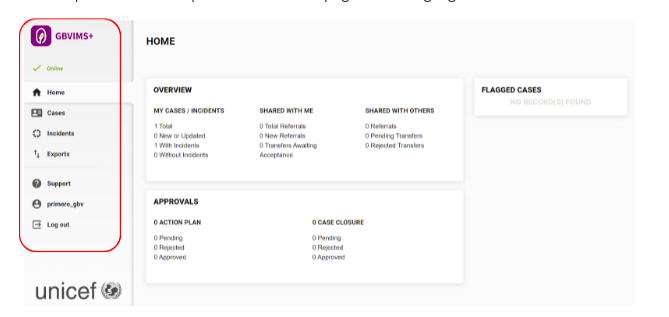
The image below shows an example of the dashboard you might see as a case worker when you first login to Primero.
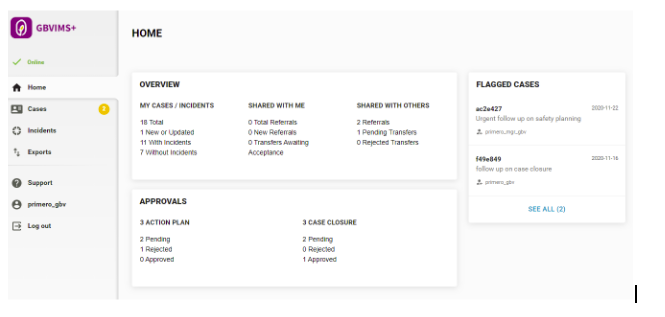
- My Cases/Incidents - This includes four indicators:
- "Total" - The total number of cases and incidents you manage
- "New and Updated" - A case/incident is included in this number if 1.) a supervisor has just assigned it to you; or 2.) another user in the system has added information to the case since the last time you saw it.
- “With Incidents” – The total number of cases that also have linked incidents in the system
- “Without Incidents” – The total number of cases that do not have any linked incidents. Typically, each case should have at least one connected incident. Thus, any number other than zero in this indicator is an indication that a case may be incomplete in the system.
- Shared with Me - This shows you the number of cases which have been referred or transferred to you. We will review referrals and transfers in a later section.
- Shared with Others - This shows you how many of your cases have been referred or transferred to someone else in the system. We will review referrals and transfers in a later section.
- Approvals - This tells you how many of your approval requests are pending, approved, or rejected by a case management supervisor. Each type of approval appears with its own column.
- Flagged Cases – This shows your flagged cases along with the reason for flagging. It also tells you how many of your cases have been flagged.
Case Manager Dashboards
Below are some examples of sections which may appear in your dashboard if you are a case management supervisor.
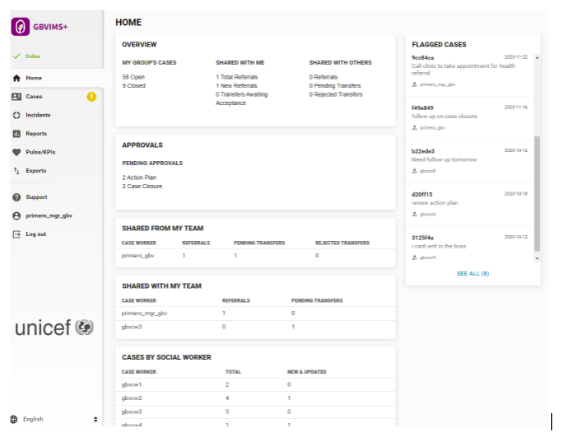
- My Group's Cases - This shows the total number of open and closed cases managed by all of the case workers in your team.
- Shared with Me - See description above.
- Shared with Others - See description above.
- Pending Approvals - This tells you how many of requests are pending your approval for each type of approval.
- Shared from My Team - This is similar to the "Shared with Others" section, except that it shows how many of the cases managed by each of the case workers in your team have been transferred or referred to other users.
- Shared with My Team - This is similar to the "Shared with Me" section, except that it shows how many of the cases other users have referred or transferred to case workers in your team.
- Cases by Social Worker – For each case worker in your team, this shows the total number of open cases they manage, as well as their new and updated cases.
GBV Administrator Dashboards
The below image gives an example of the sections you may see in your dashboard if you are an administrator.
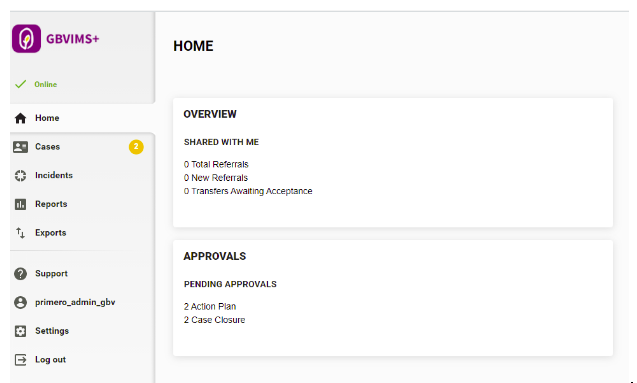
- Shared with Me – See description above.
- Pending Approvals – See description above.
Record Lists
There are two main types of records in Primero/GBVIMS+: Cases and Incidents. In the Navigation Menu, below the Home link are the links to the List pages for each type of record. These are the Case List and the Incident List. As a case worker, when selecting the record type or page you want to visit via the navigation menu, you can see all cases or incidents that belong to you. Once there, you see a list of the records that you can filter and/or sort. See the Case List below:
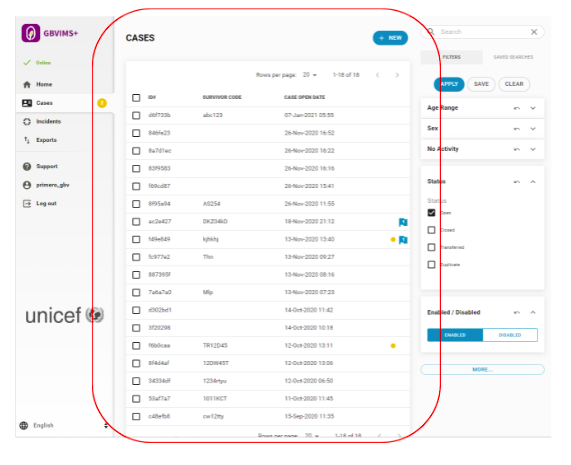
Depending on the work you do, you may only have access to one of these pages and the user interface may change slightly. For instance, the Client Feedback Enterer role only works with Cases’ Client Feedback forms, so they can only access the Case List.
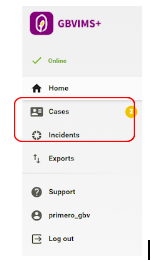
Pictured Above: Client Feedback Enterer Navigation Menu (left); GBV Case Worker Navigation Menu (right)
For more information on how record lists work, please see the Navigating Record Lists section.
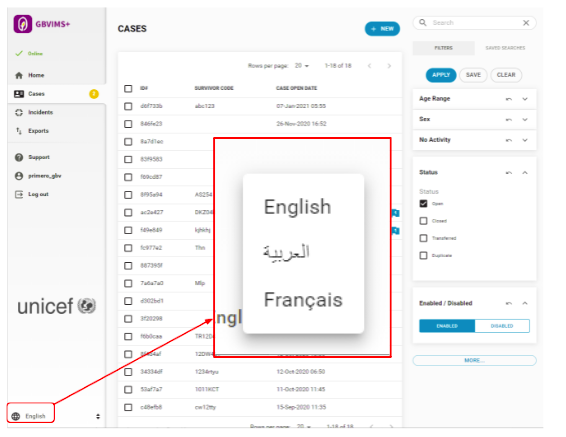
Language Toggle
At the bottom of the Navigation Menu, you will see a dropdown with a small globe icon alongside the current language Primero+ is using. This is the Language Toggle. Click this to view Primero in a different language.
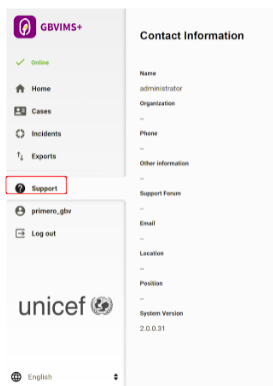
Support
In the Navigation Menu, below the Exports link, you will see the Support link. Clicking on this will bring you to a page with contact information for your System Administrator, as well as links to support forums and other documentation.
My Account and Password Change
In the Navigation Menu, you will see a link with your username. Click this to go to the My Account page.

Here, you can see details about your user account. Click the “Edit” button at the top right of the page to update any of these details or to change your password.

Here you will be able to update the following:
- Full Name: The name managers and administrators will see when looking at your account.
- User Code: User codes are used in the system-generated GBVIMS+ ID and will only appear if your GBVIMS+ has been customized to show your user code on records that you create.
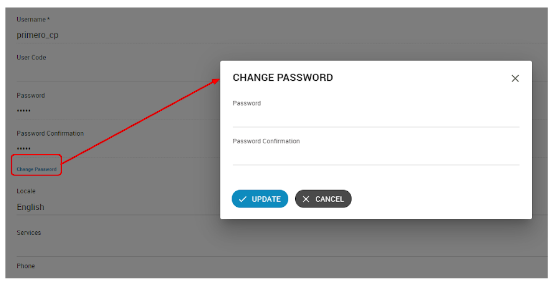
- Password: Must be at least eight characters and contain both letters and numbers.
- To update your password, please click the blue "Change Password" link. Otherwise, your password will stay the same.
- If you forget your password, contact the system administrator to provide you with a temporary password.
- Language: This will be the default language in which you will see the application.
- Phone: Allows other users with the ability to view your profile to contact you.
- Email: Will be used for any email notifications to able to accept or reject transfers. It is required that all users have a functional email address to ensure they can receive email notifications from Primero and email notifications are enabled.
- Services: Any services you will be providing through Primero. This will determine whether and when you appear as a potential recipient for record referrals.
- Position: Your official title within your organization.
- Current Location: The location where you are always or most-often based. This will determine whether and when you appear as a potential recipient for record referrals and transfers.
- Receive email notifications: Will determine whether you receive email notifications, including the following:
- Cases assigned, transferred, or referred.
- Requests from other users for you to transfer one of your cases to them.
- Manager approvals and requests for manager approval.
Click the Save button once you are finished making changes.
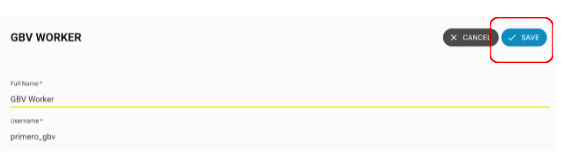
NOTE: You will not be able to change a username once it has been created.
Offline Mode
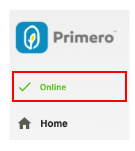
Online Mode:
When you have an internet connection, you will see the “Online Mode” symbol at the top of the Navigation Menu. This means that Primero has full functionality.
Offline Mode:
If you lose your internet connection or choose to work offline, you will be in “Offline Mode,” as indicated in the images below.
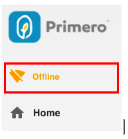
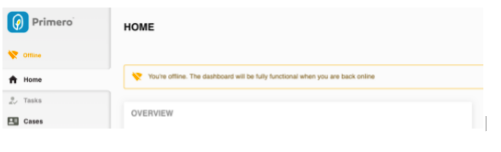
When you are in Offline Mode, you will have limited functionality.
-
You will be able to create and save new cases, but your changes
will not be submitted until you are back online.
- You will only be able to access and edit records that you have accessed previously during that session while online. (A user session begins when you log-in to Primero or access a particular computer or network. It ends when you log-out of Primero or shut down the computer.)
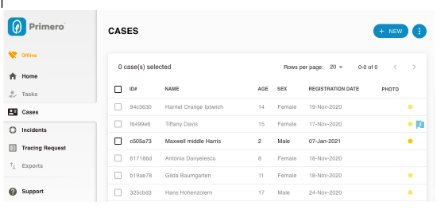
For example, in the image above, the cases you were working on before you lost connectivity (ie. Maxwell) are still accessible from the Case List. All the other cases are greyed out and inaccessible until you are back in Online Mode.
This means that if you are planning to go into Offline Mode, you should open any Cases you will want to edit or access while still online. You do not have to edit the case itself, just opening it is sufficient.
- Only certain actions will be available in Offline Mode (such as requesting approvals). Note that these actions will only get submitted to the system once you are back online.
- Some pages, such as Exports, are unavailable in Offline Mode
IMPORTANT: If you choose to log out while in Offline Mode, you will not be able to log back in until you are online again. Additionally, if you log out, any changes you made while offline will be lost.
NOTE: If you are using a VPN, or if your organization has provisioned your device with advanced security settings, you may not be able to use Offline Mode. Before attempting to use Primero in a low-connectivity setting, try using Primero at home or in your office, and switch on your device's "Airplane Mode," which cuts your device's internet connection. If you do not see the "Offline" notification appear in Primero, then Offline Mode may not work on your device. This means information you enter while you are offline will not be saved. If you are unable to use Offline Mode, please talk to your organization's ICT team about how to update your device's settings.
Navigating Record Lists
Searching for Records
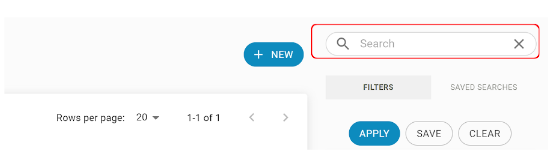
On all of the record list pages, you will find a search bar at the top right of the page (location may change when System is in Arabic). From here you can type in your search and return a list of possible matches. This is useful when searching for a specific name or case ID. After searching, you can filter results further. Approximate and exact matches will appear.
When you perform a search, Primero compares your query against the following fields for each record type:
- Cases: “Long ID,” “Case ID,” “Name,”
- Incidents: "Long ID," "Incident Code," "Account of Incident," "Survivor Code", and "Incident ID IR."
NOTE: You can search and filter the record lists at the same time (example: Search for Cases with the name "Smith" while filtering for only Male Cases).
Filtering
On the right side of all of the Record Lists, you will see the Filters Panel (location may change if System is in Arabic). Filtering is an efficient way to find the record or records that need your immediate attention. Filtering allows you to search for a case with a particular feature - e.g. all cases of women (in which case, you will filter by 'Sex') or cases of a certain age group.
NOTE: By default, the record list pages will only show records which are open and enabled. You can choose to show closed or disabled records using the “Status” and “Enabled/Disabled” filters.
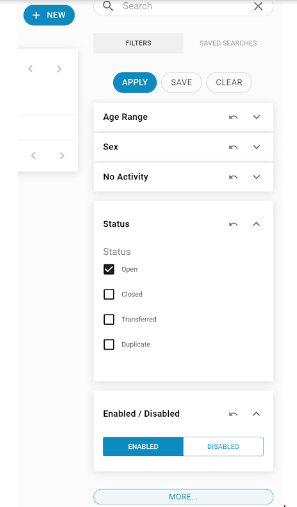
The most-commonly-used filters are always visible at the top of the Filters Panel. To expose more specific filters, click the "More" button below the panel. To re-hide these, click "Less".
Once you have set one or more filters, click the "Apply" button at the top of the Filters panel to update your list results. To clear the filters you have selected, click the "Clear" button.
You can also save a set of filters for later use by clicking the "Save" button at the top of the Filters Panel. This opens the modal pictured below.
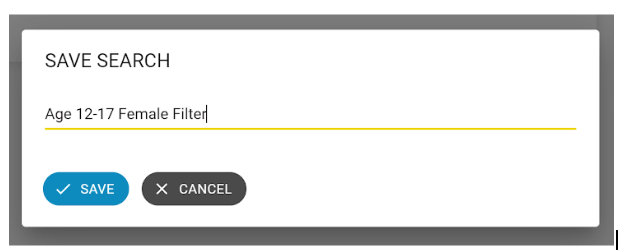
Enter a name for your new saved search and click “Save.” Once the search has finished saving, click on the “Saved Searches” tab at the top of the filters panel.
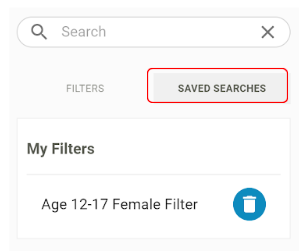
Here you can find the search you had saved earlier. Click on the saved search to apply the filters that were saved. To delete a saved search, you can click on the trashcan/dustbin button next to it.
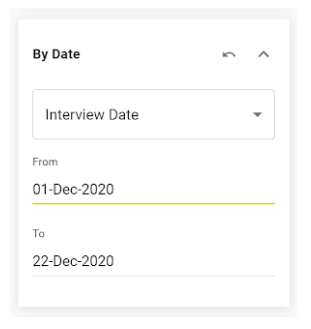
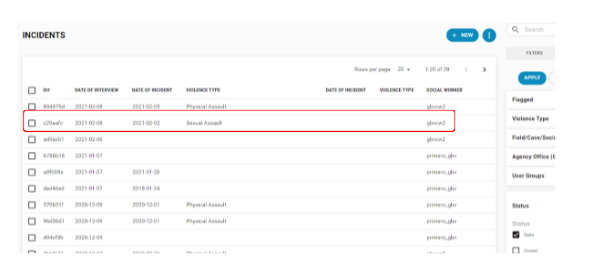
NOTE: You can filter incidents from the Incident List page by date range. Enter the date range by first selecting if the date range is for the interview or incident dates. Then, use the calendar widget to select the correct dates. You can set the range for one day as well.
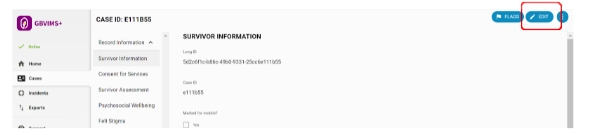
Viewing and Editing a Record
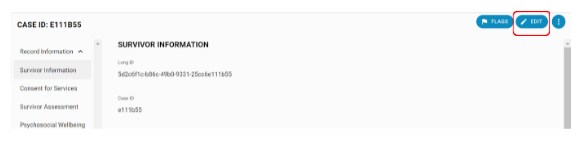
In the Case List, you can click on any Case to see more details. You will arrive at the View Case page. On this page, you can only view information about the case; you cannot edit it. In order to edit information about the case, click the "Edit" button with the pencil icon at the top right of the page.
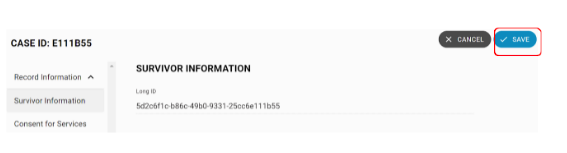
You should now be able to update information about the case. Once you have made changes, click the SAVE button in the header. NOTE: If you do not click the Save button, your changes will be lost.
Navigating Primero Forms
When you are viewing, creating, or editing a record in Primero, you can move between Forms using the Form Navigation Menu, which appears on the left side of the screen.
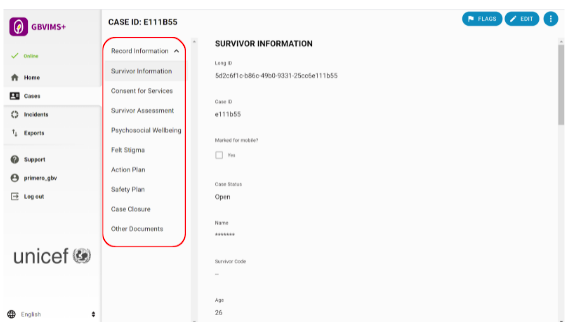
You will notice that some Forms appear under a collapsible header. This is called a Form Group. In the above image, "Record Information" is a Form Group, which, when expanded, contains a number of Forms, including "Incidents." See below:
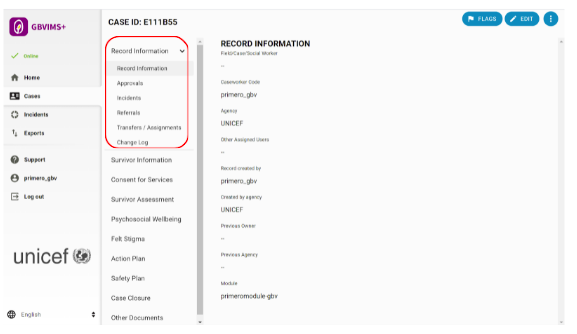
When you click on a Form Group, the Form Group opens, and you arrive at the first Form in the group. Click on any other Form in the group to view that Form. To collapse an open Form Group, click on it again.
Creating, Viewing, or Editing a Case
Creating a New Case
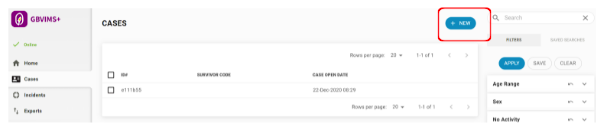
Create a case from the Case List by clicking on the NEW button at the top right of the page. This will open up the case forms to enter the case information.
NOTE: Create cases before incidents. This allows for incidents to be connected to cases and saves time on data entry. See “Incidents” for more information.
Once you have reached the new case page, you can navigate to different forms as described in the “Navigating Primero Forms” section.
Editing a New Case
To edit a case, enter the case record and click the EDIT button. The page will then allow you to edit individual form fields.
There are a number of different field types in which you can edit differently.
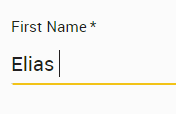
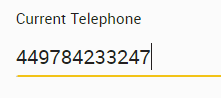
- Text - Type normally using your keypad or keyboard.
- Text Area - Similar to the Text Field, but the field expands as you type, allowing you to enter more information.

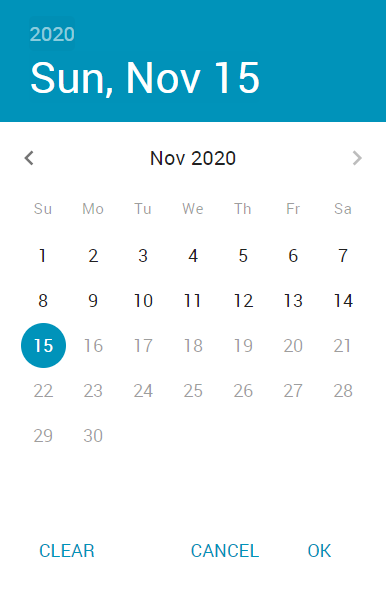
- Date - Opens a calendar widget where you can directly select the correct day, month, and year.
- To go to another calendar month, click the side arrows to navigate forwards or backwards.
- To choose another year, click on the year at the top left of the widget and select a year from the scrolling menu.
- Clicking “OK” sets your choice; “Clear” returns you to today’s date; “Cancel” does not make any changes.
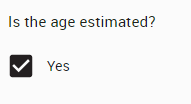
- Tick Box - Select the tick box if the statement in its label is true.
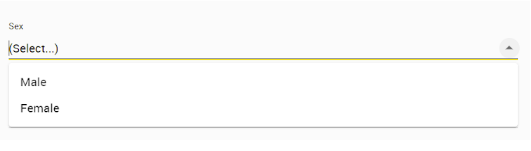
- Select Drop Down - Select an option from the dropdown menu. You can also try typing a word into the select field to narrow down the menu and find a desired option faster.
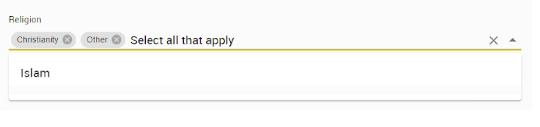
- Multi-Select Dropdown – Similar to Select Dropdown, but you can select more than one option from the dropdown menu.
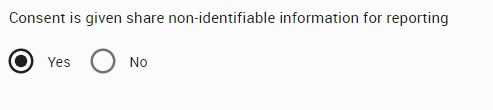
- Radio Button - Similar to Tick Box, click on the correct answer - used for yes/no/unknown or other similar selections.
- Numeric Field - Key the number into the field.
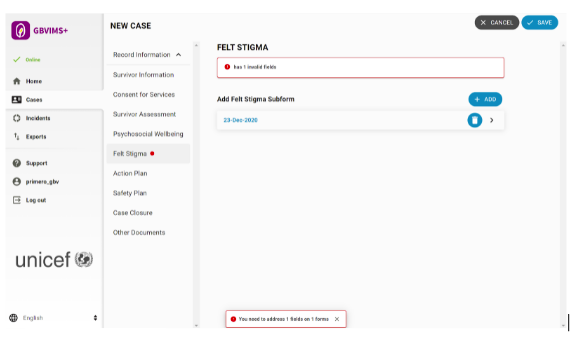
You may be required to complete certain fields. Required fields can be identified by the asterisk (star) next to the field name. You will receive an error if you try to save the Case before filling out those fields. Red error messages will appear on the corresponding forms in the Form Navigation Menu to further help you identify the required fields.
Note: In GBVIMS+ very few fields are required to avoid forcing a survivor to answer or share information.
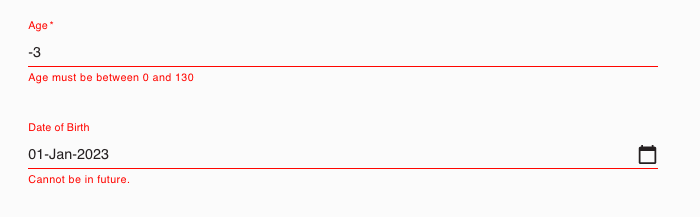
If you enter a field incorrectly, the system will return a similar series of error messages and alerts when you try to save the case. In the example below, a negative age and a “Date of Birth” in the future cause errors until those fields are fixed.
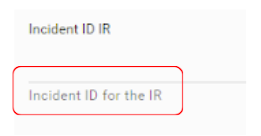
Some fields may have help text, which is grey assistive text under a field to help you determine what the field is used for.
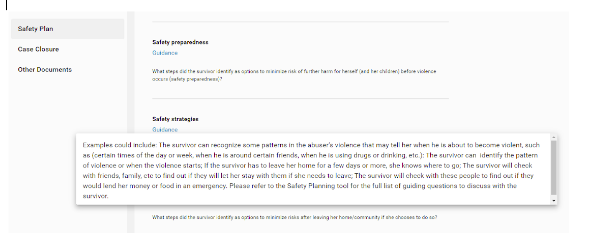
Some fields may have guidance text, which is a more detailed summary of the field.
For more information on how to set which fields are required and other data constraints, please see the Primero Administration and Configuration Guide.
Navigating Subforms
Some Forms contain information that is entered multiple times. For example, a case worker might fill out the Psychosocial Wellbeing form after the 3rd, 6th, and 7th session with a survivor in order to track their wellbeing over time. Or, for the Action Plan, you can create a sub-form for each action taken throughout the case management process. In situations like this, Primero organizes information in Subforms.
Adding Subforms
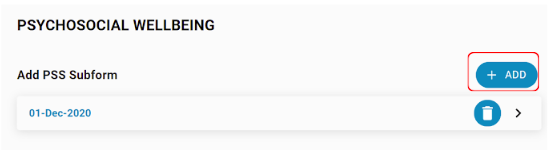
When you click into a Form that contains a subform, you will see an ADD button. Click this to add a Subform Entry.
A modal will appear. Here, you fill out information about the entry you want to add. For example, on the "PSS " subform, you will add survivor responses to different questions on their sense of wellbeing.
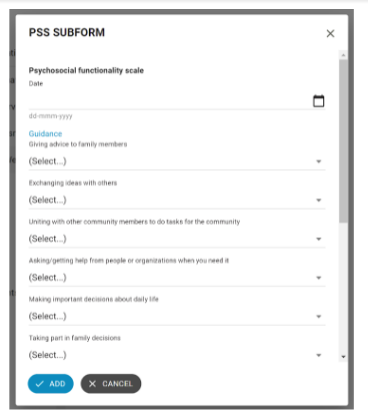
When you are done filling in information, click ADD at the bottom of the subform modal. Note that if you click CANCEL instead, you will lose all of your changes.
NOTE: The following Case forms have subforms: Psychosocial Wellbeing, Felt Stigma, and Action Plan (for both Actions and Follow Ups).
For Incident forms, subforms allow for all of the information that is collected during the initial assessment to be entered into the system. For example, there may have been more than one perpetrator of GBV. In this instance, you will add a subform for the details of each alleged perpetrator. For Service Referrals, these subforms allow you to add information about each referral type from the initial assessment with the survivor.
NOTE: The following Incident forms have sub-forms: Alleged Perpetrator and Service Referrals.
Updating Subforms
If multiple subforms are added, they will be listed in collapsed form. Each can be reopened by clicking on the right-side arrows. Once you are finished with your edits, click UPDATE at the bottom of the subform in order to add your changes.

Removing Subforms
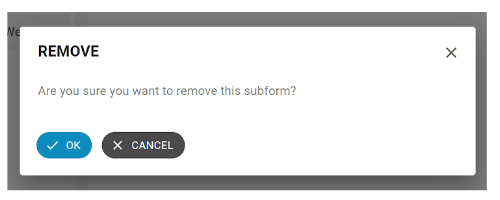
To remove a subform, click on the trashcan icon on the collapsed subform. A modal will appear asking you to confirm your decision.
Alerts
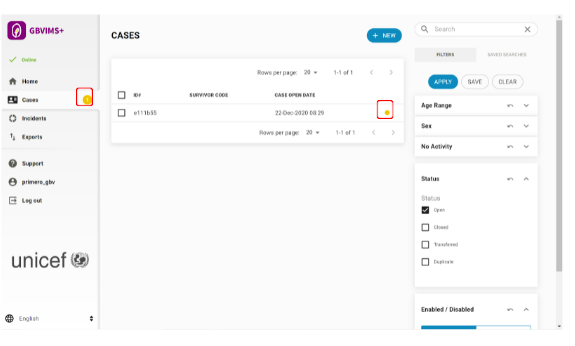
Alerts help you keep track of updates to a Case's situation. Alerts are represented by small gold dots or message banners.
Case-level alerts:
- On the Navigation Menu, an alert next to the Cases link keeps track of total cases with alerts.
- In the Case Records List, a small gold dot appears next to each Case with one or more alerts.
Form-level alerts:
- When you click into a case, an alert in the Form Navigation Menu indicates the form with updated information.
- When you click into the form, you can see a message banner alert that informs you of the reason for the alert.
Alerts appear in any of the following situations:
- When you request approval for the Action Plan and/or Case Closure. Alerts will appear on the corresponding form or forms pending approval. Once the form is approved or rejected by your supervisor, the alert goes away.
NOTE: Depending on your configuration, some form names may be different from the User Guide examples.
Flagging
The Flags button allows a case worker or case management supervisor to leave a message or a "Flag" on a record. Usually, this is a reminder to other users that they need to perform an action (example: reminding a case worker to perform an assessment or reminding a manager to approve the Case Plan).
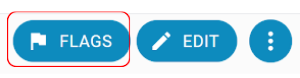
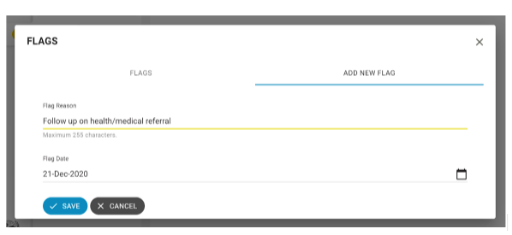
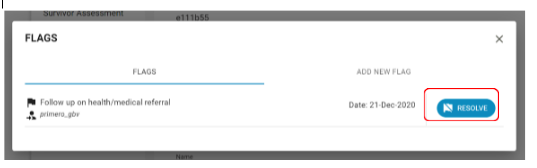
When you click the Flags button, a modal appears with two tabs: "Flags" and "Add New Flag". The "Flags" tab will open by default. Here, you will see a list of all flags that have already been added to this record. To add a new flag, click on the "Add New Flag" tab. Here, you can enter a reason for your flag, as well as a flag date.
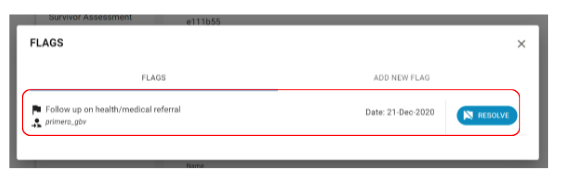
Once you click "Save", you will arrive back on the "Flags" tab. Here, you will see the flag you just saved.
Records which have active flags will appear in the record list with a flag icon displaying the number of active flags on that record.

When you are viewing a record, if it has any active flags, the Flags button will display a small red circle showing the number of active flags.
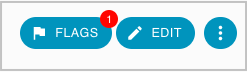
Once a flag is no longer relevant (example: your manager read the flag and approved your Action Plan as you requested), you can resolve the flag. To do this, click the Resolve button next to the flag. A modal will now appear where you can enter your reason for resolving the flag.
Note: Only the user who created a flag can resolve it.
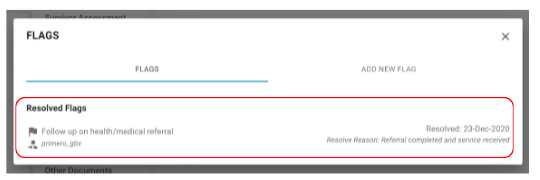
Once the flag is resolved:
- It will appear under the "Resolved Flags" header in the "Flags" tab of the Flags modal.
- It will no longer be included in the count of active flags which appears in the record list and on the "Flags" button (see below).
Change Log
Some case worker and manager roles may see a page under Record Information called the “Change Log.” This page tracks all changes made to that Case, as well as the name of the user who made those changes. Changes can include simple field editing, updated subforms, and other actions such as approvals or transfers.
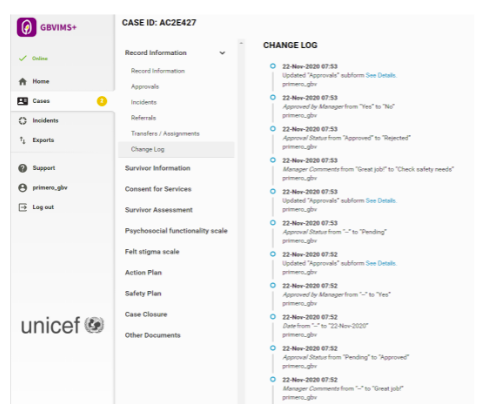
For more in-depth information about a subform update, click the “See Details” link on the Change Log to open up a modal window, as illustrated below.

Actions Menu
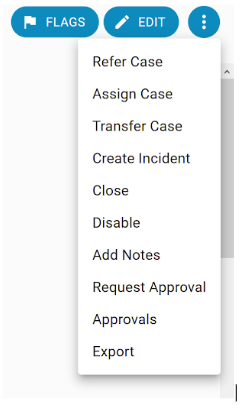
To the right of the “Edit” button on the View Case page, you will see a small button with three vertically aligned dots (ellipsis). This is the Actions Menu.

The full list of actions for cases, depending on your permissions, are:
- Refer Case
- Assign Case
- Transfer Case
- Create Incident
- Close
- Note: This action will appear as "Close" if the Case is open, and "Reopen" if the Case is closed.
- Disable
- Note: This action will appear as "Disable" if the Case is enabled, and "Enable" if the Case is disabled.
- Add Notes
- Request Approval
- Approvals
- Export
The Actions Menu may also appear on the Incidents List page, depending on your role. The actions for incidents are limited to exporting where role permission allows.

NOTE: When using these actions, you must follow your local Standard Operating Procedures (SoPs). Primero does not replace normal day-to-day communications (e.g. email, text, WhatsApp, etc.) between the people and organizations that provide GBV case management services.
Transfers and Referrals
There are three very important actions which allow you give another user access to your case: Assign, Transfer, and Refer.
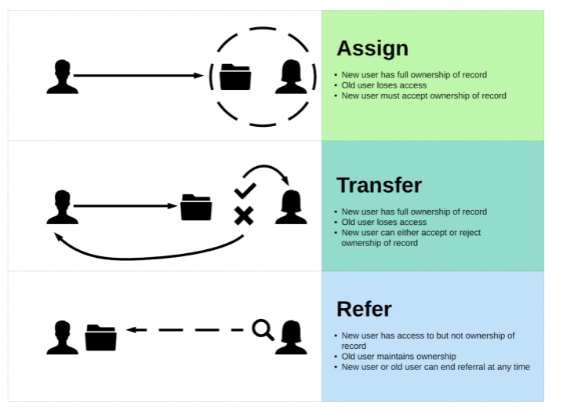
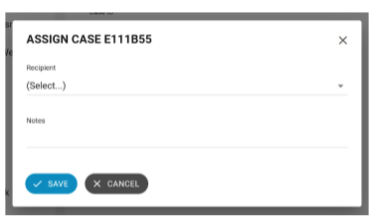
Assignments
Case Management Supervisors have the ability to assign a case to a different user. If you select the Assign option, a modal will appear that allows you to select from existing users. Assigning the case will change the record owner to the selected user. The new owner will have full access to the record, and the previous case worker will lose their access.
Transfers
Case Workers can transfer a record to a different user. Unlike assignments, however, transfers give the recipient the opportunity to accept or reject the record. If the recipient rejects it, the record will stay with its original owner. If recipient accepts it, they will now have full ownership of the record, and the original owner will no longer have access.
To Transfer a record, from within the individual Case record page, click on the Actions Menu (ellipsis). Then, click on the options for 'Transfer Case'.
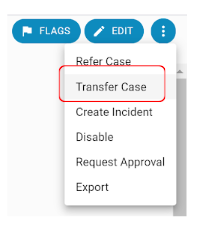
A modal will appear and allow you to add the correct information for the transfer. Consent of the individual is required. You may also be asked if you are transferring to a remote system (i.e. someone who does not use Primero). As this feature is not currently enabled for most configurations, you can ignore this field without affecting the Transfer action.
To select the user that you are transferring to, first select the agency and location associated with the user.
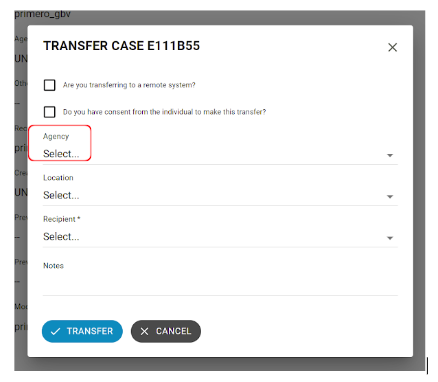
Once you have selected an agency and location for your transfer, the “Recipient” field will only display users who are part of that agency and based in that location. If the desired user to transfer to is not in the drop down, it means this user does not have privileges to be transferred to or that the user does not meet the criteria selected in the Agency or Location fields.
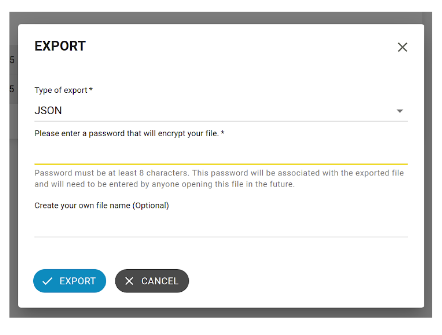
To transfer to a user outside of your Primero instance, you must create a transfer export file (.JSON or “Primero” format) that is password protected to be shared outside the system by selecting “Export” from the Action Button. This action is role dependent.
NOTE: It will be difficult for users in other organizations without Primero to use this information and format.
Accepting or Rejecting Transfers
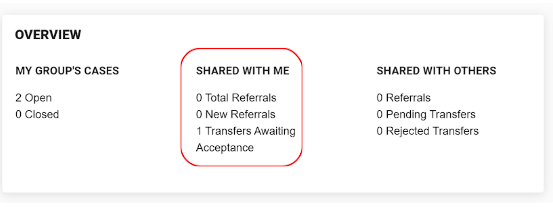
Based on your Primero instance’s configuration, you may have the ability to receive a case transfer. You can see if any cases have been transferred to you on your dashboard under “Shared with Me – Transfers Awaiting Acceptance.”
When you enter the case that has been transferred to you, open up the Record Information form group and click on the Transfers / Assignments form. You will see that the status is in progress. Clicking on the menu at the far right displays buttons to either accept or reject the transfer.
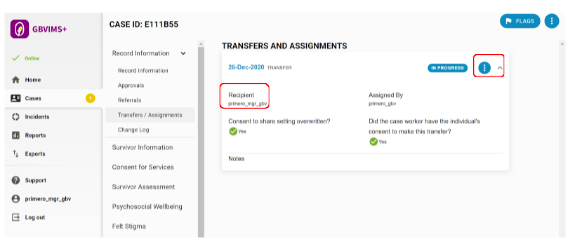
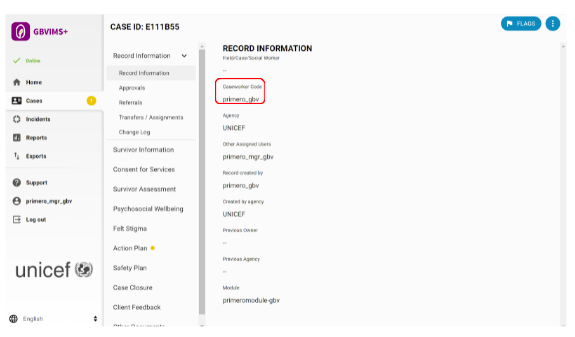
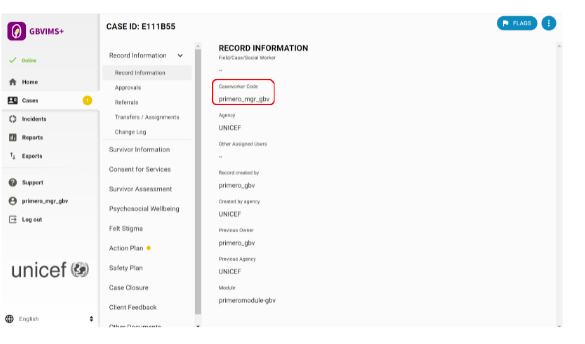
If you click to accept the case, the status will change to accepted, and you will become the record owner, rather than an “Other Assigned User”. The record information is updated with this change (see below images).
Before accepting the transfer:
After accepting the transfer:
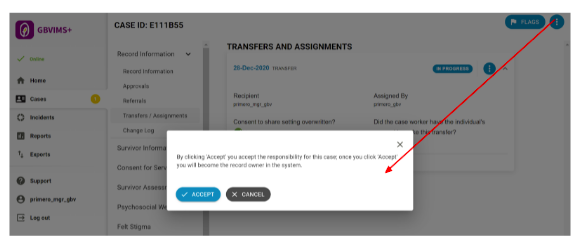
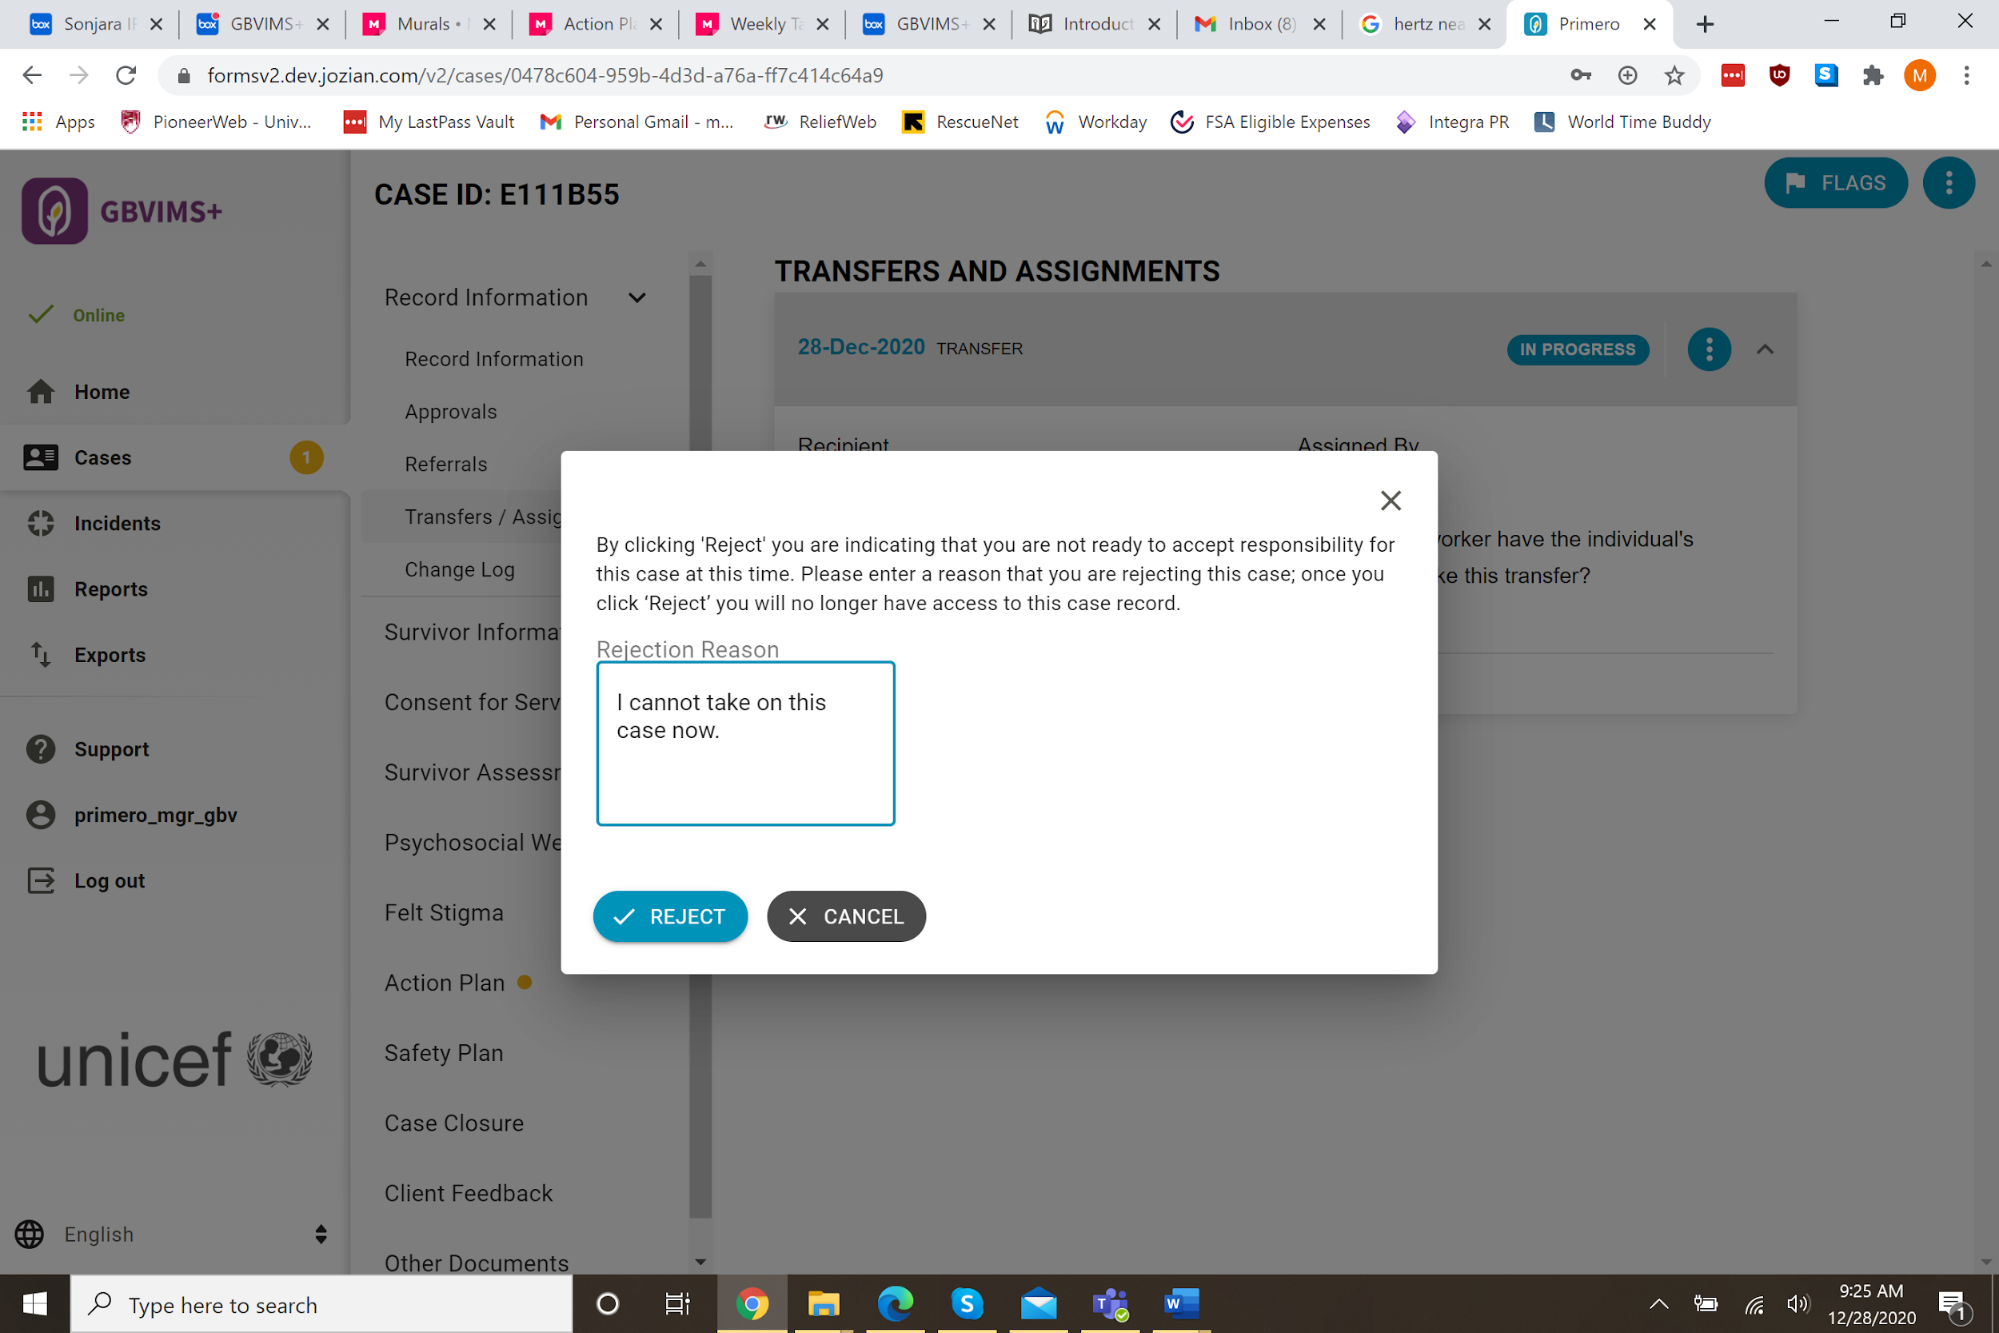
If you click Reject, a modal opens with text box for entering the Rejection Reason. When you click REJECT, the rejection reason is in the transfer subform on the Case and the transfer status is changed to 'Rejected.' You will then lose access to the record.
Referrals (to be updated)
Referring is when caseworkers contact and share information with other service providers—with the informed consent of the survivor—to help meet the survivor’s specific needs. It is a way of giving a user limited access to a record without transferring it completely. While referring a record allows the recipient to access your record (Note: the recipient will only be able to access the information that appears on the interagency referral form), the referring user will maintain full record ownership and will be able to remove the recipient's access at any time. To start a referral, click the Refer Case action in the Actions Menu (from within the individual Case Record page).

The following modal form will appear and allow you to select options for your referral.
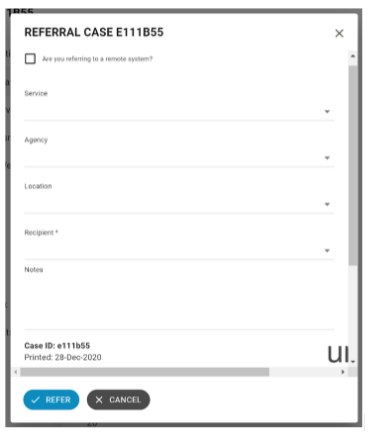
As with transfers, consent of the individual is required for referral. Consent for referral is found on the Actions subforms.
The following fields are important for selecting a user:
- Service you are requesting the other user perform
- Agency you would like to perform the service
- Location where you would like the service to take place

Now, select the “Recipient” - who must be a user within your deployment of Primero. A list of all users that perform the service selected, from the agency selected, and in the location selected will appear. If the desired user is not in the drop down, it means this user does not have privileges to be referred to or does not meet one of the three criteria listed above.
For more information on how to specify the Agency a user belongs to, the Location where they are based, and the Services they offer, please see the Primero Administration and Configuration Guide.
Referring to a non-GBVIMS+ user
For referrals outside of Primero or to non-Primero users, you will need to determine the appropriate steps. But those will be determined by your organization and the Standard Operating Procedure (SOP) of the organization of the person you are referring to.
The "Remote System" option allows you record a referral to an individual or organization who is not using Primero. This action will generate a PDF export of some limited information about the Case which you can give to the referral recipient. To start this process, select the tick box for "Are you referring to a remote system?"
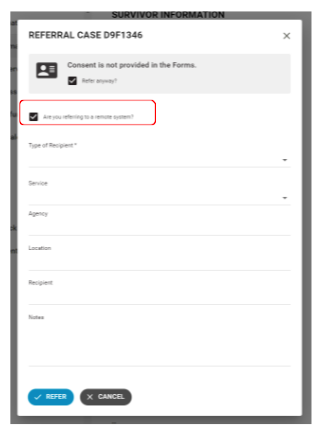
The "Type of Referral" field indicates the level of information access your export file will include. The options in this list will generally be roles in the system which are permitted to see specific forms on the Case, depending on the role's expertise. For instance, one option might be "Medical Service Provider." Selecting this option will produce a non-encrypted PDF export file which only contains the information a Medical Service Provider would be able to see in Primero.
NOTE: When referring any export/import file containing sensitive Case information, the means of sending the file will be determined by the SOP decided by the appropriate local steering committee. When determining this policy, on-the-ground security considerations will be at play, as well as the ease and speed of physical transport within the country.
Revoking a Referral (to be updated)
The Case Workers can remove a referral recipient's access to a Case, usually upon completion of the referral work. To revoke a Case you have referred to another user, simply enter the Case and go to the Referrals form in the Record Information form group. Expand the referral subform for the recipient you wish to remove and click the REVOKE action in the referral's action menu.
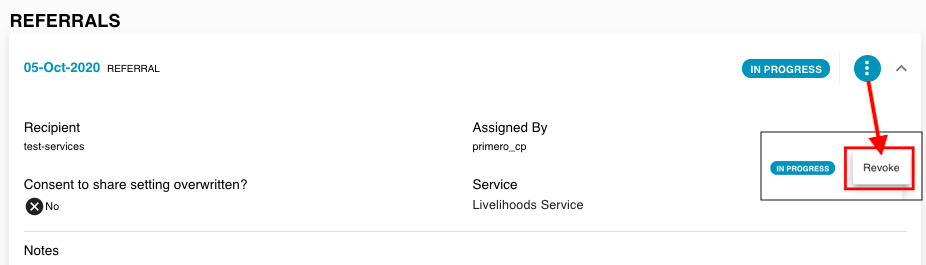
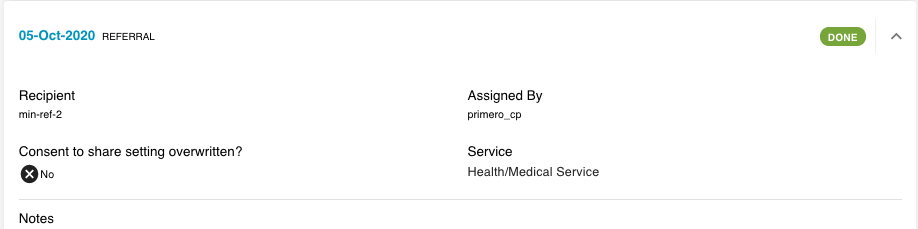
Once you have revoked a referral, that referral's recipient will no longer have access to the Case. The referral's status changes from In Progress to Done to indicate that the referral has been closed and the recipient no longer has Case access.
Relinquishing a Referral (to be updated)
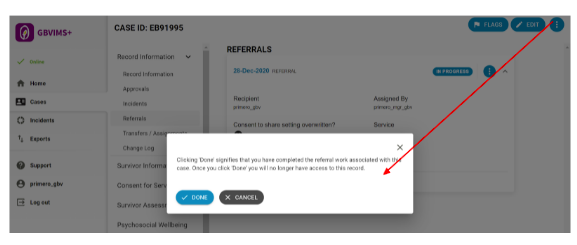
If you have received a Case referral, you can relinquish the referral and give up access to the Case at any time by marking the referral as Done. Go to the case record, click on the Referrals form in the Record Information form group. Click the Done action in the actions menu of the appropriate referral. Primero will then ask you to confirm your decision in a modal. Once you have marked the referral as Done, the referred Case will be removed from your Case List and you will no longer have access to it.
Incidents
Creating an Incident from a New Case
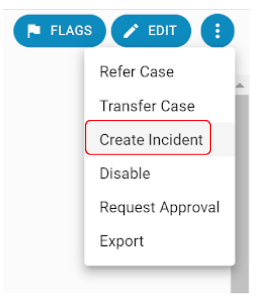
Once a case is created, you can then create an incident that is linked to that case. From within the case, there are two ways to do this. First, using the Action Menu when the case is in “view” mode, select CREATE INCIDENT. This appears once you have already saved the case.
Click on this button, and you will be redirected to the Incident forms to create a linked incident.
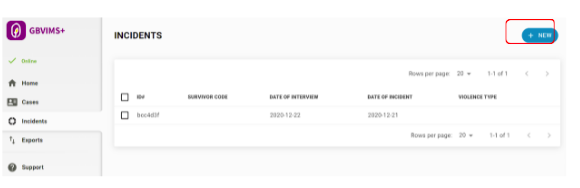
Additionally, you can create an Incident from within the Case while in “edit” mode. To do this, expand the Record Information from the secondary Navigation Menu and select INCIDENTS. Then, select the Create Button (+ New). This will redirect you to the Incident forms to create a linked incident. See below:

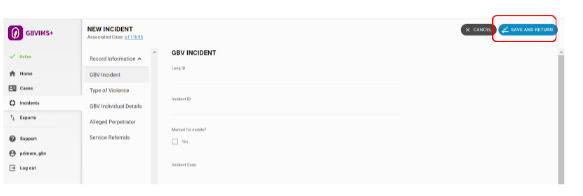
Once in the incident, you can navigate to the proper forms to enter information about the incident, perpetrator, etc. Select Save and Return when you have completed the Incident forms.
Creating a New Incident
When creating a new Incident without a Case, use the Create button (+ New) at the top right of the Incidents page. However, this is not the preferred method, as the incident will not be linked to the survivor’s case. This will open up the forms to enter information. See the Create button below:
Editing a New Incident
Once you have saved the Incident, there are two possible ways to view/edit the Incident.
- From the View Case page: You can access any Incidents linked to a Case by navigating to the Incidents form in the Record Information form group. The linked Incidents will appear as collapsed subforms, from which you can choose to either View or Edit the incident.
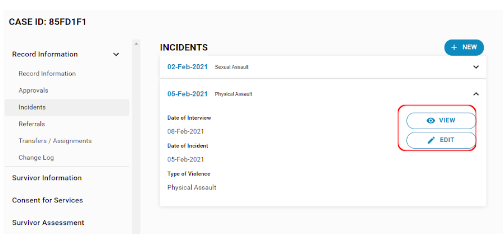
- From the Incidents List: The Incident will also appear on the Incidents record list. From this page, you can also choose to View or Edit the incident.
NOTE: The only way to link an Incident to a Case is to first create the Case, and then select the “Create Incident” action. If you try to create an Incident first (by clicking +NEW from the Incident List), there will be no way to retroactively link that Incident to an existing Case.
NOTE: When a Case with linked incidents is referred, transferred, or assigned to another user, any linked Incident records are moved along with the Case record.
Case Status
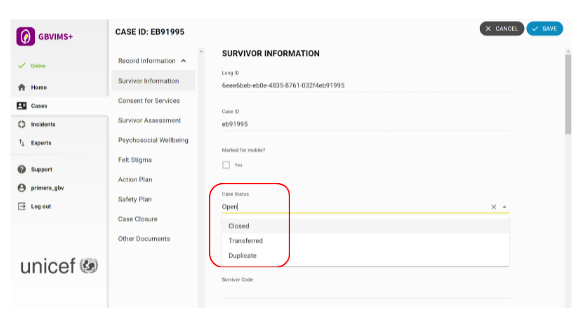
The Case Status action allows you to change a Case's "Case Status" field on the Survivor Information form. Only certain users should perform this action.
When a Case is open, this action appears as Closed, Transferred or Duplicate in the Actions menu. Clicking this action will change the Case Status field.
Note: Once a Case is closed, it will not appear by default on the Case List page. For information on how to find closed Cases, please see the Filtering section.
Approvals
Requesting Approval for a Form
Case workers can request a supervisor’s approval on the following Case forms:
- Action Plan
- Case Closure
To request approval for one of these forms, click the Request Approval action in the Actions menu.
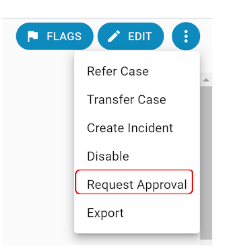
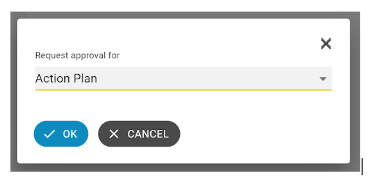
The below modal will appear. Select the form for which you would like to request approval, then click OK. In the example here, the user has selected approval for the Action Plan form.
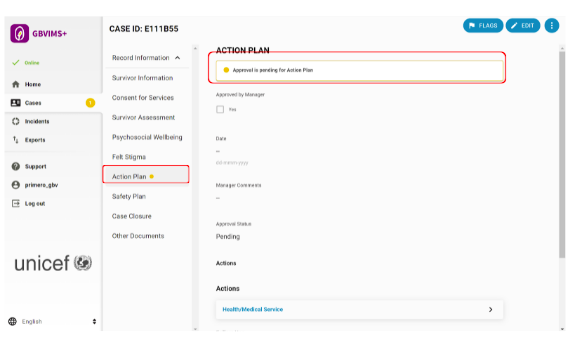
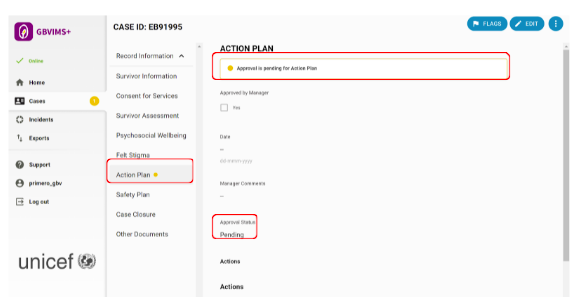
Once you have requested approval, you will notice that an alert appears on the link to the corresponding form on your Case's Form Navigation Menu (in our example, this would be the "Action Plan" form). Click into this form. Note that there is an alert message at the top of the form. Also, note that the "Approval Status" field is set to "Pending." This means that you are still waiting for your manager to either approve or reject the form.
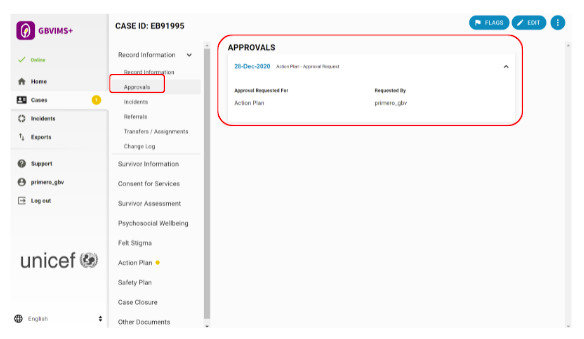
Now, click into the "Record Information" section of the Form Navigation Menu. Click "Approvals". Here, you will see a list of all approval requests and approvals made on your Case. The approval request you just submitted should appear here.
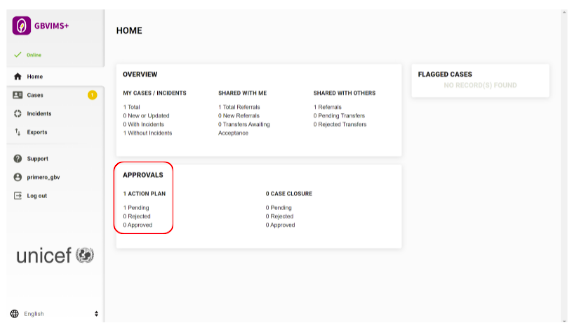
Now, go to your dashboard. In the "Approvals" section, your case will now be counted as "Pending" in the column for the form where you requested approval (in our example, this is "Case Plan").
Approving or Rejecting a Form
Supervisors will also have the ability to approve or reject certain Case forms. Once again, these are:
- Action Plan
- Case Closure
A supervisor can check for pending approvals in the "Approvals" section of their dashboard.
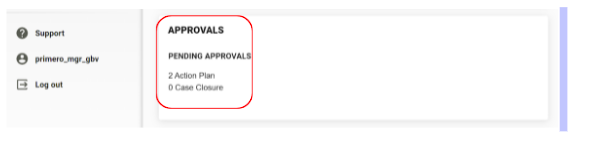
The numbers here represent the number of Cases with pending approvals for each approvable form.
Using our previous example, if a supervisor clicks on the number for "Action Plan," they will arrive at a list of Cases with pending Action Plan approval requests. Clicking into one of these Cases, they will see an alert on the Action Plan form in the Form Navigation Menu. The supervisor can then click into the Case Plan form, read through the Case Plan that the case worker has recorded, and decide whether to approve or reject it.
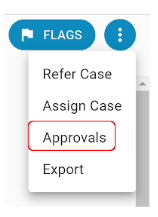
To approve or reject the Case Plan, the manager clicks the Approvals action in the Action Menu.
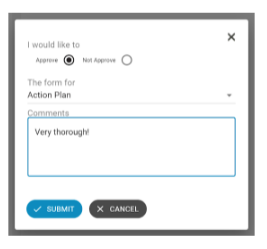
In the modal that appears, the supervisor can select Approve to approve the Action Plan, or Not Approve to reject it. Note that the manager can also use the "The form for" dropdown to select a different form to approve. The supervisor can also leave a comment on their decision, which will appear both on the approved / rejected form and in the Approvals form.
Once a supervisor has approved or rejected the Action Plan, the "Approval Status" on that form will update to be either "Approved" or "Rejected." The alert will also disappear from the "Action Plan" form. For both the case worker and the supervisor, the "Approvals" section of the dashboard will show one less pending Action Plan approval. In the "Approvals" section of the case worker's dashboard, the number for "Approved" or "Rejected" Case Plans will have increased by one, depending on how the manager responded.
Exporting Information
Primero allows users to export information in a number of formats. Users can export information from the View Record or Record List pages. To print information, you must use the export option which will download to your device.
|
Format |
Description |
Fields Included |
|
Excel |
Exports to a standard .xls file. Each form gets its own tab in the file. |
All fields to which the user’s role has access. |
|
|
PDF file which displays data as it appears in Primero. Not available from the list view. Does not support encryption. |
Fields on all forms specified by the user, to which the user's role has access. |
|
Custom (Only for managers) |
Excel file containing all the fields specified by the user. |
All fields specified by the user, to which the user’s role has access. |
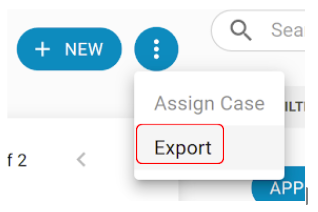
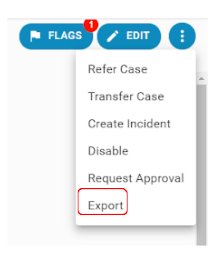
To export one or more records, in the Actions menu, click Export. This action can be found on the Cases/Incidents List page at the top right of the page by clicking the Action Menu after the cases/incidents you want to export have been selected.
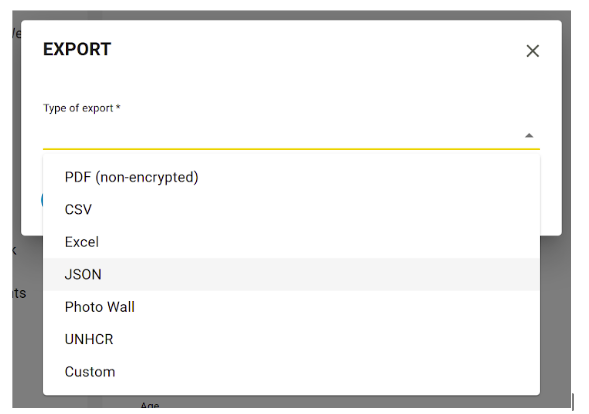
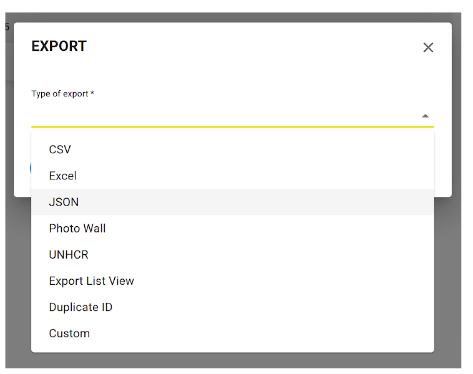
The following modal will appear. You will see a dropdown labelled "Type of export." Click into this dropdown and select an export format.
Once you’ve selected your format, the export modal window will appear, allowing you to set your own password for the file, and name the file accordingly. When exporting, you export ALL information available in the record, including blank fields.
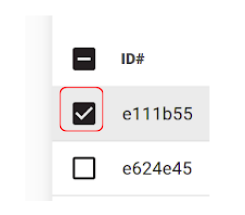
To Export a list of cases, while in the case list view, you can select as many as you’d like to export via the check boxes:
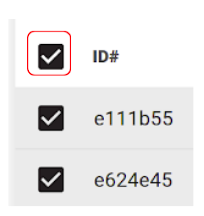
To Export all cases/incidents, you can check the box at the top of the list next to “ID#” and it will select all cases/incidents, allowing you to export all cases/incidents you have access to.
To Export a single case/incident, you can either check only that case in the Case/Incident List or enter into the Case/Incident to view the record, then use the Action Menu to export.
Custom Export
This feature will most likely not be available to the average user. If you find yourself in need of this, and do not have access, please contact your Site Administrator.
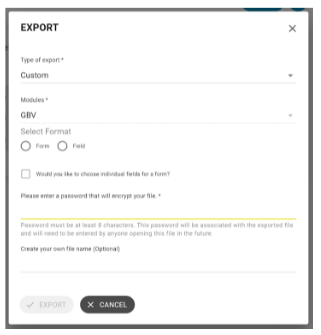
If you select Custom as your export type, you will see the below fields appear in the Export modal.
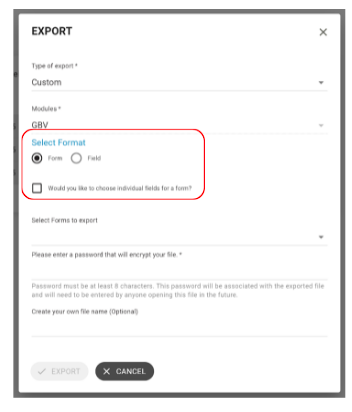
The two formats for the Custom export are:
- Form - The user selects a list of forms or a list of fields to include in the export. Primero exports an Excel file with a tab for each form included in the export.
- Field - The user selects a list of fields to include in the export. Primero exports an Excel file with one tab, which includes all exported fields.
If you select "Form" as your format, a checkbox appears with the label "Would you like to choose individual fields for a form?"
- If you leave this un-checked, you will choose a list of forms you would like to include in the export file. All fields on these forms will be included.
- If you check this box, you will choose a list of individual fields to include in the export file. In the Excel file Primero exports, the fields you choose will be organized by form, so that each form gets its own tab.
Downloading Exports
To create the export file, click Export. A notification will appear with a link to the Exports page. Click on this.

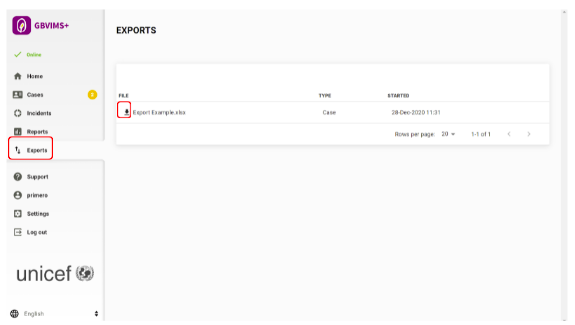
You will now arrive at the Exports page. You can always access the Exports page by clicking the Exports link in the Navigation Menu. Here you will see a list of all of the exports you have created. When Primero is still loading an export, you will see a "loading circle" spinning next to it. If an export is ready to download, you will see a "download" icon next to it. Click on an export in the list to download the file.
NOTE: PDF exports do not appear on the Exports page. Instead, these download automatically in your browser once you submit your export.
Notification Emails
Users may receive notification emails that either welcome them to the application, or alert them to changes to their cases. Only user accounts which have been designated to receive notification emails will receive anything, and only if the system as a whole has been set to send notification and welcome emails. The following users will receive emails in the following circumstances:
- Case Management Supervisors whose case workers have requested approval for case plans, closures, etc.
- Case workers whose managers have responded to approval requests for case plans, closures, etc.
- Users who have received a case transfer
- Users who have received a case assignment
- Users who have received a case referral
Welcome emails will look something like the below message. If the new user clicks the "Primero" link in the message, they will be sent to the system login screen. Once again, users will only receive welcome emails if the system has been configured to send them, and if the user in question has been set up to receive them.
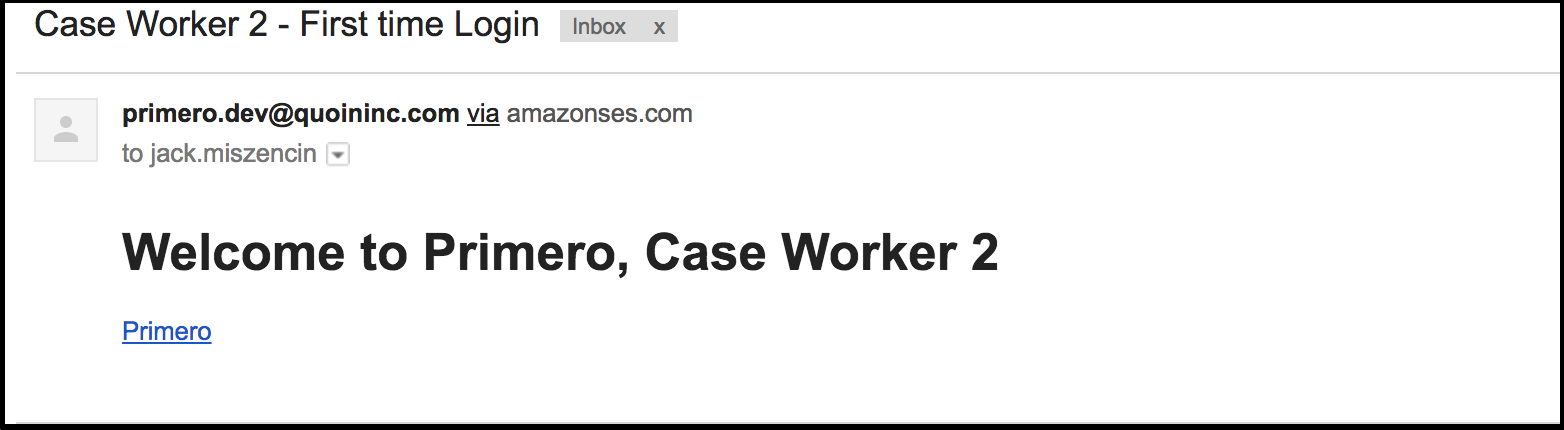
For more information on how turn welcome and notification emails on or off in the system's configuration, please see the Primero Administration and Configuration Guide.
Reports
Reports allow users to see a high-level, aggregate view of data, helping them to understand trends and coming challenges in their work. Only certain roles - and thus certain users - will have the ability to create or view reports. Administrators will be able to navigate to the Reports section of the application and view existing reports but not edit them or create new ones, while Case Management Supervisors will have the ability to view, create, and edit reports.
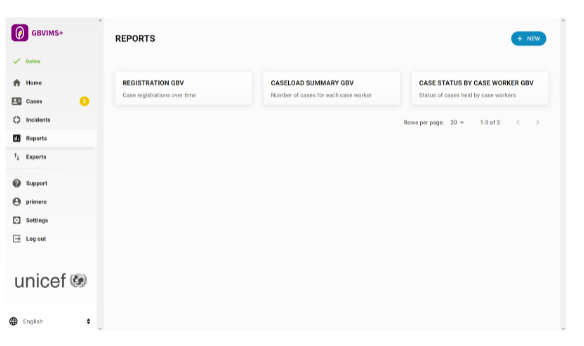
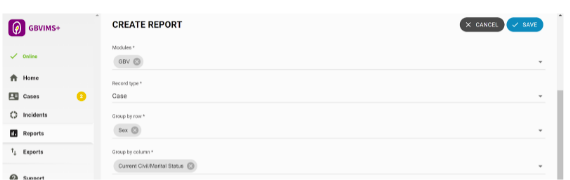
Creating a Report
To create a report, first click on Reports in the Navigation Menu. You will see that there are already a number of pre-built reports which you can view at any time. To start your own, click the +New button at the top of the screen. Complete all of the fields as detailed below, and then click Save to generate and view your report.
Name and Description: Type in a title for the report, so you can find it on the Reports List later.
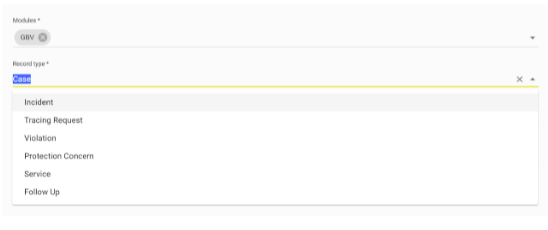
Module and Record Type: Specify the module and type of records you want to draw the records from for your report. Below, we have chosen the GBV module, and the Case record type.
Rows and Columns: Group your data by row and by column by selecting one or multiple fields from a dropdown menu. The options in the menu depend on the type of record and module you selected above. For instance, if you selected Case records, you will only see the fields that would appear on a Case record form, as opposed to an Incident record.
It is possible to select more than one attribute per row or column, for further subdivision of data. Then the first item you choose in each field will be the outer grouping layer, with each successive item acting as a sub-categorization.
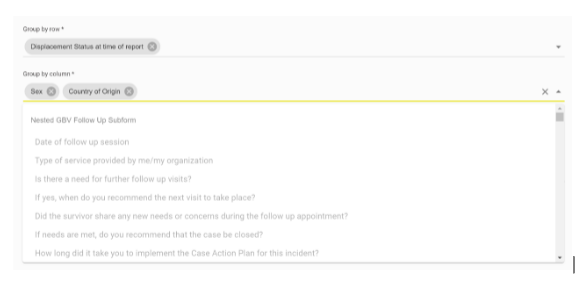
In the example below, the rows are divided by sex and the columns by marital status.

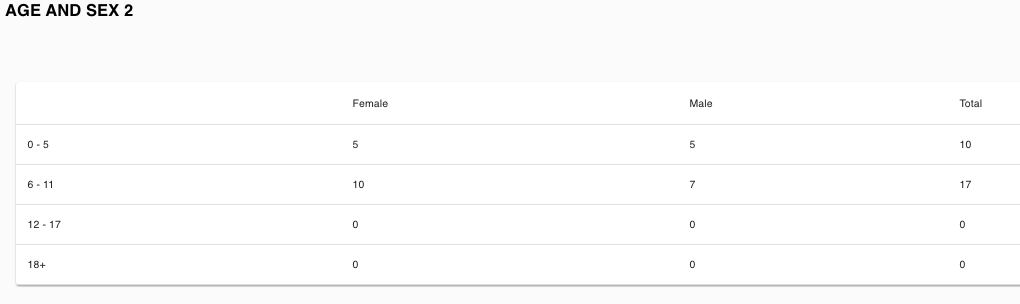
Age and Date Ranges: Select the tick boxes for age and date ranges to group these large data sets into a smaller, more manageable set of ranges.
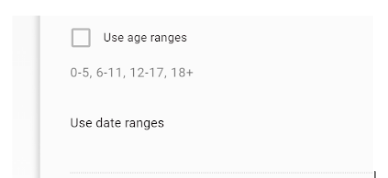
The two images below exemplify the usefulness of this feature. The first image shows part of a sprawling report showing every age. The second shows the same report with age ranges enabled.

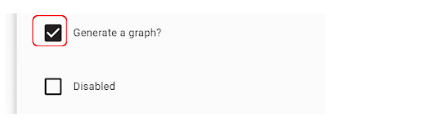
Generate a Graph: Select this tick box to generate a bar graph of your data in addition to a table report.
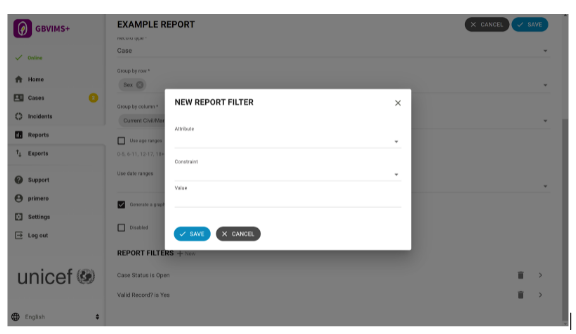
Filters: Put filters on the records you are using to eliminate irrelevant data. The two default filters are set to ensure that reports include only "Open" and "Valid" records. You can create a filter on any field, as well as specify which values are acceptable for records being included into the report.
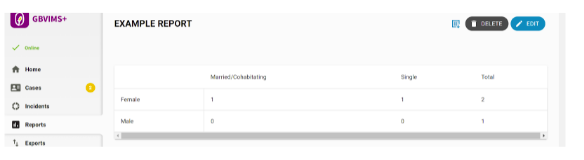
Viewing a Report
If you click Save on your report, and it saves successfully, you will arrive at the view page for your report. If you did not select the "Generate a graph" tick box, you will see a data table representing your report. If you specified that your report should generate a graph, you will see the graph followed by the table report.
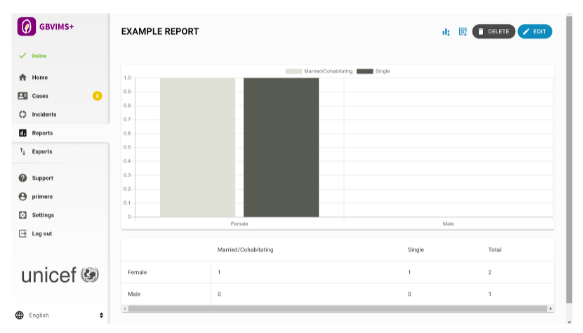
Note that the columns of your report contain a “Total” column, which shows the aggregate for each row. The numbers in each of your columns may not add up to the number in your total column, since some fields may go undefined by caseworkers.
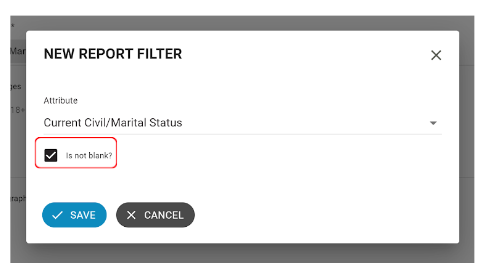
If you wish to view only the cases that contain relevant data, you can select Edit to go back into the case. Then, create a new report filter and select the "Is not blank?" tick box. Once saved again, the report generated with this criteria has a Total column that only calculates based on the completed fields.
Audit Logs
Some administrative users and team managers may have access to the Audit Logs. To access this feature, click the Settings link in the Navigation Menu. Once you are in Settings, click Audit Logs in the Settings Navigation Menu.
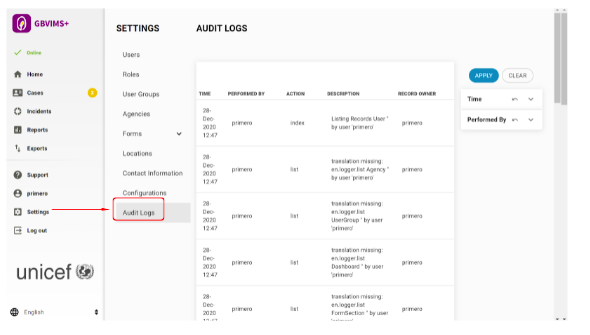
The Audit Logs page shows you a list of all actions which users have committed in the system. Each row represents a different action, including the username of the user, the type of action, the type (and sometimes the ID) of the record on which the action was performed, and the date and time of the action. Using the filters menu to the right of the list, you can limit which audit log entries are displayed. You can filter by date and time or username. To apply a set of filters, click Apply, and to clear out all filters, click Clear.
Note: The Audit Logs do not contain identifiable information from records. For instance, an audit log entry might tell you that the user "john-case-worker" edited a case with the ID "abcd123" at 10:15 on October 1, 2020. However, it will not tell you what specific information was added to the case.
[1] Disabling a case equivalent to deleting a case in the sense that it will no longer be visible for the case worker but remains in Primero for recording purposes.