Administration & Configuration Guide
July 2021
How it Works: The Building Blocks
Primero is an information management system that allows for data entry and reporting for child protection. The system helps intake relevant information via multiple sources, consolidates the information into relevant record types (Cases / Incidents) and allows service providers to report and make educated decisions to assist in these locations.
Records
Primero uses three types of "records" to represent protection-related information:
- Case - This represents an individual beneficiary.
- Incident - This represents an event that has occurred. This is often an incident of violence or an encounter with the beneficiary outside of the typical case management process.
- Tracing Request - This represents an individual seeking to be reunified with one or more unaccompanied or separated children. Tracing Requests are used primarily in Family Tracing and Reunification programming.
Each of these three "record types" will contain a different set of information, depending on the system's configuration, and which Primero Modules are in use.
Users
Primero Users are the individuals working for service-providing organizations and agencies who use the system.
User Groups
User Groups represent teams of users working together. For example, there may be a team of social workers in a particular district providing services to children. There may be another team responsible for the child’s best interest determination. A manager of a user group will have some level of access to all of the data managed by that group, but not to the data managed by a different group.
Roles
Users will have a Role, which defines what particular users are allowed to do: for instance viewing records, editing records, creating reports, or configuring the system. Examples of roles are Social Worker, CP Manager, and CP Administrator.
Along with defining what actions the user is allowed to perform, roles also limit what kind of information is visible about individual records for a specific user. For example, a CP Social Worker may be allowed to view and edit personally identifiable information (such as name, age, and sex) about a particular client, while a CP Manager may only see a reduced set of information about that same person (age and sex, but not the name), and may not be allowed to edit any of it.
The general term for these limits to what the user can do and what a user can see is authorization.
Fields
A field (data field) is information within a record. Fields are attributes like name, age, date of birth. Sometimes one field can be used to store several values like a list of protection concerns or all the languages spoken. Fields types include:
- Text Field
- Text Area
- Date
- Date-Time
- Date Range
- Tick Box
- Select Drop Down
- Multi-Select
- Radio Button
- Numeric Field
- Tally Field
Each of these field types is defined in the Form and Field Configuration section of this guide.
Forms
A Form contains a set of fields for a record. By configuring the Primero application, you can specify new fields on a form, reorder the fields, or allow different forms to share the same field. In general, fields are organized into forms which represent steps in the user’s workflow. For instance, an administrator may add the “Risk Level,” and “Protection Concerns” fields to a “Preliminary Assessment” form on the Case record, since case workers collect both these pieces of information during the Preliminary Assessment step of the case management process.
Form Groups
Form Groups appear in the form navigation menu on the left side of the screen when a user is creating, viewing, or editing a record. When a user clicks a form group, it expands or collapses to either show or hide the forms it contains. For example, the “Registration” form group might contain the forms “Child’s Details,” “Care Arrangements,” and “Interview Details.” Form Groups keep the form navigation menu organized.
Getting Started
Where to Make Configuration Changes
It is recommended that configuration design take place on a separate sandbox or “demo” instance. This will buffer live end users from experiencing potential errors from misconfigured forms and roles. Once the configuration has been successfully modified, it can then be applied to production as an import of the Configuration. For more information on how to send configuration from a sandbox or “demo” site to a production site, please see the Managing Configurations section of this guilde.
Sequencing Configuration Work
Some elements of Primero configuration depend on others. For this reason, we recommend configuring your system in the following order:
- Forms and Lookups: Decide which forms contain which information. Creating Forms is necessary to specify each Role’s Form access. In addition, you must specify options for the “Service Type” lookup before you can set the Service configuration for Agencies and Users.
- Agencies, User Groups, Roles: All of these must be configured before you can create Users.
- Users: While you can create User accounts to test your configuration, you should avoid creating production users until implementation partners have fully reviewed and approved the rest of the configuration.
- Reports: You can begin configuring Reports any time after configuring your Forms, but administrators will continue creating and updating Reports after go-live.
Note: You can generally configure the Contact Information at any point.
Navigating Settings
To begin configuring Primero, click on the Settings link in the navigation menu.
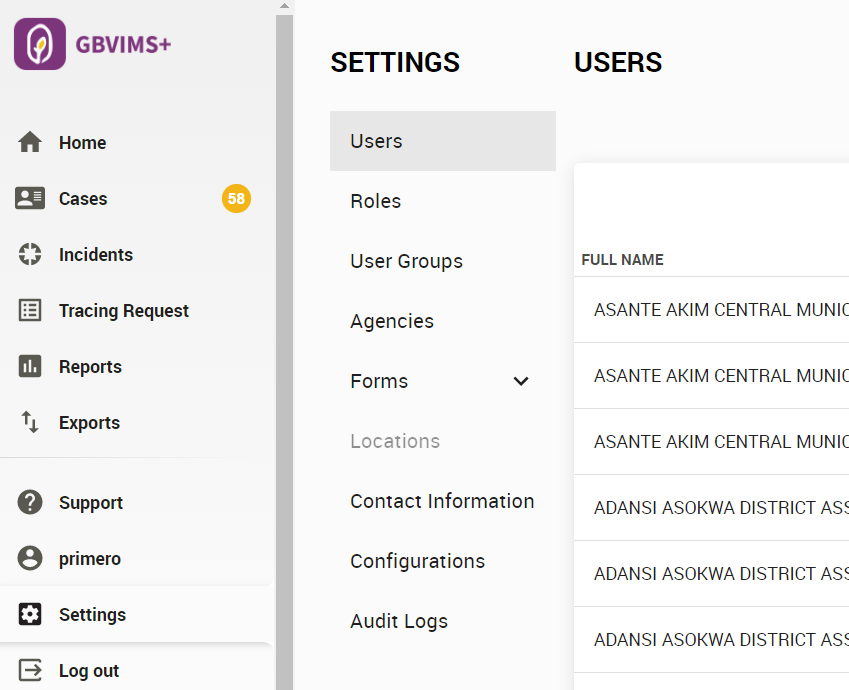
Note that both “Forms” and “Lookups” can be found in the “Forms” section of the Settings navigation menu.
Form and Field Configuration
Forms determine how information is organized in Primero and help control which users can see which types of information about a record.
A Form contains a set of fields for a record. As an administrator in Primero, you can create a new form, modify the existing forms, specify new fields on a form, reorder the fields, or allow different forms to share the same field.
A Field (data field) is information within a record. Fields are attributes like name, age, date of birth. Sometimes one field can be used to store several values like a list of protection concerns or all the languages spoken. The same field can be ‘shared’ on different forms so that you can enter a date of birth on one form and see it on multiple forms.
The Forms List
To configure Forms, first click on the “Forms” section within the Settings navigation menu, then click the “Forms” link that appears.
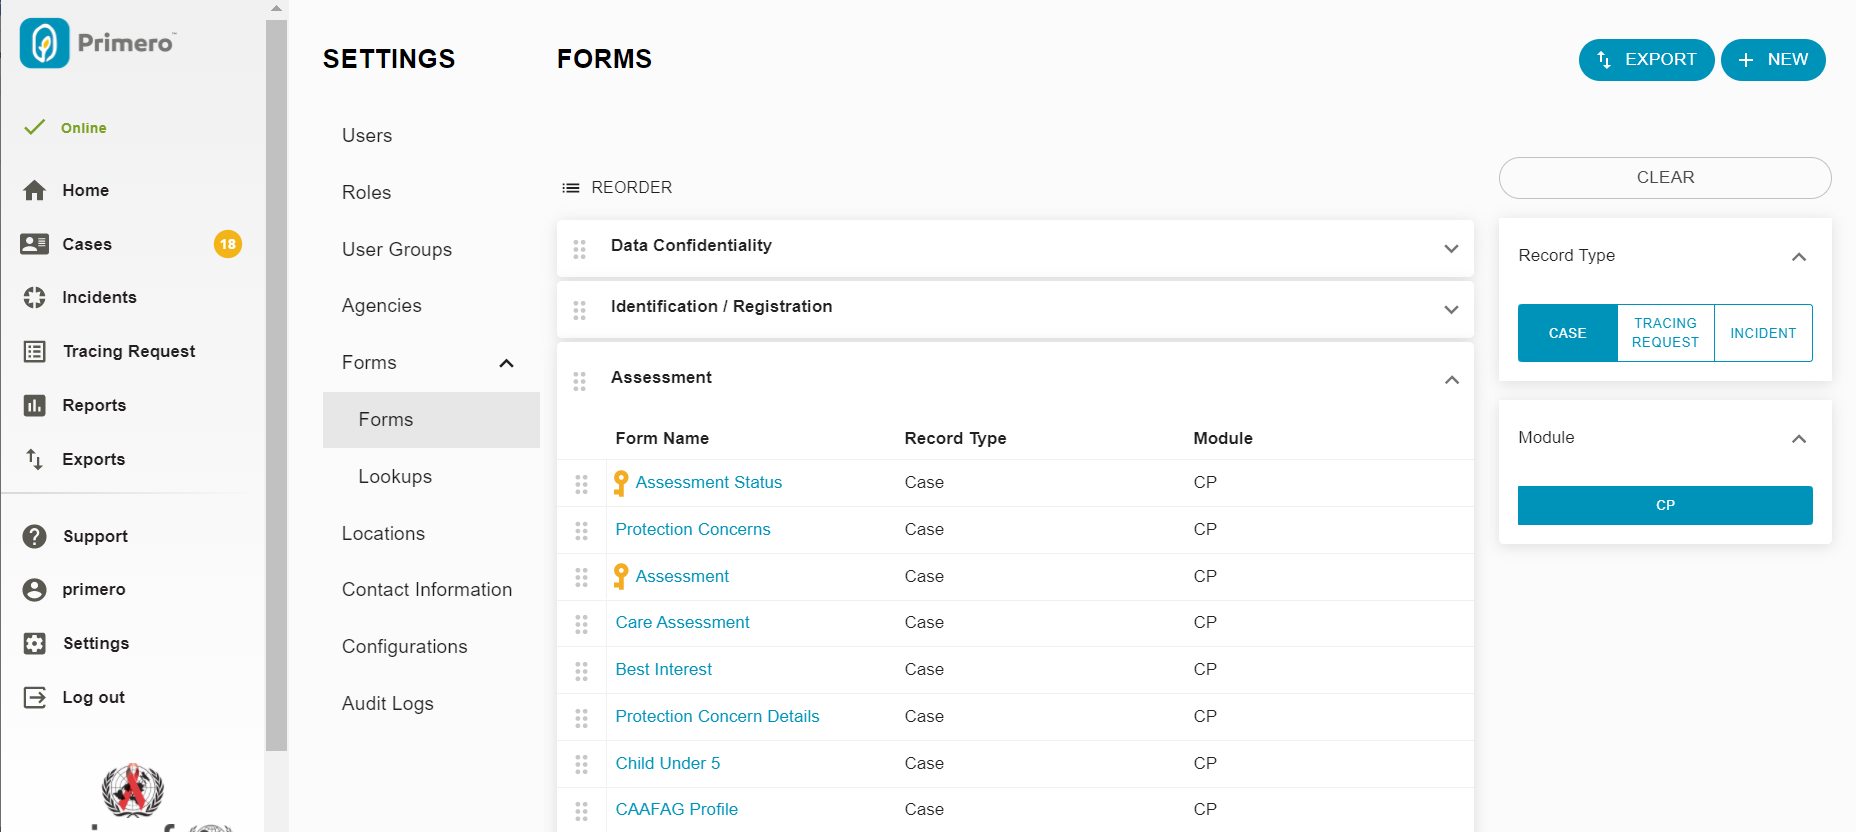
Here, you will see Forms organized by Form Group. Click on a Form Group to expand it and see the forms contained within.
Note that this list only shows Forms for a given Module and Record Type at a given time (e.g. CP Cases). You can use the filters on the right side of the page to change which Forms you are viewing.
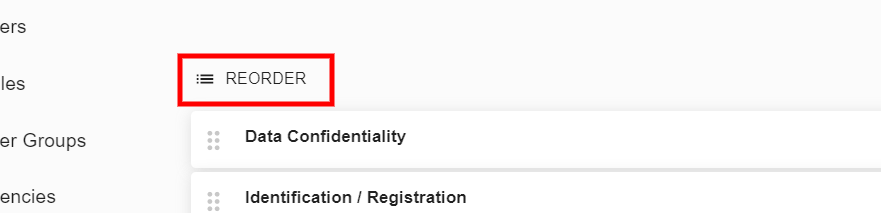
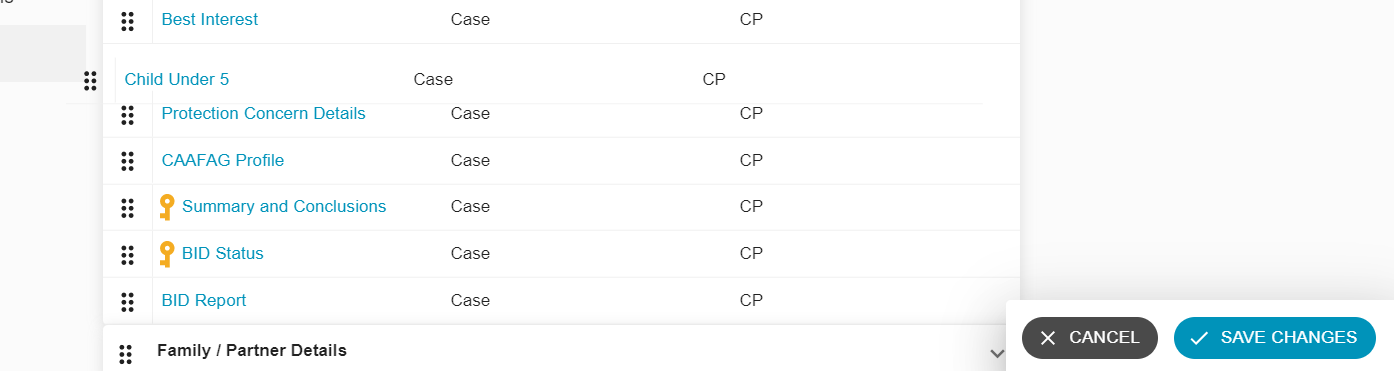
Reordering Forms
To update the order in which Forms appear, click the “Reorder” button at the top of the list. Then drag and drop Forms and Form Groups into the desired order. Click the “Save Changes” button once you are finished.
Creating a Form
To create a new form, click the “New” button at the top of the Forms List.

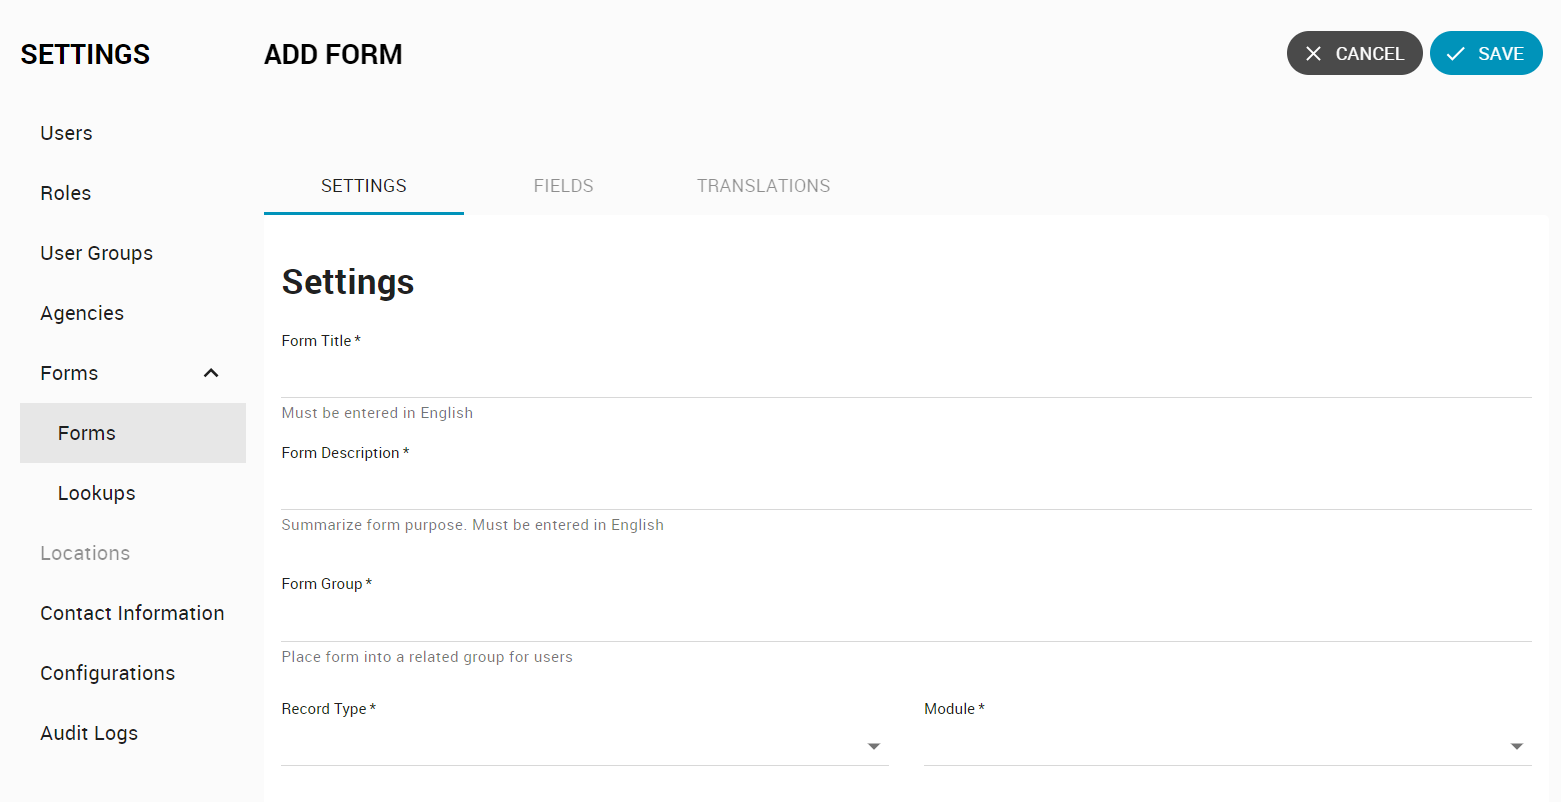
Fill in the following information about the form:
- Form Title - This is the name of the Form that will appear in the List of Forms in the Left Navigation panel.
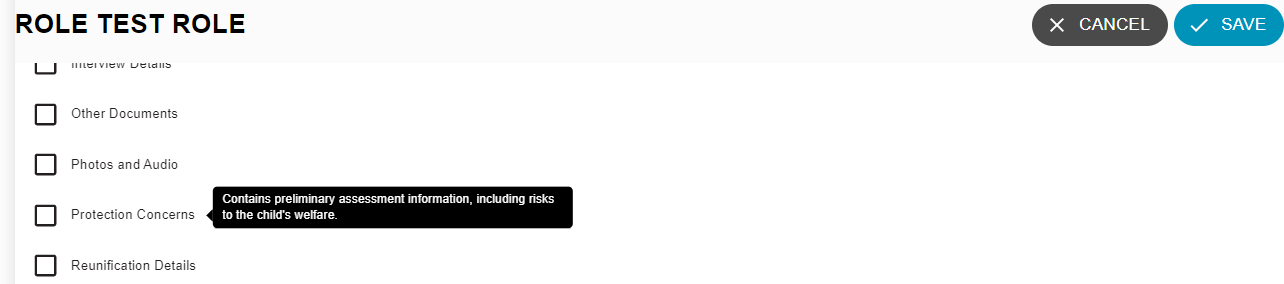
- Form Description - This a description of the form. Later, when you are configuring which Forms a Role can access in the Role form, hovering your mouse over the Form name will reveal this Description, to remind you what information you included in this Form, and how it is used.
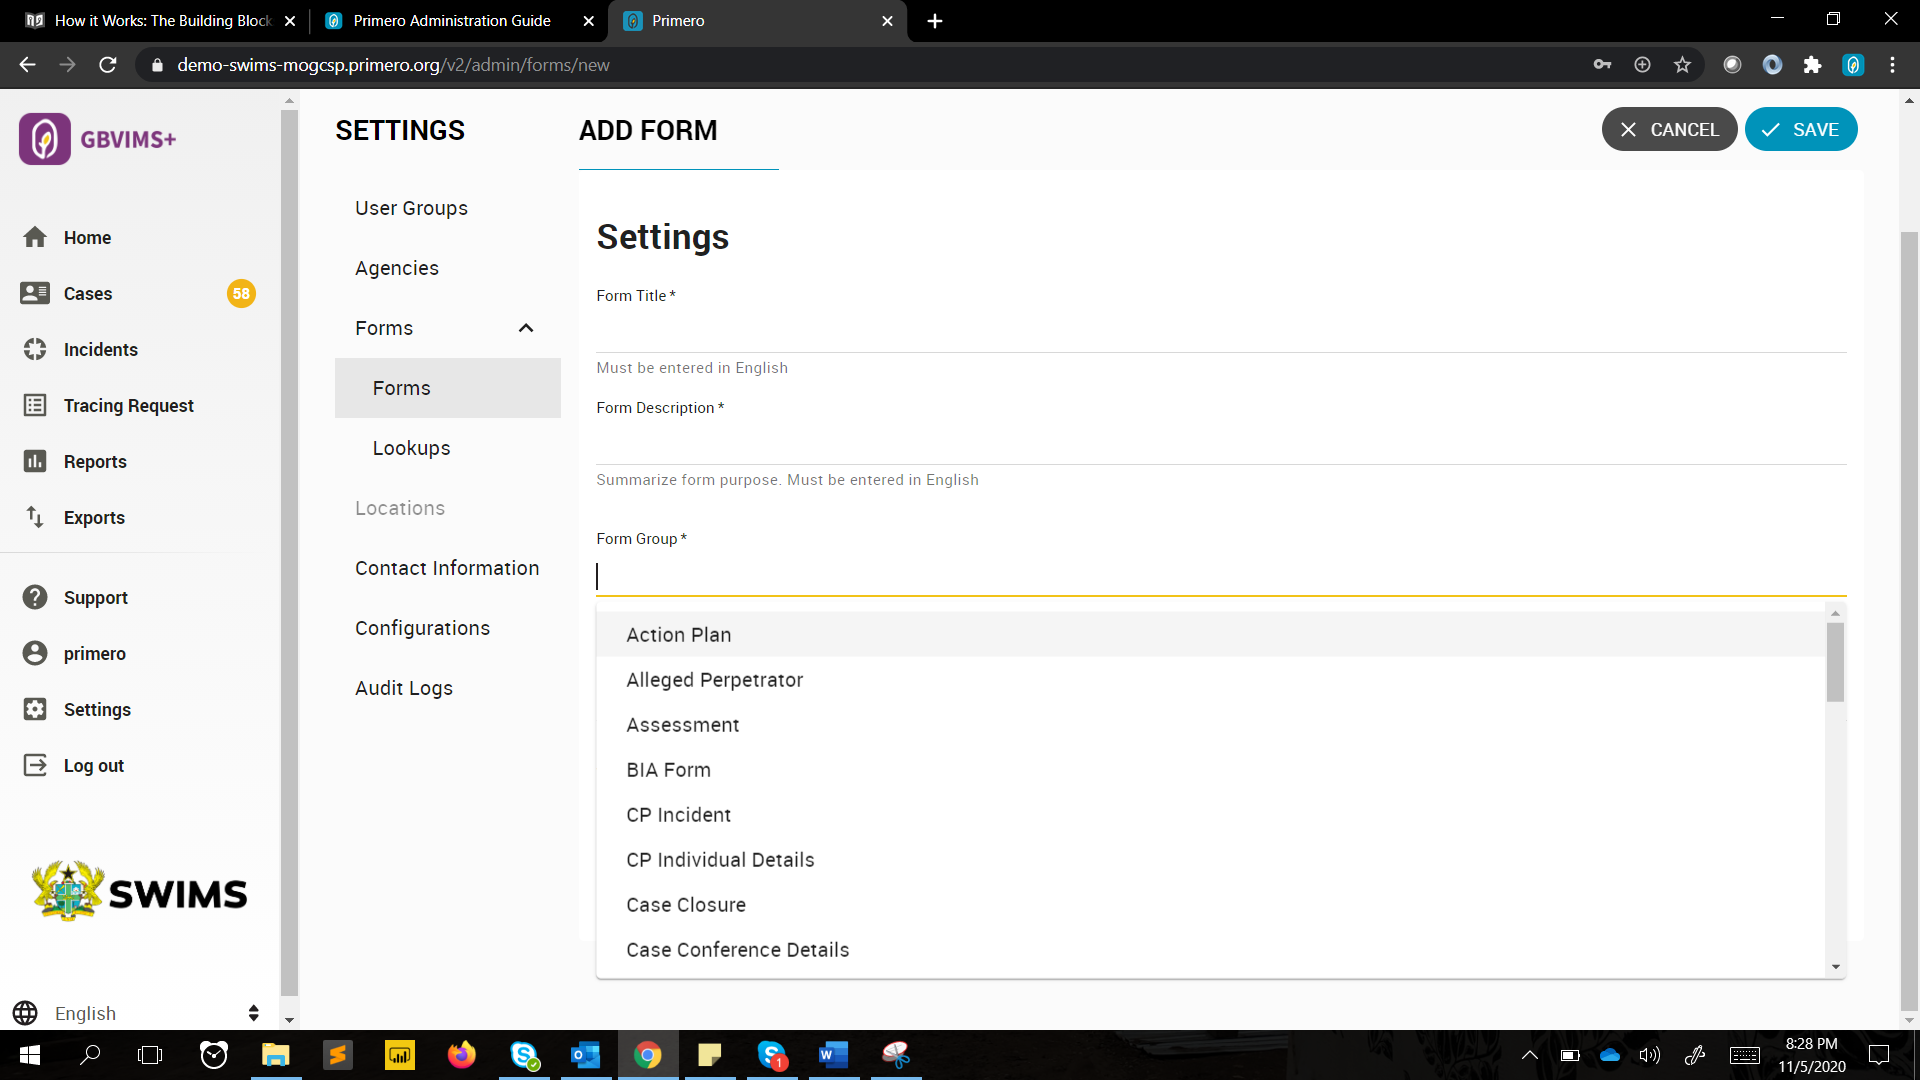
- Form Group - This is the name that displays in the Left Navigation Panel at the top level when forms are grouped. The Form Group has a dropdown carrot to the right of the name in the Left Navigation Panel. Clicking on this carrot expands or contracts the Form Group. To add the Form Group Name, you can select an existing Form Group from the dropdown list or add a new one. To add a new one, type the desired name in the box directly below the field and then click on the phrase ‘Click to add <form group name>‘ directly below that:
If you create a new form group for your form, it will appear later in one of the Form Group lookups. You will be able to edit and provide a translation for your form group there. For more information on how to edit form groups, see the section Managing Form Groups.
If you want the form to appear by itself and not as part of a Form Group, you must enter your Form’s name in the Form Group Name field, then click the option to create a new Form Group with this name.
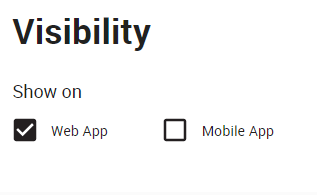
Be sure to specify whether your form is visible.
Press the Save button when all the desired information is entered.
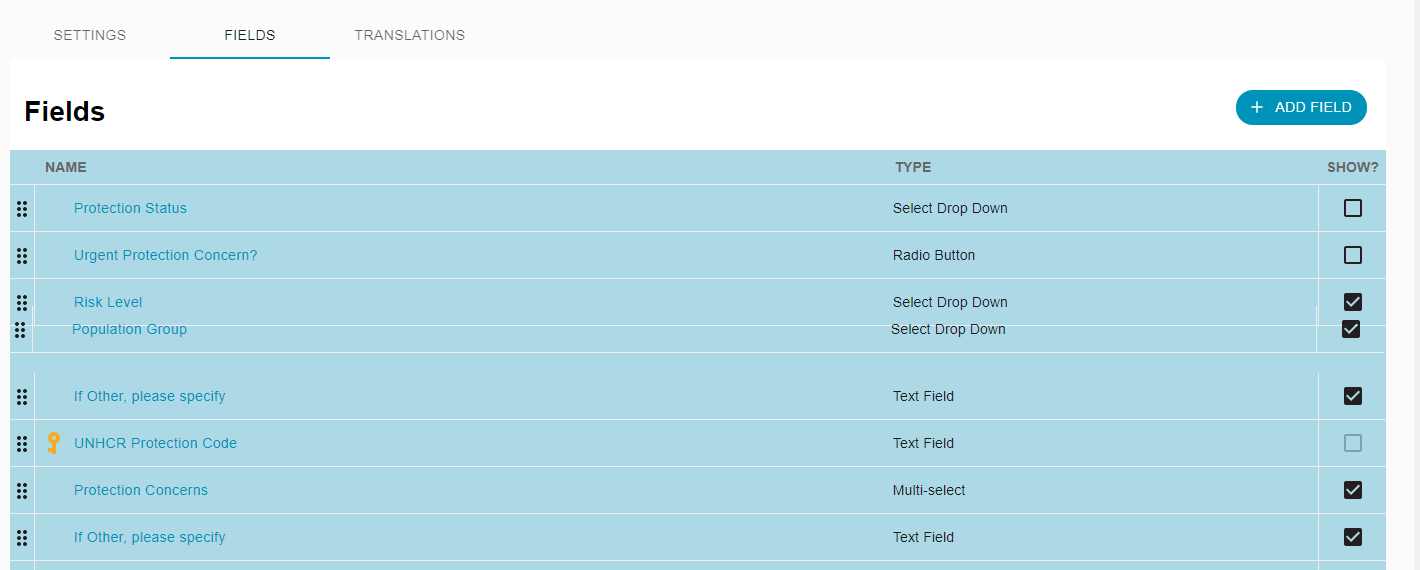
Adding and Updating Fields
You must create and save a Form before you are able to add fields to it. Once you have saved the Form, click the “Fields” tab.

Here, you can add, update, or reorder any fields in this form.

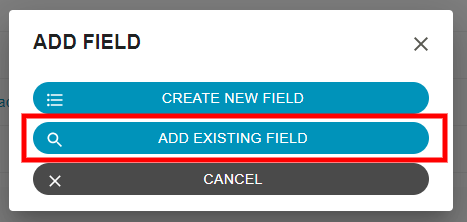
To add a field to the form, select the ADD button. The following will appear:
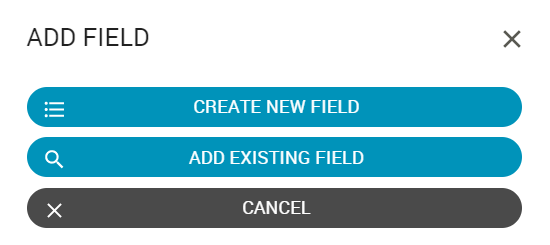
You have two options:
- Create New Field: This will create a completely new field on the form. You will get to choose the type of field as well as its options.
- Add Existing Field: This will copy an existing field from a different form onto this form. When a user is updating a record, if they enter a value on this field in the first form, the same value will appear automatically on the copied field in the second form. If you choose this option, you will not be able to choose a field type, and you will not be able to update all of the field’s configuration options.
Create New Field
If you select the “Create New Field” option, you will be prompted to select a field type. Please be careful selecting the field type: once you have selected a field type and saved the field, you will not be able to change the field type.
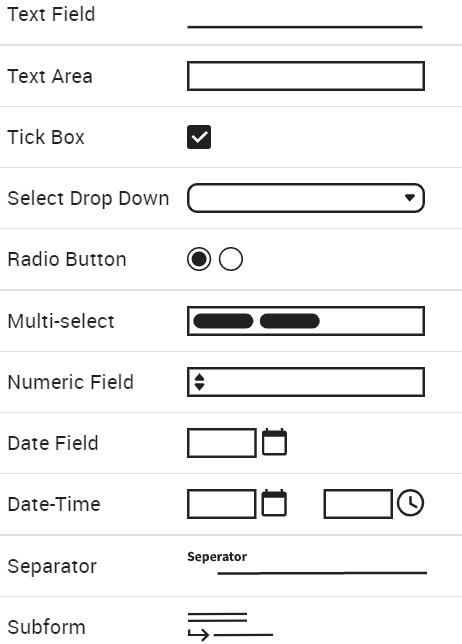
A brief description of each field type and any additional information to build the field is detailed below:
- Text Field - A Text Field is used for brief pieces of text. Unlike a Text Area, it will not expand to fit the text entered. Text will not be truncated but it is not easy to view.
- Text Area - Unlike a Text Field, a Text Area will expand to fit the text entered.
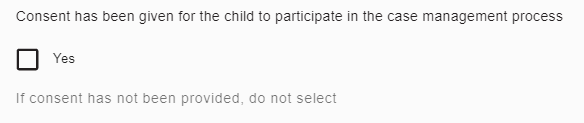
- Tick Box - A tick box is a checkbox with one selection as shown below:
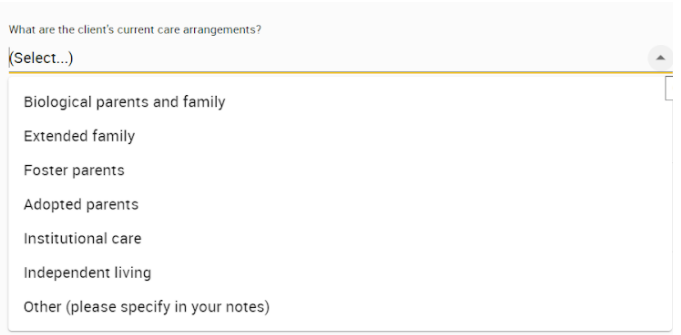
- Select Drop Down - A select drop down field allows the user to pick a value or values from a defined list of options as shown below:
- Radio Button - This is similar to a Select Drop Down, since users can only select one option at a time. Note that, once a user selects an option, they cannot go back to having no options selected. This field type is typically used for Yes / No questions.
- Multi-Select - This is similar to a Select Drop Down, except that a user may select as many options as they like.
- Date Field - The date field type will automatically validate that what the user enters is a valid date field. The standard date format for Primero is dd-mmm-yyyy.
- Date-Time - This is similar to a Date Field, except that users can specify a time of day, in addition to a date.
- Separator - This is a header which separates one section of a form from another. For instance, if the Child’s Details form contains a number of fields about contact information for a child (e.g. “Location,” “Address,” “Phone Number”), you may add a Separator above these fields with the label, “Contact Information for the Child.”
- Subform - The Subform is a section of a form where a user can collect the same set of data for multiple occurrences within the same Case, Incident or Tracing Request. For example, to collect information on a Case’s family members, a user may enter the “Name,” “Relationship to the Case,” “Age,” and “Sex” for multiple people. For this reason, these fields appear in the “Family Details” Subform, where the user adds an entry for each family member. See example below

Once a type of field is selected, the fields required to create that type of field will appear.
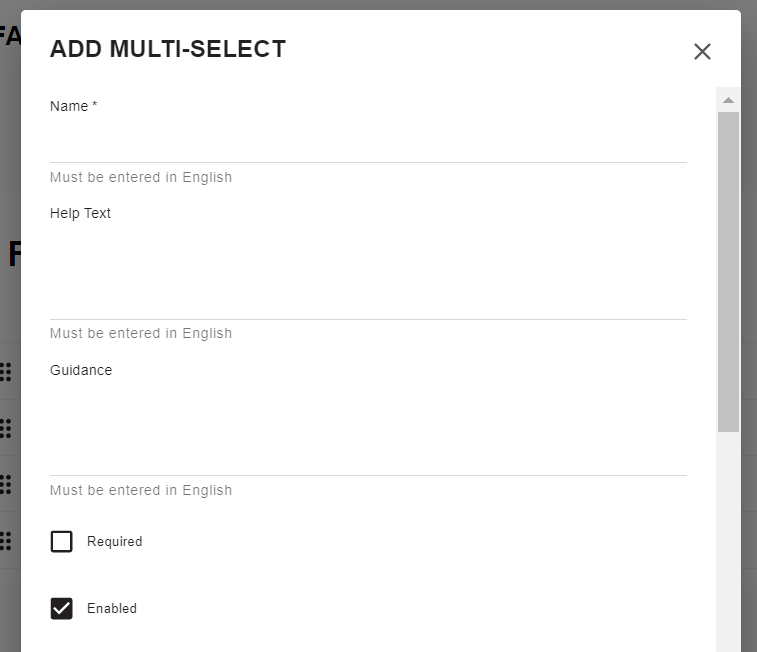
Below are the attributes you will need to specify for a field, though you will only need to specify some of these, depending on which field type you selected.
General Field Attributes
- Display Name - This is the field label that will display on the form
- Help Text - The help text will appear below the field and only in Edit mode. The help text is not visible when you are only viewing the record. This allows you to provide some guiding language to give the user a frame of reference for the proper answer or how to come to a conclusion based on information provided.
- Guidance - Similar to Help Text, Guidance is text you display to users to give guidance on how to fill out the field. Generally, Guidance is for guiding text which is too long to put into Help Text. Users view Guidance by clicking the “Guidance” link below a field, at which point a small box appears containing the configured Guidance text.
- Required - If a field has this attribute checked, users will not be able to save a record without filling out the field. Note that if a field inside a subform is required, users will only be required to fill out the field if they have already added an entry into that subform.
- Enabled - Set to checked by default, this attribute determines whether users can update information in a field, or whether they can only view that information. If this is checked, users can update information in the field; if not checked, they cannot update the field’s information.
Specifying Field Options
For Select Drop Downs, Multi-Selects, and Radio Buttons, there are two ways to specify options:
- Use Pre-Defined Lookup - A Lookup a list of options that can be reused across multiple fields. For example, the Country Lookup (containing the names of all the world’s countries) is used by fields like “Nationality” and “Country of Origin.” Using a lookup helps you avoid specifying the same options multiple times when configuring forms. It is highly recommended to use Lookups whenever possible. For more information on Lookups, as well as how to create and update them, see the Lookup Values Management section of this guide.
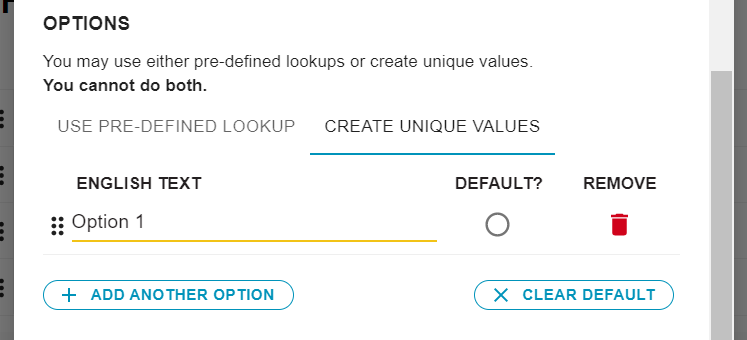
- Create Unique Values - If your field will need options that will not be used by any other fields, you can specify unique option values.
To specify a Lookup to use for your field’s options, click the “Use Pre-Defined Lookup” tab in the “Options” section of the form. Then begin typing in the “Find Lookup” field to search for the Lookup you want.
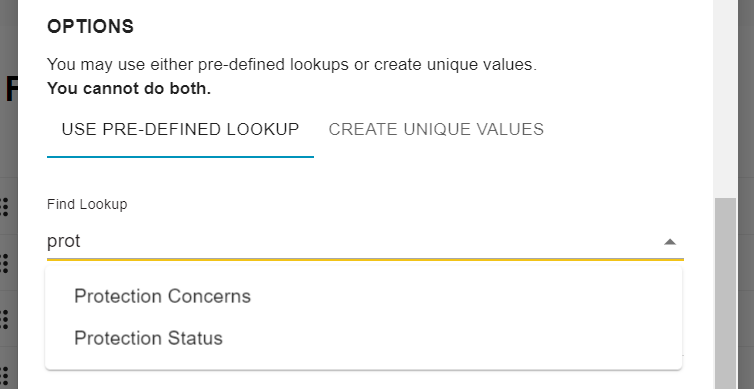
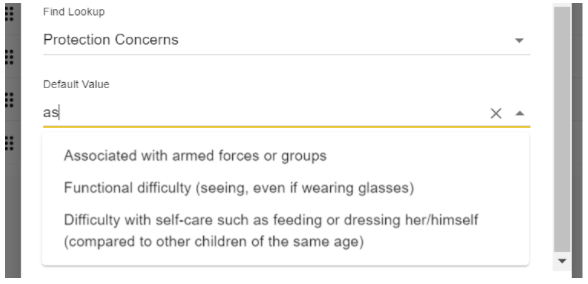
Once you have selected a Lookup, you can also choose one of the Lookup’s options to be selected by default when a user creates a new record.
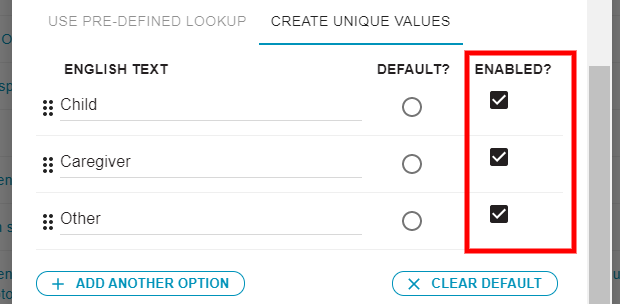
To specify unique options, click the “Create Unique Values” tab. Add as many options as you want. Use the radio buttons in the “Default” column to select which option should be populated by default when a user creates a new record. You can drag-and-drop options to rearrange them.
NOTE: Please be careful when selecting options. Once you have saved a field, you will not be able to ...
- Change the Lookup used for its options
- Switch from using a Lookup to using unique option values.
- Delete options from Unique Values.
Setting Visibility
At the bottom of the Add Field pop-up, you will see four tick boxes which control where the field appears.
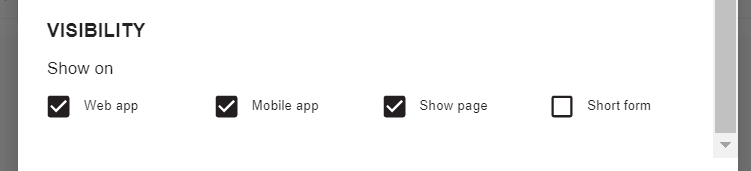
- Web app - This controls whether the field appears for users when they are viewing, editing, or creating a record.
- Mobile app - NOTE: This attribute no longer controls anything. It may be removed in the future.
- Show page - Checking this box allows the user to see the field when they are viewing a record. If the box is unchecked, the field will only be visible when they are creating or editing a record.
- Short form - If this box is checked, the field will appear to users who are previewing records they cannot access. Note that this attribute will not appear for fields which are located within subforms.
Specialized Attributes
Some form attributes only appear for specific types of fields:
- Tick Box
- Tick Box Label - This is the label which appears to the right of a tick box. If left blank, users will see the word “Yes” to the right of the box, as seen below.
- Date Field and Date-Time
- Cannot be in future - Checking this box will prevent users from entering dates or times in the future for this field.
- Defaults to current date? - If this box is checked, users creating a new record will see this field with the current date automatically filled. For Date-Time fields, this attribute appears as “Defaults to current date and time,” since users creating new records will see the field automatically filled out with the current date and time.
Adding a Subform
If you select “Subform” as the field type, you will specialized attributes for Subforms.

- Subform Title - This will appear at the top of the modal for adding subforms, and as part of the header above your subform. See example below.

- Subform Description - This description is only visible to administrators.
- Selective Syncing on Mobile - NOTE: This attribute no longer controls any functionality. It may be removed in the future.
- Prevent subform entry removal? - Checking this box will prevent users from removing a subform entry once they have added it. This is typically used for subforms which are critical to Primero functionality, such as the Services subform.
- Start with one subform entry? - If this box is checked, when users create a new record, they will see one blank entry automatically added for this subform. Note that selecting this setting while including required fields in your subform can help ensure users fill out at least one subform entry on record creation.
Add Existing Field
To copy a field to your form which has already been created on another form, click the “Add Existing Field” button after clicking the Add field button.
In the search box, type to find a field. Click the ‘+’ next to the field you want to add.
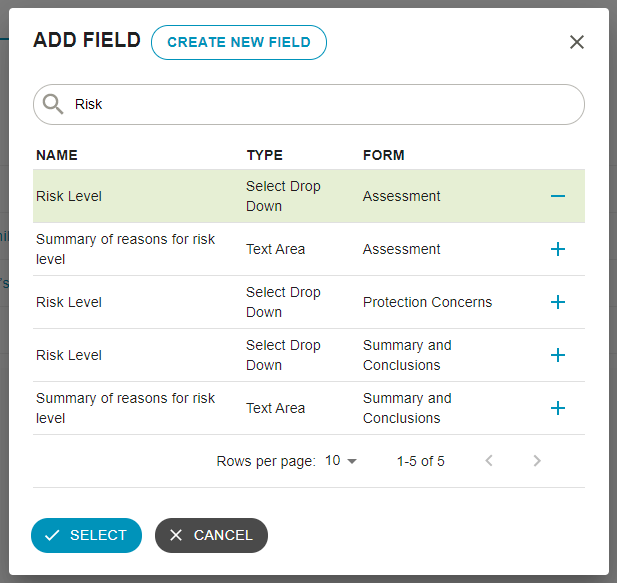
Once you have selected the field, search for other fields to add. If you want to deselect a field, click the ‘-’ which appears where the ‘+’ was previously. Click the “Select” button when you are done.
Updating Fields
To edit a field, go to the Fields tab of the form editor, then click the field you want to edit. Editing a field is very similar to adding a field, with the following exceptions:
- You cannot change a field from one type to another. If you would like to change a field’s type, you must create a new field with the desired type, then hide the field you are replacing.
- You will not be able to change all of your field’s option configuration. Specifically, you will not be able to ...
- Change the Lookup used for its options
- Switch from using a Lookup to using unique option values.
- Delete options from Unique Values. Instead, if you no longer want one of your unique values to appear, you can deselect the tick box next to the option in the “Enabled” column of the option list. This will prevent users from selecting this option in the future.
Note: You cannot delete fields in Primero. If you created a field by mistake or do not want it to appear in the forms anymore, you can hide it using the “Visibility” tick boxes in the Edit Field modal.
Editing an Existing Form
To edit an existing form, go to the Forms list and click the form you would like to edit. You will automatically arrive at the Edit Form page. Once you have made changes, be sure to click the Save button. If you do not click Save, your changes will be lost.
Editing a form is mostly similar to creating a form. Note that you cannot add fields or translations for your form until you have saved it.
Change the Field Order within a Form
While editing a form, you can change the order of fields. Drag and drop fields using the “grip” at the left side of the fields table.
Change the Form Group
While creating or editing a form, you can change the form group by clicking into the Form Group field. Begin typing the name of the form group you want and then select one of the results that appears.
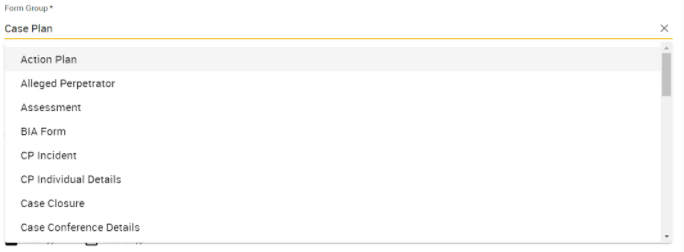
To add a new form group, type the name of the new form group in the field. Then click the “Add” option that appears. Once you save the Form, this new Form Group will be added.

Providing Translations
NOTE: You cannot provide translations for a form until it has been saved. You must create and save a form with its English name before you can provide translations.
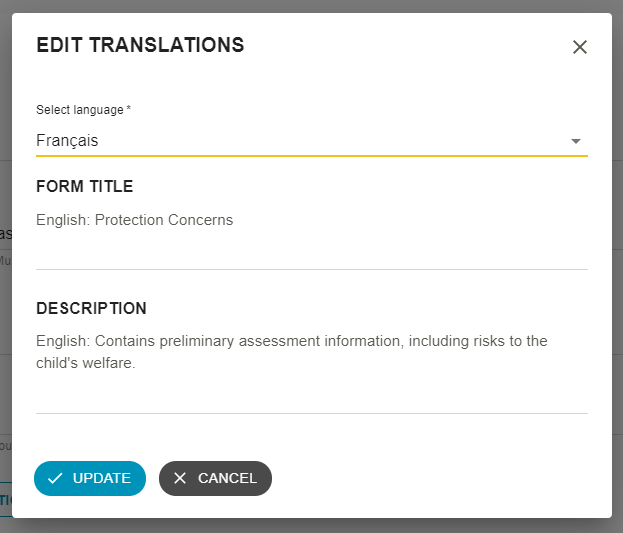
To provide translations for a Form’s main attributes, click the Manage Translations button on the Settings tab.

The Manage Translations modal will open. Select a language from the “Select language” dropdown, then enter your translations. Click the Update button when you are done.
You can also provide translations by clicking on the Translations tab in the Form Editor. Here, you can provide translations for settings like the Form Title and Description, as well as for the display names of any fields. Be sure to select your translation language before entering translation text.
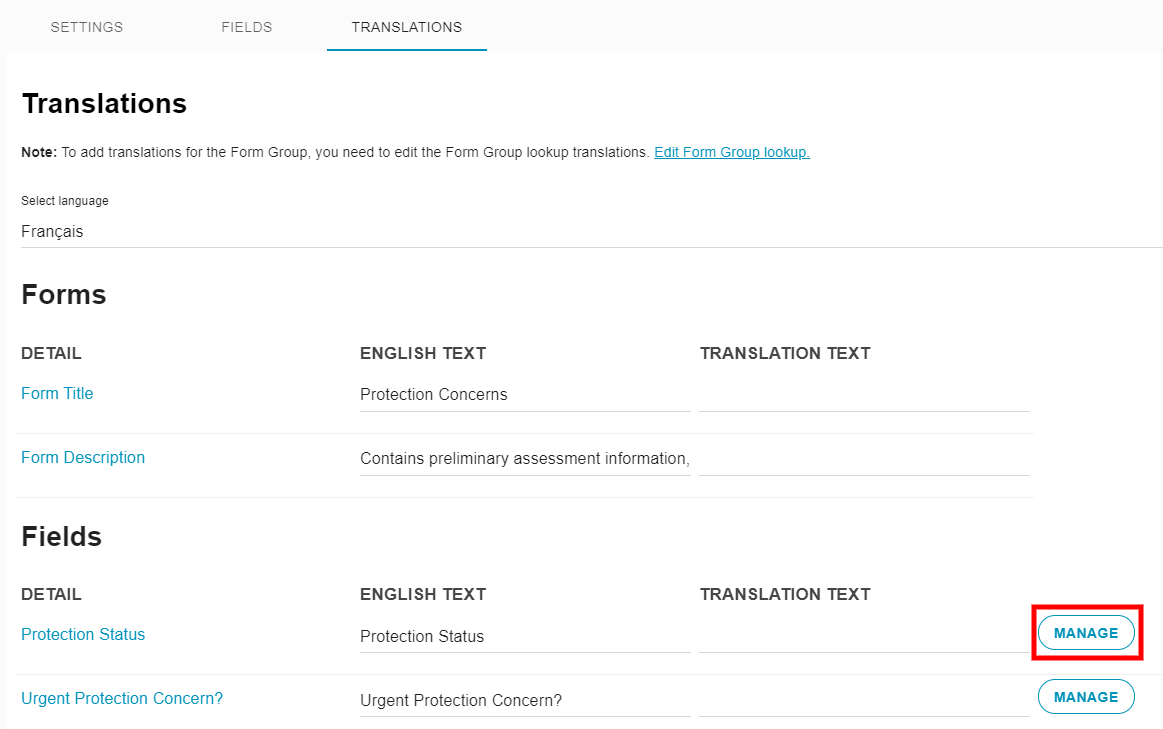
If you would like to provide more detailed translations for a field, click the Manage button next to that field. The Manage Translations modal will appear for that field. Select the language, provide translations, and click Update when done.
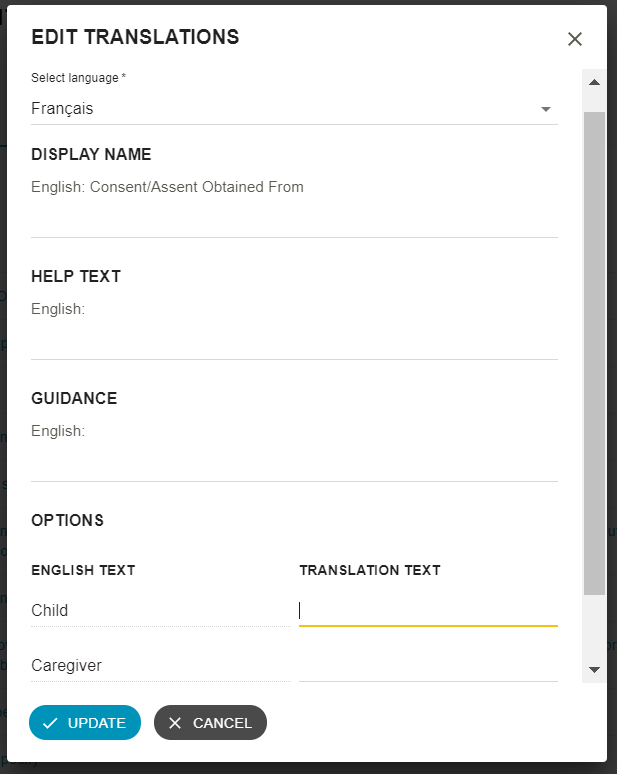
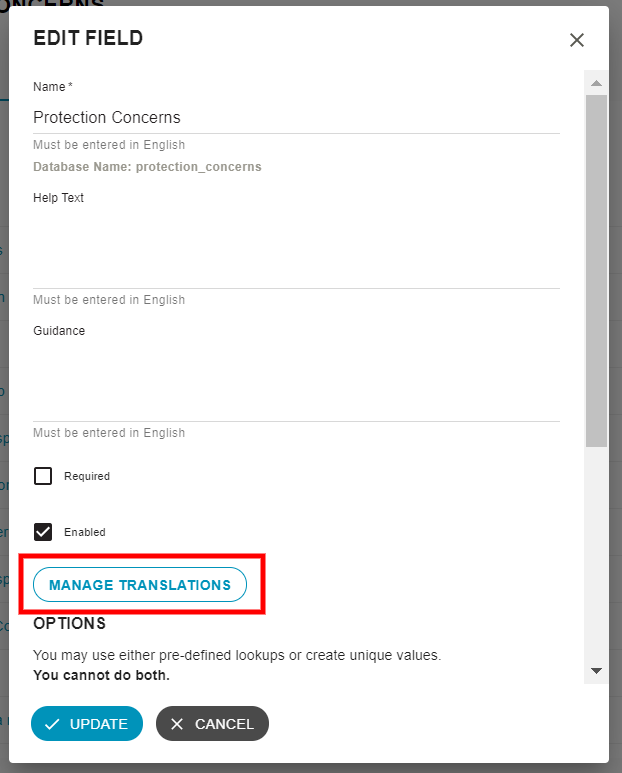
You can also provide translations for field attributes in the Edit Field modal. Go to the Fields tab of the Form Editor and click a Field to edit it. Then, inside the Edit Field modal, click the Manage Translations button.
The same Manage Translations modal will appear for the field. Select a language, enter translation text, then click Update when you are done.
Once again, please be sure to click the Save button at the top of the Form Editor page once you are done making any changes to Form or Field translations.
Note: While you can manage unique field options in the Manage Translations modal, you cannot use this interface for translating Lookup options. For information on how to translate Lookup options, please see the Lookup Values Management section of this guide.
Lookup Values Management
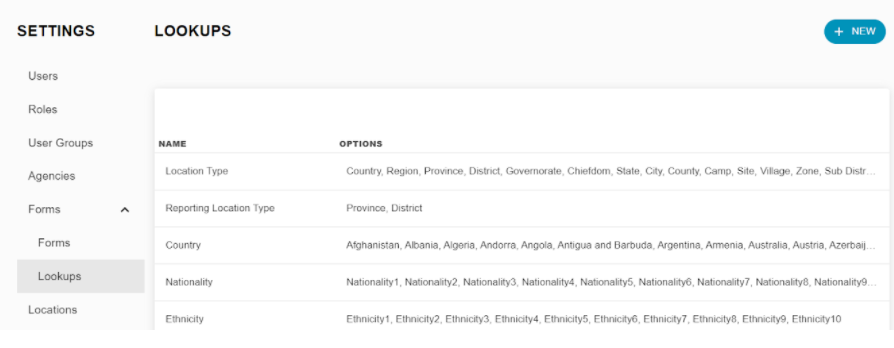
“Lookup” is the term used for a set of values that might be used as the dropdown options for multiple fields. For example, the Country Lookup (containing the names of all the world’s countries) is used by fields like “Nationality” and “Country of Origin.” Using a lookup helps you avoid specifying the same options multiple times when configuring forms. To view all configured lookups, click the Settings link in the navigation menu. In the Settings navigation menu, open the “Forms” group, then click the Lookups link. You will then arrive at the Lookups list.
Creating a Lookup
To create a new lookup, click the New button at the top of the page.
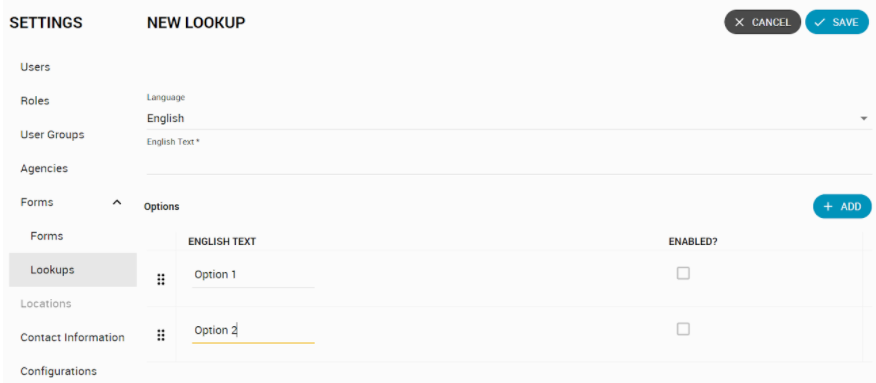
Specify a name for the Lookup you are creating, then use the Add button to add options. To add translations for the Lookup name or options, select a language in the “Language” dropdown at the top of the page, then fill in the translation text.
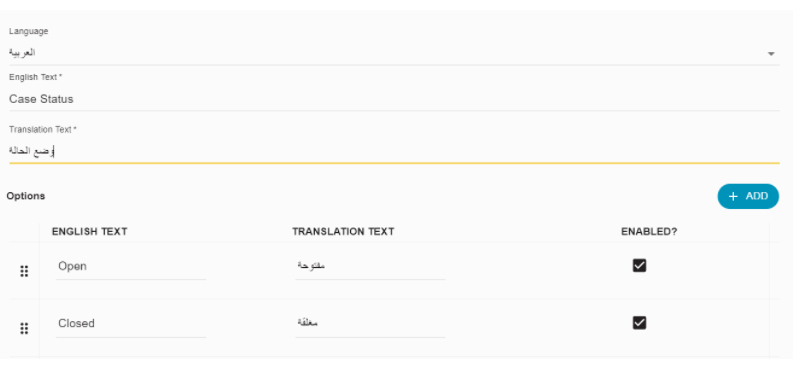
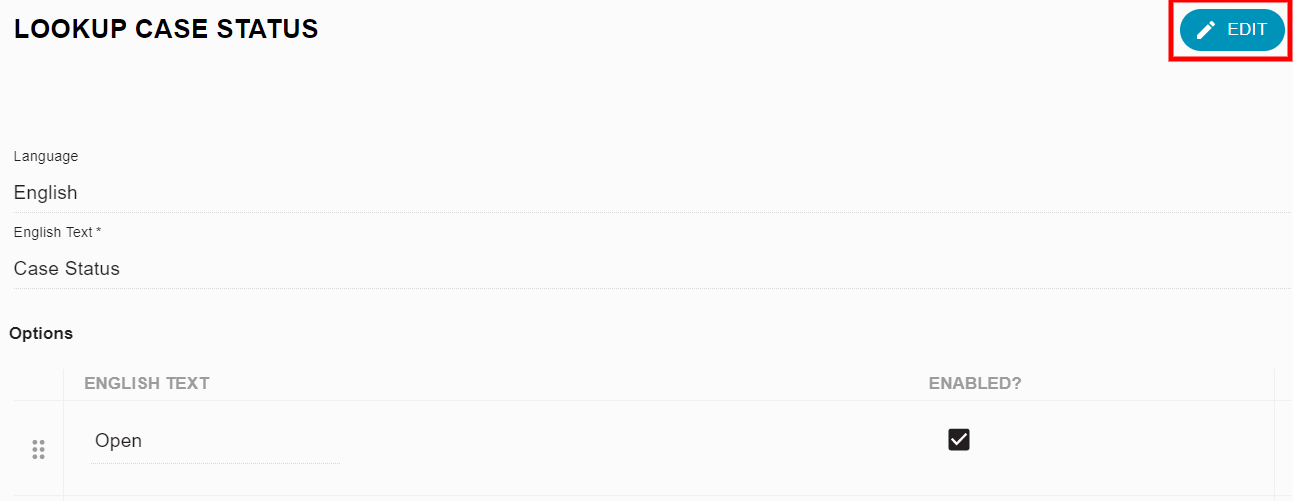
Editing a Lookup
To edit an existing Lookup, go to the Lookups list, click on the Lookup you would like to edit, then, on the Show Lookup page, click Edit.
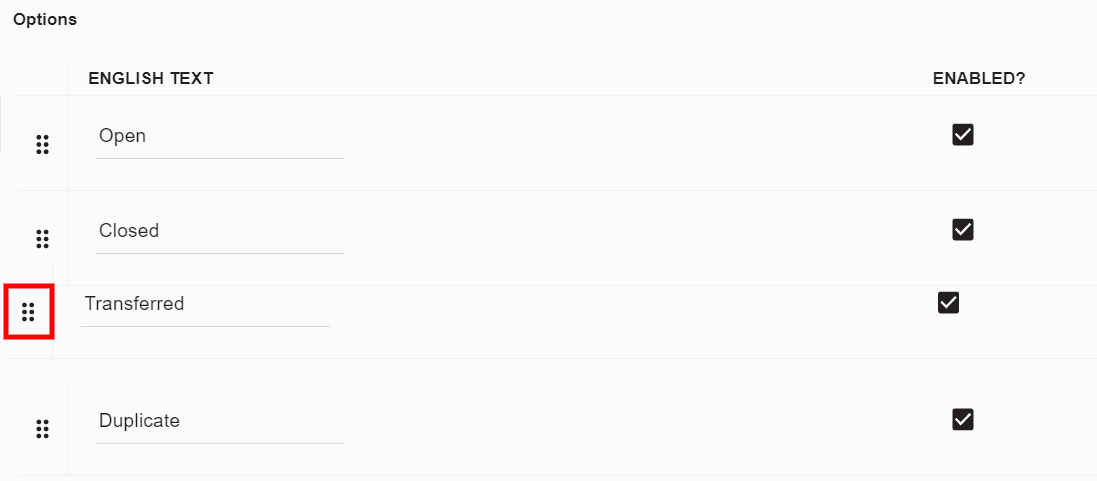
To rearrange the Lookup options, use the “grip” on the left side of the option row to drag-and-drop an option into a new position.
Note that you cannot delete options from a Lookup. Instead, you can “disable” an option. This will prevent users from selecting this option in the future. To do this, un-check the box next to the option in the “Enabled?” column of the Options list.

Remember to click the Save button after you have finished making changes.
Managing Form Groups
As you scroll through the list of lookups, you will notice that there is a lookup for the form groups for each type of record. Find the lookup labelled "Form Groups - CP Case” you will see that the options include all of the Form Groups see when viewing a CP Case.

To update or provide translations for the Form Groups, find the lookup that corresponds to the Module and Record Type of the Form Groups you want to update, click into the Lookup, and click Edit. You can now add, update, translate, and reorder the Form Groups the same way you would manage the options for any other Lookup.
Other Important Lookups[a]
There are other Lookups which impact key Primero functionality. Here are a few of them:
- Service Type - Updating these options will affect which services you can configure for Agencies and Users, as well as which options appear when you are selecting a type of Service for a Referral.
- Service Response Type - Since some implementations use a Case’s most recent Service Response Type as its workflow status, updating the Service Response Type Lookup may affect which Workflow Statuses appear on the Case and in the Dashboards.
- PDF Header - These options appear for users choosing which header to show at the top of their PDF exports.
- Agency Office - Users can be assigned to one of these “Agency Offices.” Supervisors will then be able to filter records by which Agency Office’s users created them.
Locations
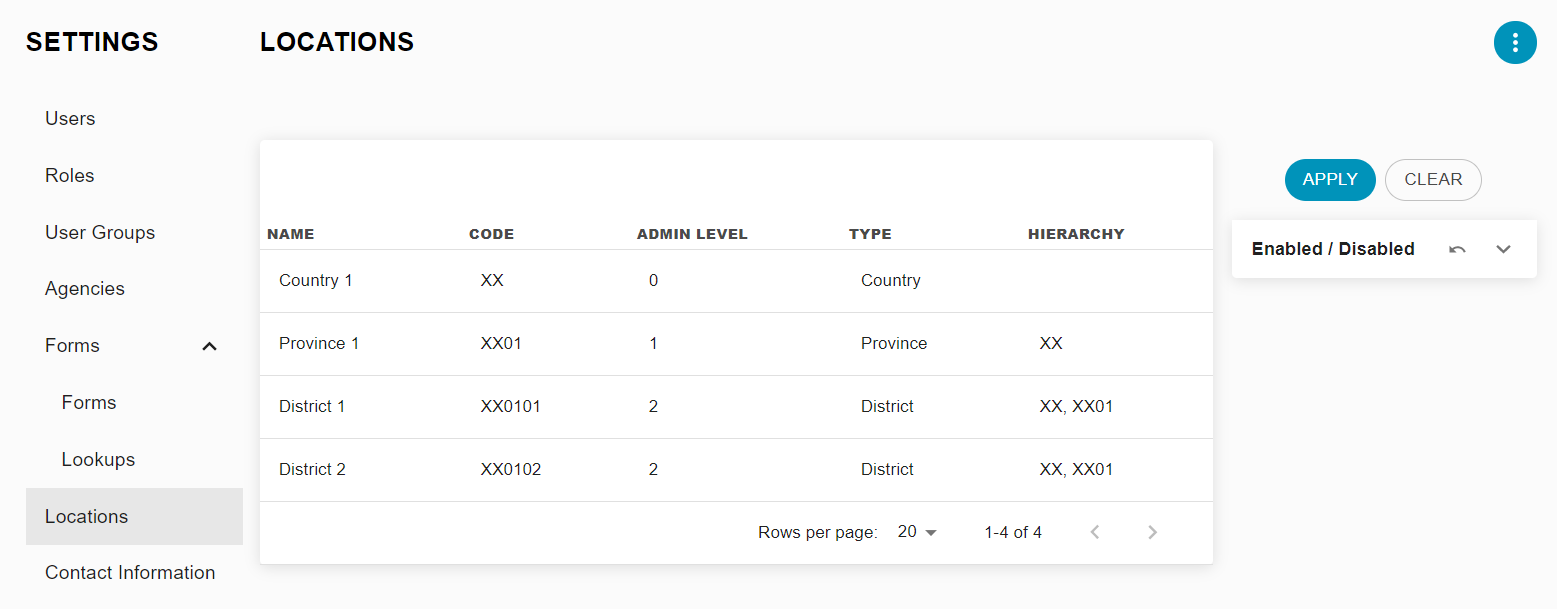
To view all Locations currently configured in the system, click the Settings link in the navigation menu. Then, in the Settings navigation menu, click Locations. You will see a list of all system locations.
Importing Locations
To import locations, click the Actions menu at the top-right of the screen, then click the Import action.
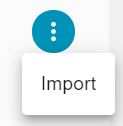
The Import Locations modal will appear. Here, you can upload the CSV file containing your Locations. Select your file, then click Import to begin creating Locations.
Formatting the Locations File
The CSV file containing your locations must be precisely formatted for your Locations to be created properly.
- UTF-8: Your file must be encoded using UTF-8. To do this in Microsoft Excel, click “Save As.” In the “Save as type” dropdown, select “CSV UTF-8 (Comma delimited) (*.csv)”.
- HXL headers: The second row of your file should contain HXL tags which indicate the Location attribute contained in that column. This tag should contain a designation for both the Location admin level and the Location attribute.
- The highest admin level should be represented by the HXL hashtag “#country”
- Each admin level must contain at least the attributes “name”, and “code”.
- If Locations will need their names translated into languages other than English, include an extra column for each admin level to specify the name in that language.
- For a full reference of HXL tags and how to format them, please see the HXL dictionary: https://hxlstandard.org/standard/1-1final/dictionary/
- All admin levels represented in each row: Each row must contain not just the attributes for that location, but for its parent locations.
Below is a sample of the first few rows of a properly-formatted Location CSV file containing place name translations for Jordanian Arabic.
|
Country Code |
Country Name |
Country Name (Jordanian Arabic) |
Governorate Code |
Governorate Name |
Governorate Name (Jordanian Arabic) |
District Code |
District Name |
District Name (Jordanian Arabic) |
|
#country+code |
#country+name |
#country+name+ar-JO |
#admin1+code |
#admin1+name |
#admin1+name+ar-JO |
#admin2+code |
#admin2+name |
#admin2+name+ar-JO |
|
JOR |
Jordan |
الأردن |
|
|
|
|
|
|
|
JOR |
Jordan |
الأردن |
JOR005 |
Amman |
عمَان |
|
|
|
|
JOR |
Jordan |
الأردن |
JOR005 |
Amman |
عمَان |
JOR005009 |
Wadi Essier |
وادي السير |
|
JOR |
Jordan |
الأردن |
JOR006 |
Tafiela |
الطفيلة |
|
|
|
|
JOR |
Jordan |
الأردن |
JOR006 |
Tafiela |
الطفيلة |
JOR006001 |
Hasa |
الحسا |
Updating Locations
Note: At this point in Primero v2, there is no way for administrators to edit or disable Locations therefore the locations that are uploaded must be the final list. This functionality is still in development.
Components of User Management
Components of User Management
As described above, each Primero user must have one role and at least one user group, allowing them to access the functions and records necessary to perform their day-to-day work. User management consists of the following three elements:
- Users are the individuals using Primero who each have a unique username and password. Each user is given access to one or more modules in Primero (e.g., CP for case management).
- Their Role sets which actions they can perform on which record types; as well as which records they are able to access. Below are some examples to illustrate these two concepts:
- Actions: A role may be able to “View,” “Edit,” and “Flag” Cases, but only “View” Incidents.
- Access: A may be able to access all records in the system, all records managed within their User Groups, all records managed by their Agency, or only their own records.
- A User Group is like a team of users. Managers within a User Group will be able to see any records managed by members of the group.
- A user’s Agency represents the actual organization they work for. Please note that, while User Groups are not linked to Agencies in any way, an administrator can create multiple User Groups which represent teams within an Agency (example: all Save the Children case workers in District 5). Or, they may create a User Group which spans multiple Agencies (example: all Alternative Care service providers in Camp 1).
Creating and Editing Roles
In the Settings navigation menu, click Roles. To create a new role, click the New button, or to edit an existing Role, click a Role in the list, then click the Edit button on the Show Role page.
General Settings
In the first section of the new/edit Role page, you will see the below fields
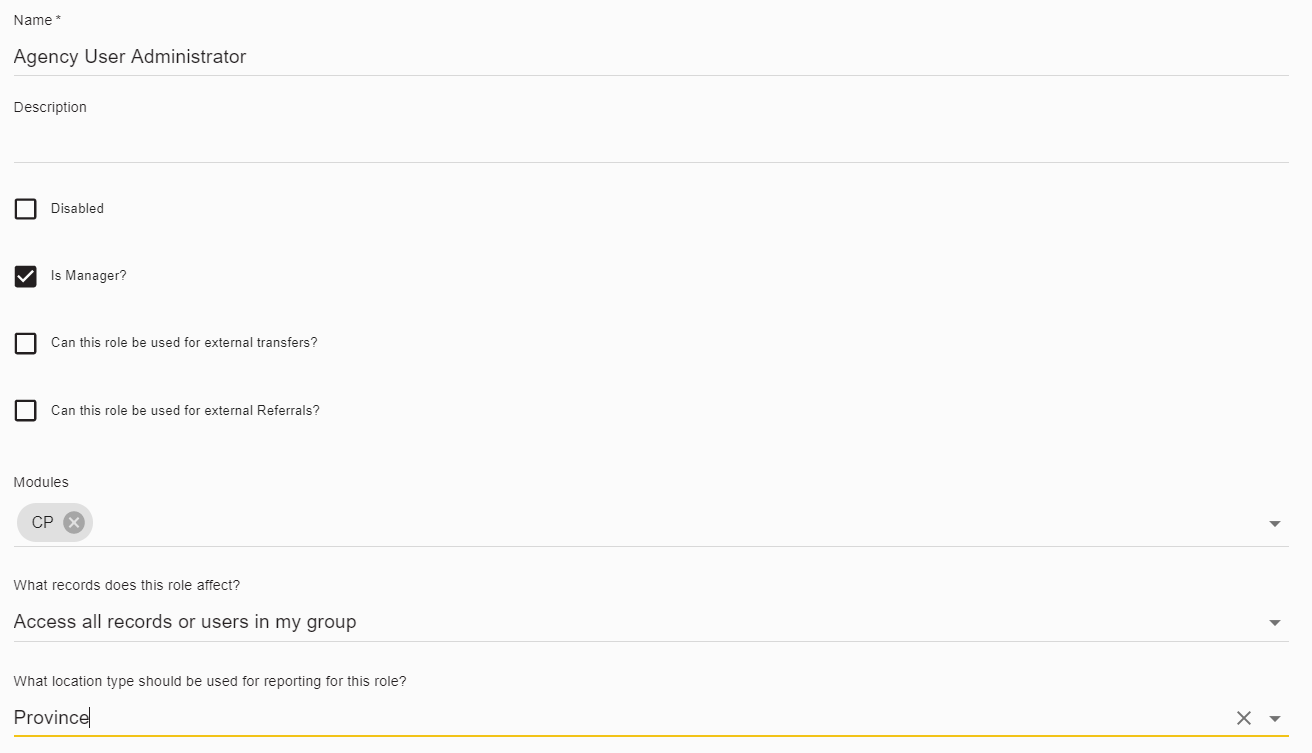
- Name and Description
- Disabled: Since you cannot delete Roles in Primero, disabling a Role prevents it from appearing as an option when an administrator creates a User.
- Is Manager?: This setting allows Users with this Role to see management-related features such as the “By Caseworker” filter on the Cases list. You should generally select this setting for all managerial and administrative Roles.
- Can be used for external Transfers?[b]: Allows this role to appear as an option when a user is selecting the Type of Recipient for an external transfer. When a user selects the Type of Recipient, the external transfer will only include information that the selected Type of Recipient would normally have access to in Primero. For instance, if the user selects “Service Provider” as their Type of Recipient, and the Service Provider role only has access to the “Child’s Details” form, the external transfer will only include information contained in this form.
- Can be used for external Referrals?: Allows this role to appear as an option when a user is selecting the Type of Recipient for an external transfer. When a user selects the Type of Recipient, the external referral’s PDF export file will only include information that the selected Type of Recipient would normally have access to in Primero. For instance, if the user selects “Service Provider” as their Type of Recipient, and the Service Provider role only has access to the “Child’s Details” form, the external referrals’s PDF export file will only include information contained in this form.
- Modules: Which Primero modules will users with this Role have access to? Typically, Roles only have access to one. For instance, a CP Case Worker would only have access to the CP module. This impacts which forms are available when a User with this Role is creating, viewing, or editing a record such as a Case.
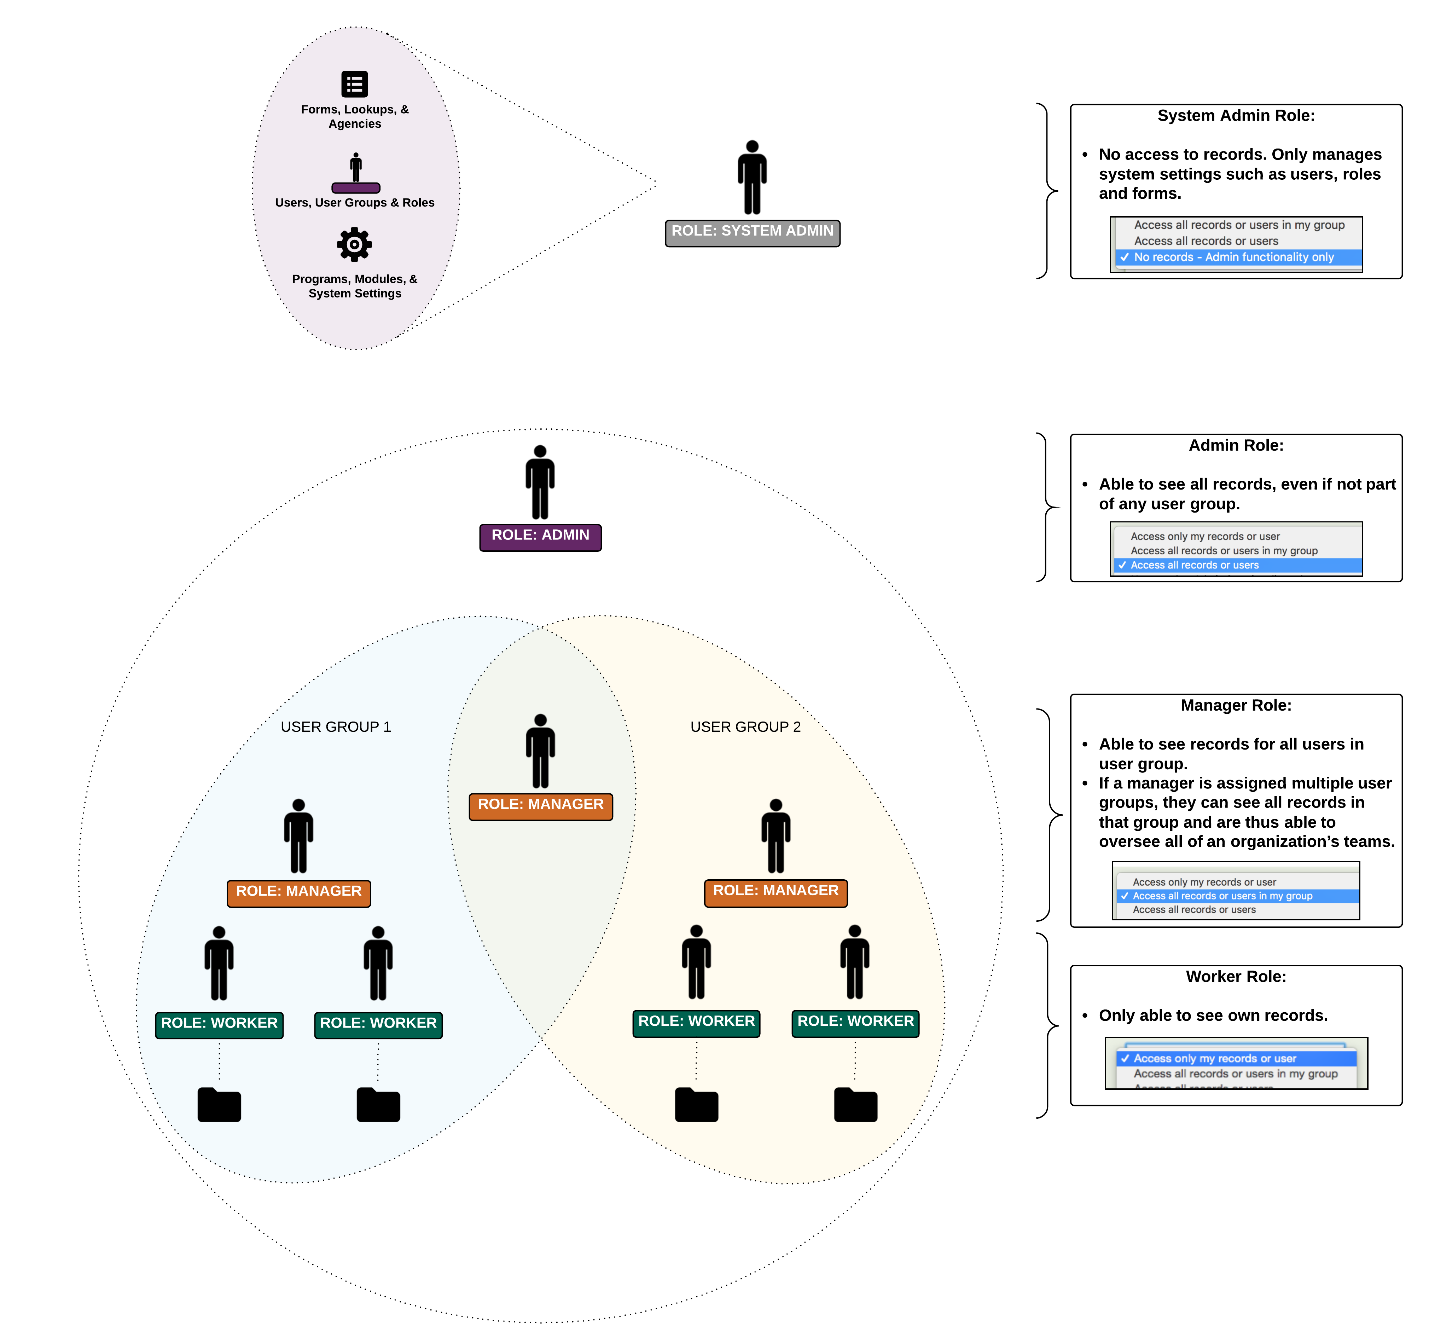
- What records does this role affect?: This controls which records Users with this Role will be able to access.
- This setting has the following options:
- “Access only my records or user”
- “Access all records or users in my group”
- “Access all records or users in my agency”
- “Access all records or users”
- "No records - Admin functionality only."
- Please note that a User will be able to perform their permitted actions for a given type of record for any records of that type which they can access. For instance, if a supervisor role has the Edit permission on Cases, and they have access to all records in their group, they will be able to edit all Cases in their groups.
- What location type should be used for reporting for this role?: Primero generally uses a system-wide setting for the level of specificity used to report Cases’ locations in Dashboards and filters. Let’s use Ghana as an example and assume that usually locations in Ghana are classified into one of Ghana’s 260 districts. If a user is looking at the “Cases by Location” dashboard, and only has access to the Cases in their own region, they will only see a few rows in the dashboard - one for each district in their region. In this case, classifying locations by district makes sense. However, a national administrator, with access to all cases in the system, would see 260 rows in that same dashboard. This is confusing and impractical. In this situation, the National Administrator role should have the “What location type should be used for reporting for this role?” field set to “Region,” so that National Administrators only see 16 rows in the dashboard: one for each of Ghana’s 16 regions.
Permissions
Scrolling down the page, you will see that a Role’s “Permissions” are organized by record type. This includes both the three main record types (Cases, Incidents, and Tracing Requests), as well as record types like “User” and “Report” which pertain to system configuration, and which usually only administrators can access.
Please note that you can expand or collapse the section for a particular resource type by clicking on the header of that section. This makes scrolling through the page easier.
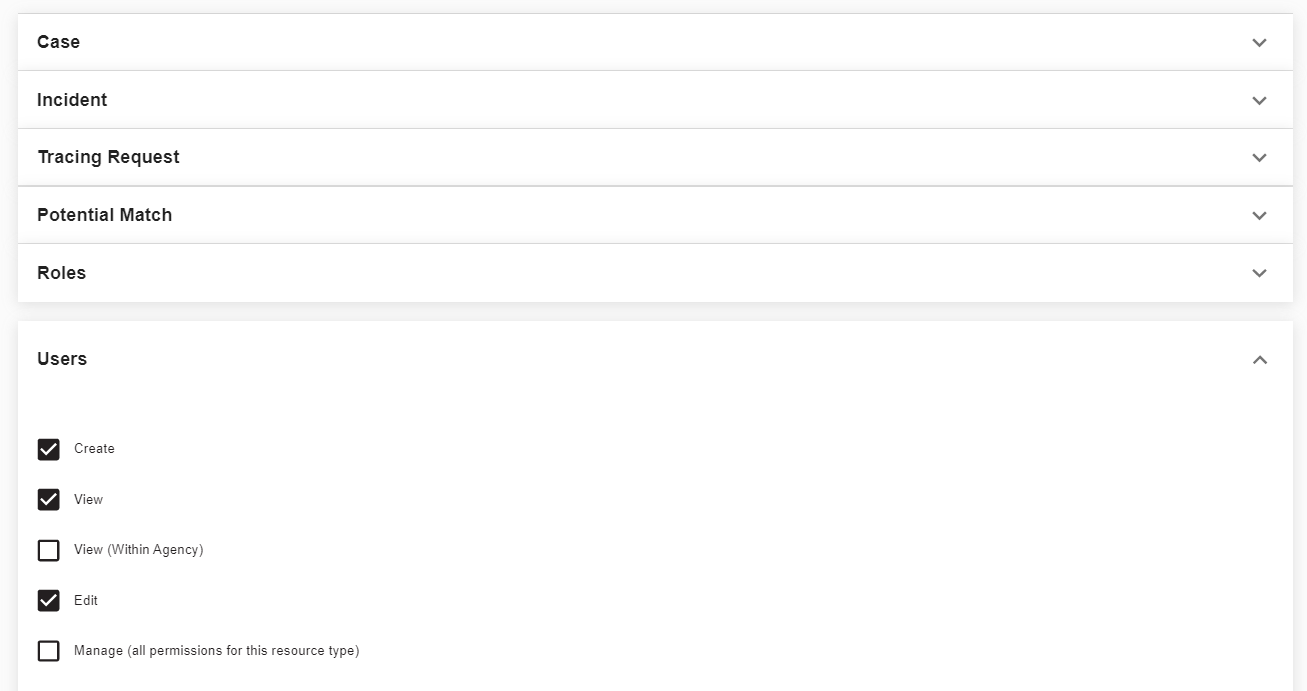
You can update permissions for the following record types:
- Case: Represents an individual child, survivor, or other beneficiary.
- Incident: Represents an event which has occurred. These are usually incidents of abuse or violence, though they can also correspond to events like encounters with law enforcement. Incidents are often linked to Cases.
- Tracing Request: Represents an individual trying to locate and reunify with an unaccompanied or separated Case.
- Potential Match: Represents the link between a Tracing Request and a Case. Access to Potential Matches is necessary for Family Tracing and Reunification (FTR) work.
- Role: Dictates which actions a User can perform in Primero.
- User: Represents an individual User account.
- User Group: Represents a team or a collaborative group of users who can share information. Managers can typically see all of the records managed by social workers in their User Groups.
- Agency: Represents an organization with members who use Primero. Agencies exist independently of User Groups.
- Forms, Lookups: Controls the ability to configure Primero Forms and Fields, as well as Lookup options used within them.
- System: Miscellaneous system-wide configuration settings.
- Report: Aggregate data analysis tool. Includes table and graph representations of data.
- Dashboard: Dictates which summary information appears on the home page.
- Audit Log: Filterable list of all actions performed in the system. Does not include any identifiable information on Cases, Incidents, or Tracing Requests.
- Matching Configuration: Controls which fields are used to compare Tracing Requests with Cases during Family Tracing and Reunification.
- Duplicate Search[c]: Advanced case search for administrators.
- Pulse / KPIs: A set of performance-monitoring indicators and dashboards tailored for GBV programming.
Each resource type has a different set of permissions, each of which represents a specific action that a User with this Role can perform. To see an explanation for a permission, hover your mouse over the text for that permission. A box will appear with a short description. When in doubt, always check these explanations for guidance on how to configure a Role.
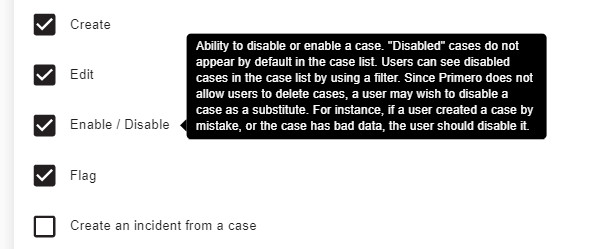
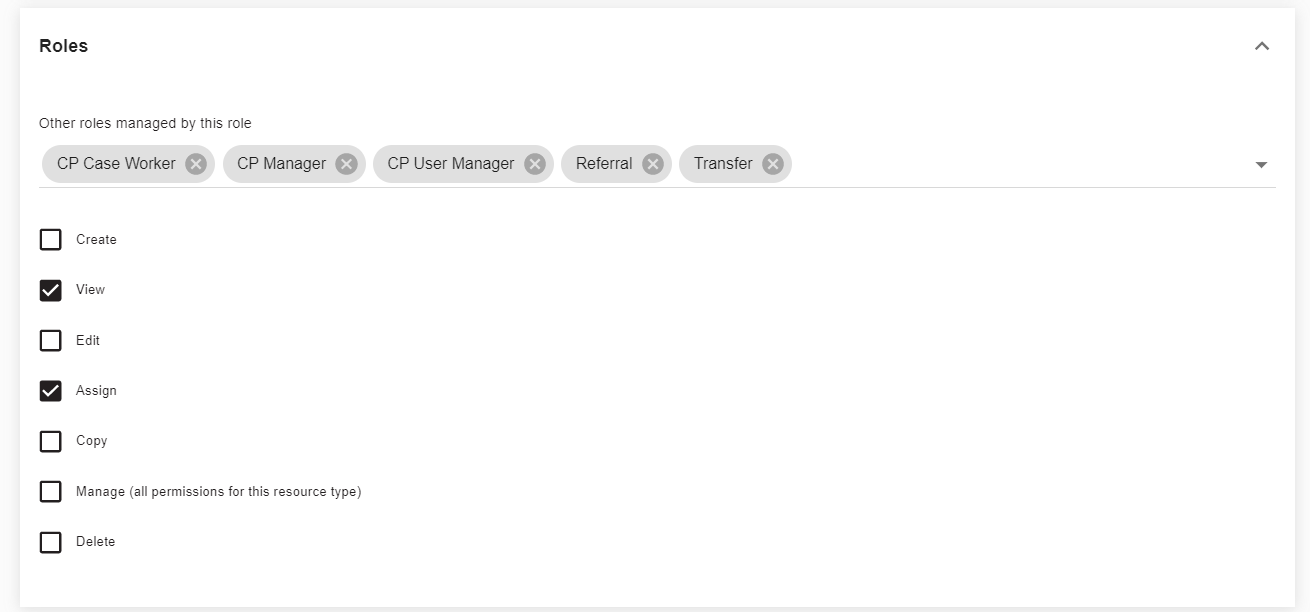
A few specific permissions warrant explanation here:
- Roles - “Other roles managed by this role”: This specifies which other Roles users with this Role can access. For example, if you give this Role the ability to ‘View’ and ‘Edit’ Roles, they will only be able to view or edit the Roles you select here. For example, to limit what kinds of Users an Organizational Administrator can create, you would give them the “View” and “Assign” permission on Roles, but you could select the “Case Worker” and “Supervisor” Roles in this field to specify that Organizational Administrators can only create users with these two Roles. This prevents the Organizational Administrator from creating a user account with a very powerful Role such as “National Administrator.”
- Dashboard - “Tasks Page”: Rather than controlling access to a specific “dashboard” within the home page, this permission gives Users with the Role access to the separate “Tasks” page, where users can keep track of upcoming case management deadlines. For more information on this view, see the Primero CPIMS User Guide.
- Users - “View (Within Agency)”: This denotes that the given role can perform actions on Users only within the current User's agency. As an example, suppose an administrator named Ahmad at a local NGO named "ABC" needs to be able to manage the organization's Users: resetting passwords, disabling Users, and creating new User accounts. Ahmad's User account gets a role with the “Edit,” “Assign,” and “View (Within Agency)” permission for Users. Because of this, Ahmad will only be able to view and edit User accounts which, like Ahmad's User account, have their agency set to "ABC." This means Ahmad can only access, and is only responsible for, Users within his organization.
- Reports - “Group Read”: Typically, when a User views a Report, the numbers they see will reflect all records in the system, regardless of which records that User actually has access to. For instance, a User with no access to Cases can still view a Report which includes information about all Cases in the system. However, Users whose Role has the “Group Read” permission on Reports will see numbers in each report will reflect only those records which are accessible to users in the current user's user groups. This permission is often used for local, regional, or agency administrators.
- (Multiple resource types) - “Manage” - The “Manage” permission appears on multiple types of resources and generally means “All of the above.” If a Role is given the “Manage” permission on a resource, it will be able to perform all available actions on that resource.
Form Access
Scrolling down the page, you will arrive at the “Forms” section. Here, you specify which forms this Role will have access to for each of the three main record types: Cases, Incidents, and Tracing Requests.

This dictates which information a Role can access and modify. For instance, Roles with the “Show and Edit” permission on Cases, and with access to the “Child’s Details” form will be able to edit information for any field contained in this form. Roles with “Hide” permission, will not be able to view the “BID Status” form. Roles with “Show” permission will be able to view but cannot edit the “Assessment” form.
Please note that you can expand or collapse the sections for each record type (e.g. “Forms - Case”) within the Forms section by clicking on the header of the section.
Other restrictions on administrative Roles
Superusers and User Admins
There are two important types of roles which we must discuss here, since the system treats them differently. The first is the Superuser role.
A Superuser role is a role has the all-encompassing "manage" permission for Cases, Incidents, Reports, Roles, Users, User Groups, Agencies, System Settings, and Forms and Lookups. A superuser, meanwhile, is a user who has been assigned such a role. Since this user has a great deal of power within the system, only superusers can view or edit the attributes of other superusers. For similar reasons, superuser roles cannot be edited within Primero's administrative interface.
The second special type of role is the User Admin role. A user admin role has less power than a superuser role, but is defined as having the all-encompassing "manage" permission for Roles, Users, User Groups, Agencies, System Settings, and Forms and Lookups. Once again, a user admin user is a user who has a user admin role. Only superusers and other admin users can view or edit the attributes of user admin users. Similarly, only superusers can edit a user admin role.
Please note that Superusers are never enabled except for situations of emergency maintenance and support.
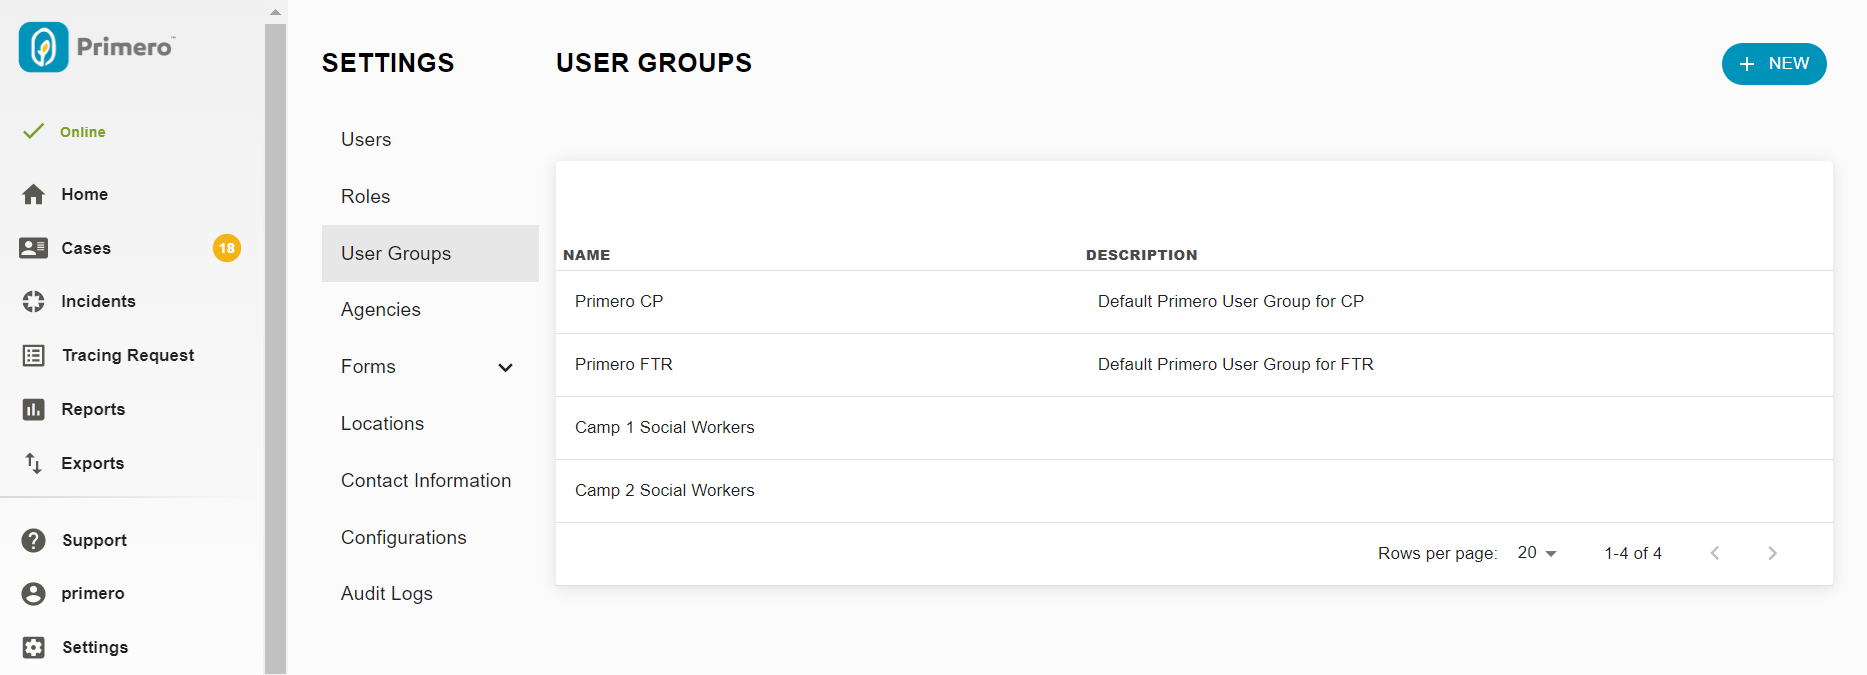
User Groups
User Groups are teams of users. Users within this group with managerial Roles will be able to access all the records managed by the other users in the group. As with Roles, User Groups should be created before you create individual users. As we discussed in the Creating and Editing Roles section, each role has one of the following “access” levels:
- Access only my records or user
- Access all records or users in my group
- Access all records or users in my Agency
- Access all records or users
- No access - Admin functionality only
The actions the user can perform once they have access to a record are driven by the privileges set with their role. These permissions given to a user apply to all records they have access to. If a user has the “Edit” permission on Cases, and also happens to have access to the Cases of all the Users in their User Group, then they will also be able to edit the Cases of all the Users in their User group.
The following diagram helps explain the relationship between Users, Roles, and User Groups through a hypothetical Role/User Group setup, where the different roles are given specific permissions regarding their ability to see records within different User Groups:
To see the User Groups currently configured in your system, click the Settings link in the navigation menu, then click the User Groups link in the Settings navigation menu. You will arrive at the User Groups list.
Limited Access to User Groups
Note that, local administrators who manage the User accounts for their team will only see User Groups in this list which they are part of. Similarly, when this local administrator creates or updates a User account, they will only be able to assign a User to the User Groups that the local administrator is part of. This specifically applies to Users whose Roles have the “All records or users in my group” access level.
For example, imagine a User with the “Camp Supervisor” Role manages User accounts for all the User Groups in Camp 1. The “Camp Supervisor” Role would have the “All records or users in my group” access level, and this Supervisor User would be part of all the User Groups for Users in Camp 1 (for example: “Camp 1 Block 1,” “Camp 1 Block 2,” and “Camp 1 Block 3”). When this supervisor goes to the User Groups list, they would only see these three User Groups, and when they created a User account, they would only be able to assign the User to one of these three User Groups.
Creating and Editing User Groups
To edit a user group, click one in the list. Once you have reached the Show User Group page, click the Edit button. Make changes, then click Save.
To create a new user group, click the New button at the top of the User Groups List page. Specify a Name and Description, then click Save.
Please note that User Groups cannot be deleted. To prevent a User Group from being assigned to Users in the future, or to prevent it from appearing in filters, dashboards, or Reports, edit the User Group and check the “Disabled?” tick box.
Agencies
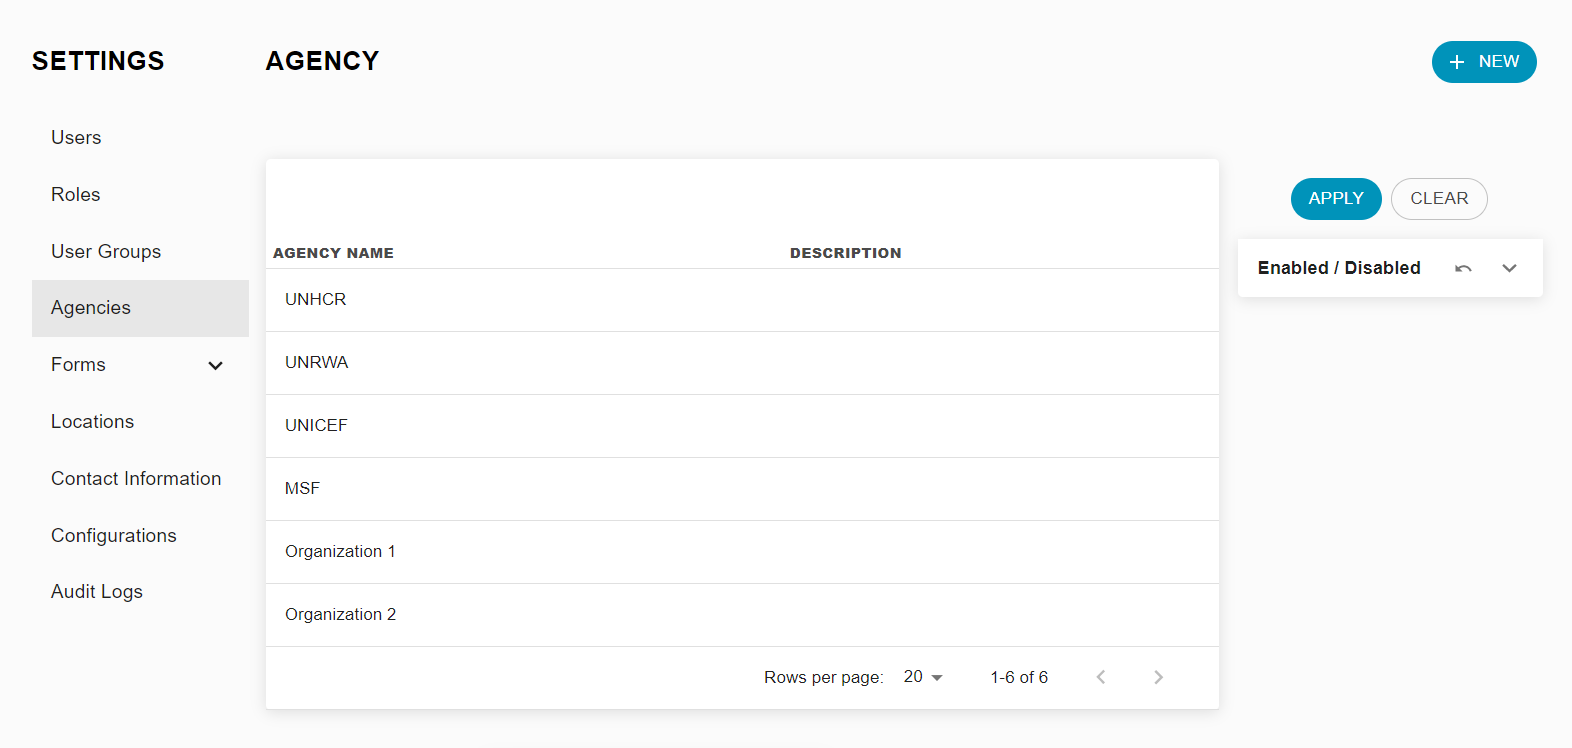
Agencies represent the actual organizations using Primero. You must set up Agencies before creating User accounts. To view the Agencies currently configured in your system, click the Settings link in the navigation menu, then click the Agencies link in the Settings navigation menu. You will arrive at the Agencies List page.
Please note that Agency Administrators, whose Roles have the “View (Within Agency)” permission on Users, will only see their own Agency in this list. Similarly, when they are creating new User accounts, they will only be able to assign a User to their own Agency. For more information on this restriction, please see the Permissions section under Creating and Editing Roles.
Creating and Editing Agencies
To edit an existing Agency, click the Agency in the list. Then, on the Show Agency page, click Edit.
To create a new Agency, click the New button at the top of the Agencies List page.
Agency Logos
You can configure an Agency with logo images. You can upload two images:
- An “Icon” logo with square proportions. This appears on phone and tablet screens.
- A “Large” logo with wide, short, rectangular proportions. This appears on large screen sizes and in PDF exports.
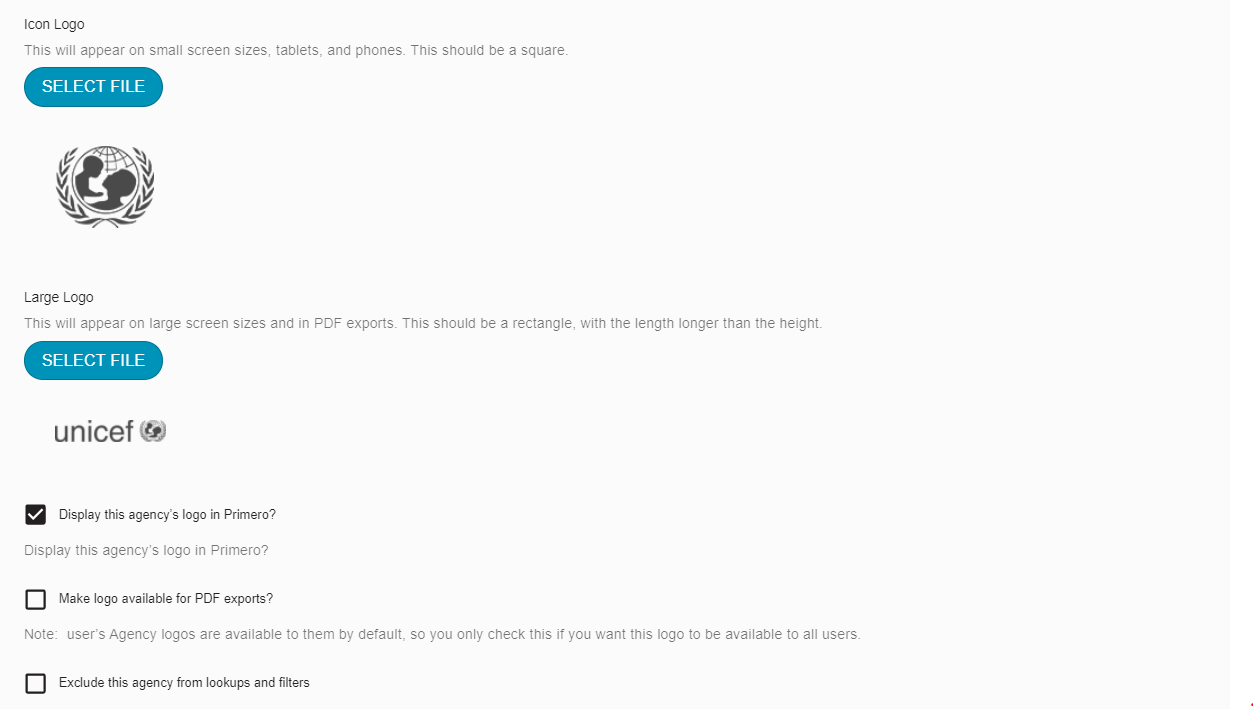
In addition to specifying which images to use for an Agency’s logo, you can choose where these logos appear using the below settings:
- Display this agency’s logo in Primero? - Checking this box will make the Agency logo appear in the navigation menu and on the Login page.
- Make logo available for PDF exports? - If this box is checked, users performing PDF exports will be able to select this Agency’s logo to appear in the export file’s header.
- Exclude this agency from lookups and filters - This setting is for Agencies which do not have any Users in Primero. For instance, if you would like to display the logo of your country’s Ministry of Justice in the navigation menu or in PDF exports, but no Ministry of Justice staff will actually use Primero, you can create a “Ministry of Justice” Agency, configure its logos, then check this box to ensure that Users do not accidentally select “Ministry of Justice” as the Agency for a referral or transfer.
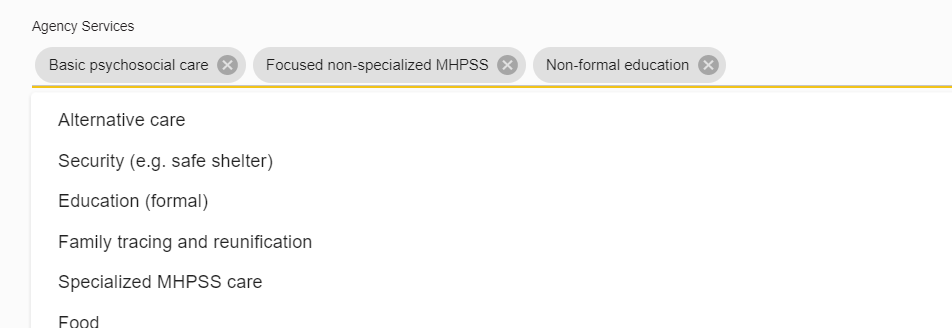
Agency Services
Each Agency can be configured with a list of Services it provides. The options which appear here come from the Service Type Lookup.
Specifying services for your Agency is very important for controlling the Service and Referral workflow in Primero, as explained below:
- When a user adds a Service to their Case, they will first specify the Type of Service.
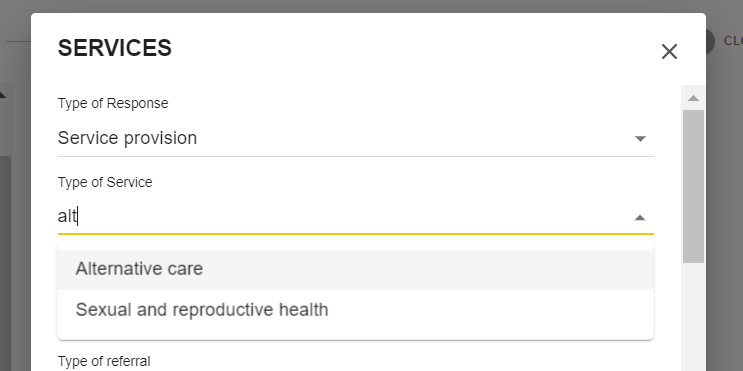
- Once the user has selected the Service, they will choose an Agency to provide the Service. Primero will only let the user select an Agency which has been configured to provide that Type of Service. So, if the user has selected “Alternative Care” as their Type of Service, and Save the Children is configured to provide “Alternative Care” Services, then Save the Children will appear as an option for the Implementing Agency field. Other Agencies, which are not configured to provide “Alternative Care” services, will not even appear as options.

- Once a user has selected a Service Type and an Agency, they can select a User to perform the service. Primero will only show Users who are part of the selected Implementing Agency, and which are configured to provide the selected Type of Service.
- While we will discuss how to configure which Services a User can provide in the Creating and Editing Users section of this guide, it is important to know that an Agency’s configured Services can impact which services a User provides. If an administrator, creating a User account, does not specify which Services the User can provide, Primero will automatically configure that User to be able to provide the Services of their agency. So, for instance, if Save the Children is configured to provide “Alternative Care” and “Food” services, and an administrator creates a Save the Children User without specifying a list of Services for that User, Primero will automatically configure that User to be able to provide “Alternative Care” and “Food” Services.
Once you are done making changes, please remember to click the Save button at the top of the page.
Note: Once an agency has been created, it cannot be deleted. The agency can only be disabled. To do this, edit the Agency, check the “Disabled?” tick box, then save.
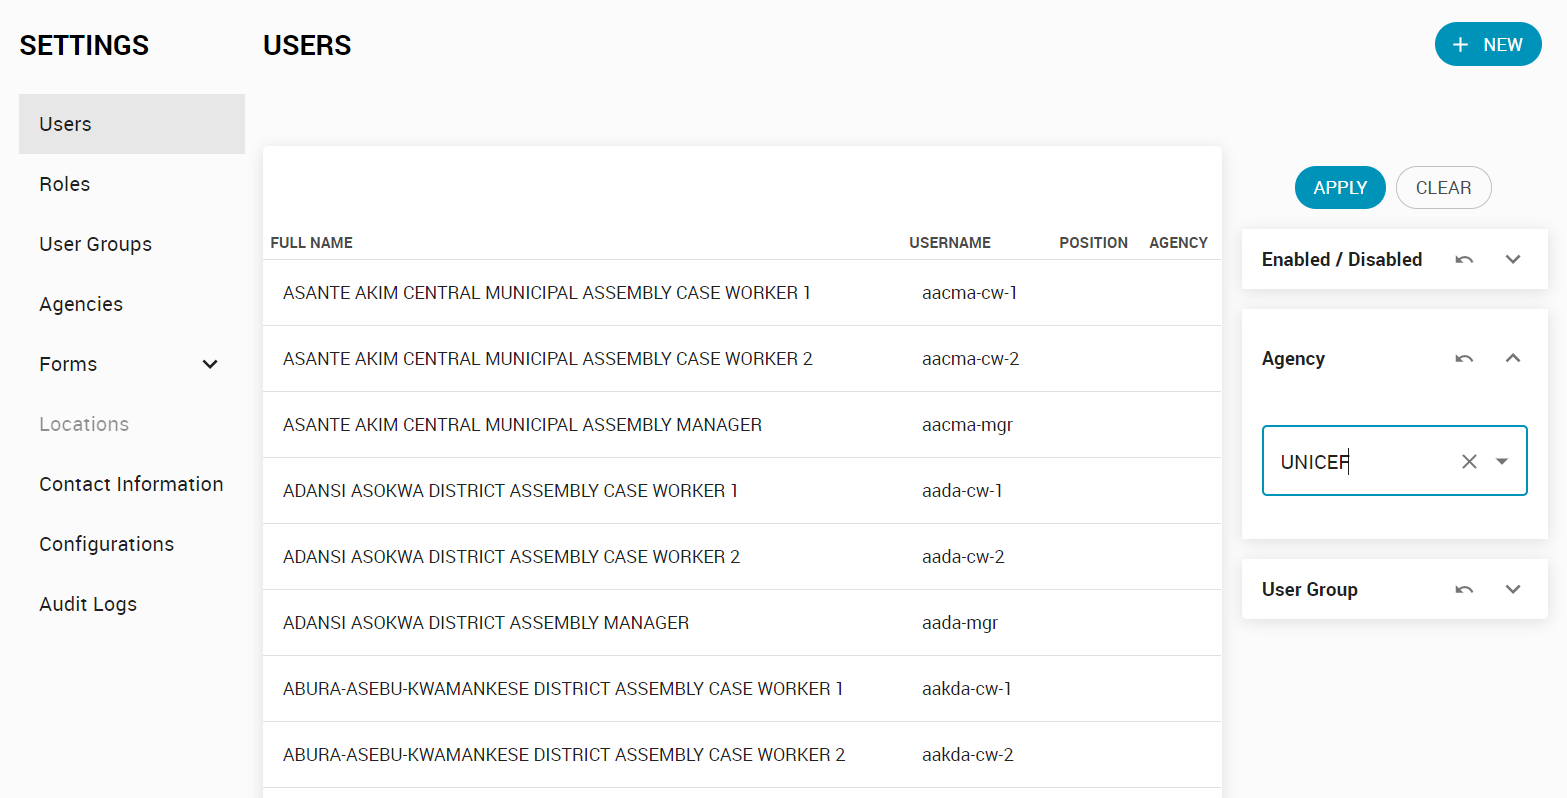
Users
To see all users currently in the system, click on the Settings link in the navigation bar, then click the Users link in the Settings navigation menu. You will now arrive at the Users List page. You can filter users by Agency, User Group, and whether or not they are Enabled, using the filters panel on the right side of the page.


Note that local administrators and supervisors will likely only see Users in their own User Groups or Agency.
- Users whose roles have the “Access all records or users in my group” level of access will see all Users in their User Groups.
- Users whose roles have the “View (Within Agency)” permission on Users will see only Users within their own Agency.
Creating Users
To create a new User account, click the New button at the top of the Users List page.
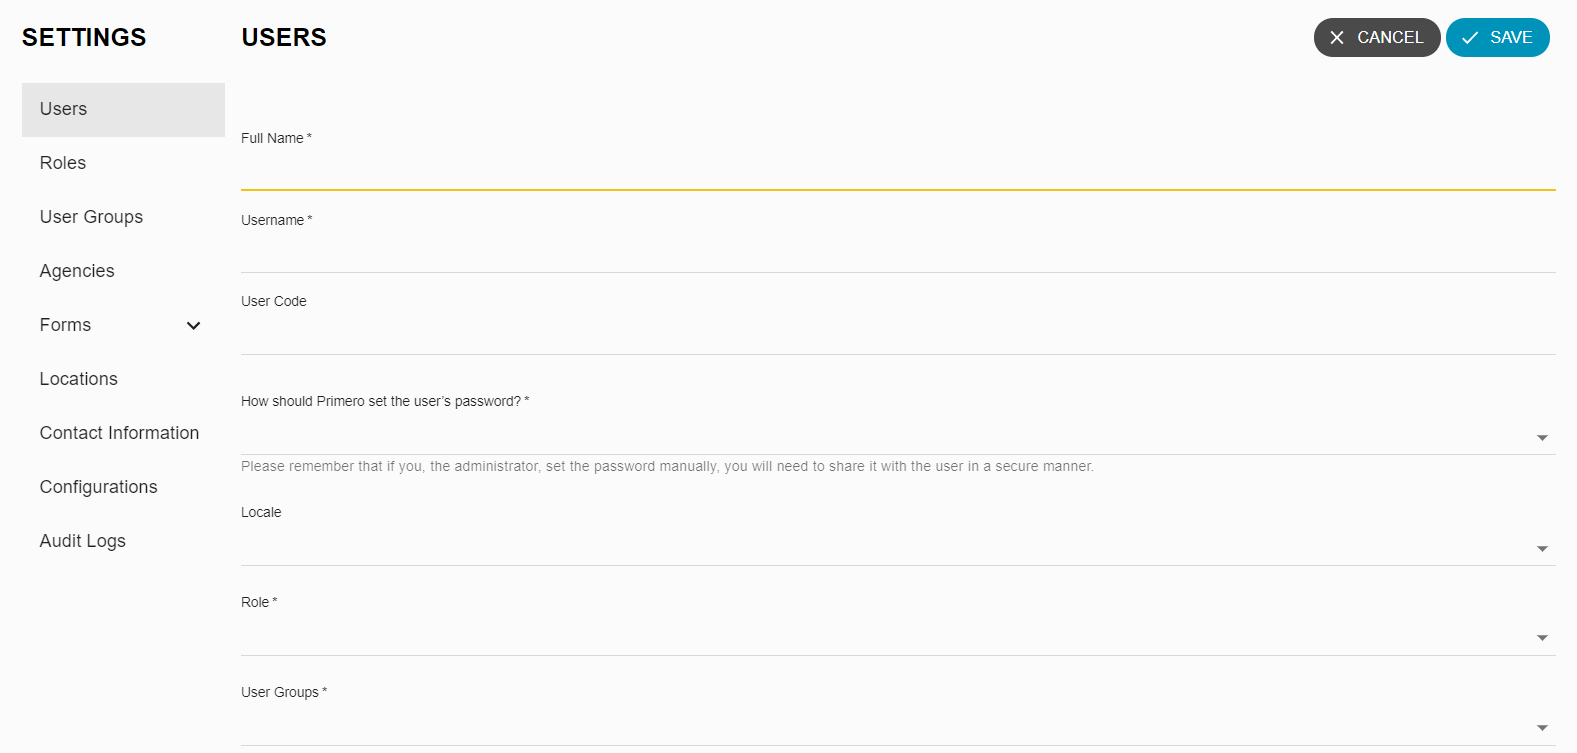
For each user, you must specify the following information:
- Full Name - This is the actual name of the User.
- Username - Users will enter this every time they login. For this reason, it is recommended to keep the username short.
- Each User’s username should be unique.
- In addition, the username will be visible on any records created by the User. For this reason, implementation partners should discuss a consistent username pattern. This can include an Agency abbreviation, some indication of the User’s day-to-day work (e.g. including ‘cw’ for case workers), and/or some part of the User’s actual name. As partners discuss a pattern, they should attempt to balance the need for Users to be able to understand which person they are dealing with when they read a username; with the need to avoid revealing too much personally identifiable information about the User.
- Note that if your implementation uses Identity Providers to handle User accounts, the username will need to match a specific format. For more information, please see the Managing Identity Providers section of this guide.
- User Code - This attribute is not used in most implementations. Unless your configuration is using the User Code to generate composite record IDs, you can ignore this.
- How should Primero set the User’s password? - Here, you have two options:
- “I will set the password” - If you select this option, you will be asked to enter the password, then confirm it (to guard against typos). You will then be responsible for communicating this password to the User.
- “User will set the password using the welcome email” - If you select this option, you do not need to set the password. A password reset email will be sent to the User, and they will be able to set their own password.
- Locale - The language in which the User will see Primero.
- Role - Must be an existing role as defined in the section above. This controls both the User’s permissions and level of record access. For more information, please read the Roles section of this guide.
- Modules - A user is given access to one or more modules in Primero. For example, a Child Protection Officer will likely only have access to the CP (or “Child Protection”) module.
- User Groups - Must be an existing user group or groups as defined in the section above. For managers, this will determine which records they can access. For more information on how User Groups influence which records a User sees, please read the User Groups section of this guide.
- Agency - The organization to which the user belongs.
- Location - The location where the user is based. Please note that this will be used for
- Reporting: All records created by the User will be listed as being created in this Location
- Referrals: When a User is creating a Service for their Case or performing a Referral, they can filter Users by Location to find a User who is close to them.
- Services - The services which the user is capable of providing. Note that this will be used to determine whether this User appears as a potential recipient when other Users are planning Services and Referrals. If you leave this field blank, the User will automatically be given the Services their Agency is configured to provide.
- Phone - While this does not currently affect any Primero functionality, it can help administrators and supervisors contact the User.
- Email - Welcome, password reset, and notification emails will be sent to this email address.
- Position - This does not affect any Primero functionality. The “Position” of the user is meant to capture the User’s precise job title, which may not be properly explained by the Role the User has been given.
Note: Since a User’s Location, and Services settings are used to determine whether a User appears as a potential recipient for a Service or a Referral, it is important that administrators regularly update users' accounts to reflect any changes to the Services they provide or their Location. For more information on the Referral workflow, please see the Agency Services section of this guide.
Editing Users
To edit an existing user, click on the User in the Users List. Then, on the Show User page, click the Edit button. Editing a User account is mostly the same as creating one, with the exception that you cannot update a User’s username once their account has been saved.
Once you are done making changes, please remember to click Save.
Limitations on editing your own account
Please note that, while users may sometimes be able to edit their own user accounts, no user may edit which role, user groups, modules, or agency are assigned to their user account. Primero uses this precaution to ensure users do not grant themselves additional power and endanger the data confidentiality of clients.
Updating Passwords
There are two ways to update a User’s password.
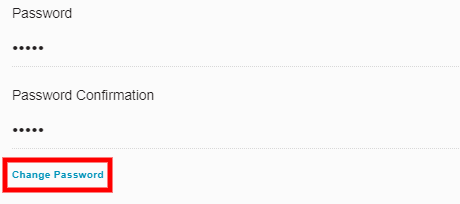
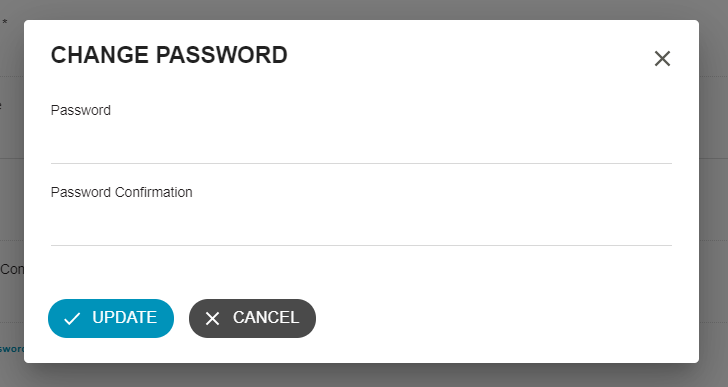
- Edit the account: When you edit a User’s account, click the Change Password link. A modal will appear. Enter the User’s new password, then confirm it. Click the Update button at the bottom of the Change Password modal, then click Save on the Edit User page.
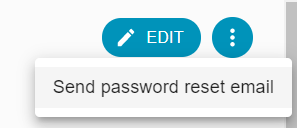
- Send password reset email: Go to the User list, and click on the User whose password you would like to reset. At the top of the screen, in the Actions menu, click the Send password reset email. The user will receive an email containing a link which they can use to reset their password.
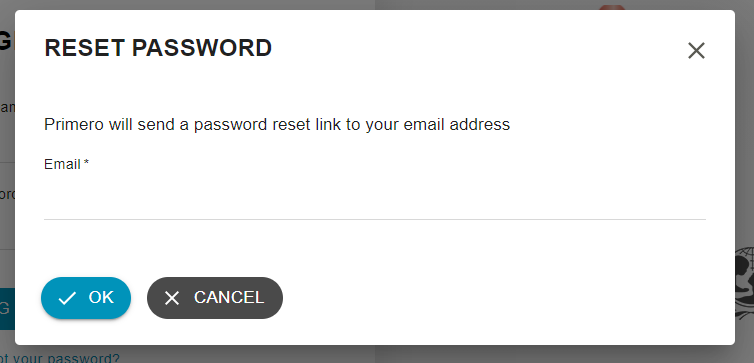
In addition, Users can always reset their password by clicking the Forgot your password? link at the bottom of the Login page.

The User will see a modal where they can enter the email address associated with their User account. They will then receive an email containing a link they can use to reset their password.
Note: Because Primero often uses password reset emails to help Users set their password, it is extremely important that administrators specify an email address for User accounts whenever possible.
Managing Identity Providers
Some implementations in Primero v2 will use identity providers to manage User accounts (i.e. Users can login using their organizational credentials, such as a UNICEF or IRC username / email address). In implementations configured to use identity providers, creating and updating user accounts will work slightly differently.
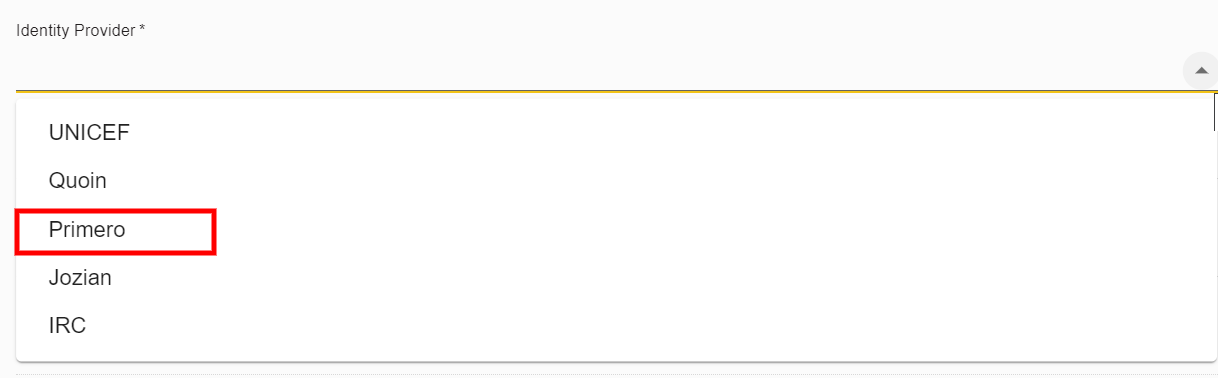
- When creating a user account, you must first specify a provider.
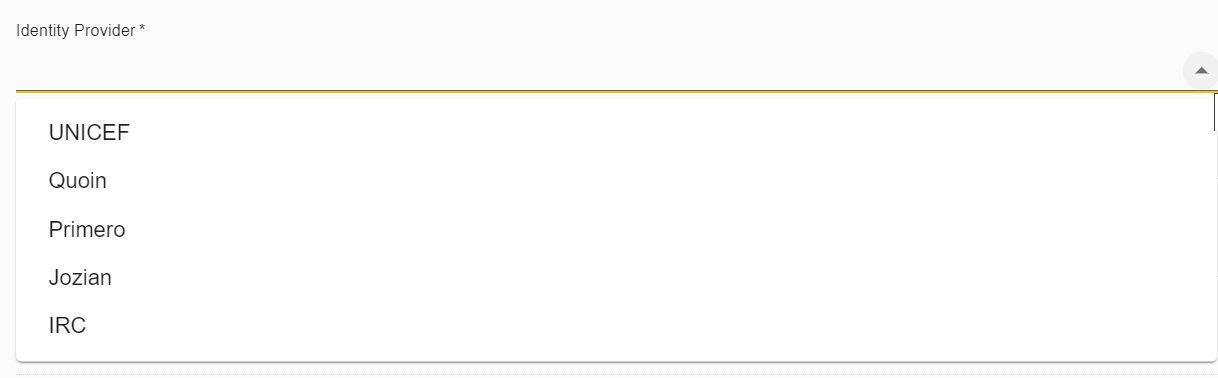
- Based on the provider you have selected, you will need to enter a username which matches that provider’s username format. For instance, in this example, I have accepted “IRC” as the User’s identity provider. Therefore, I must enter a username that ends in “@rescue.org”.
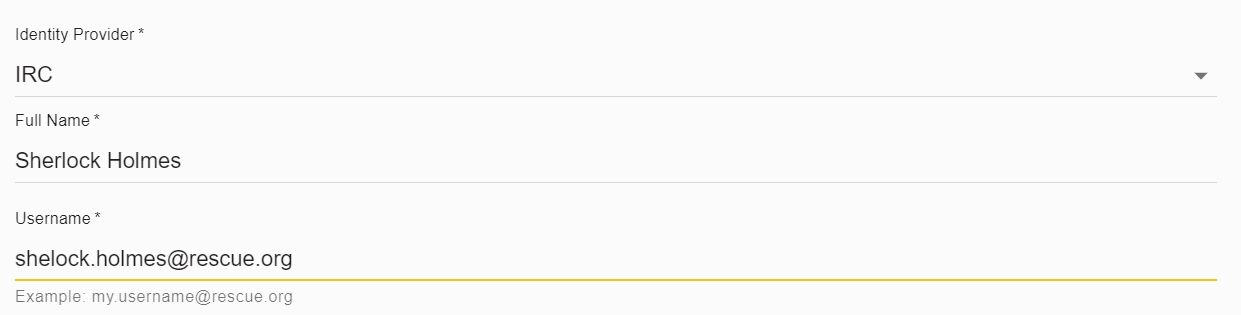
- Once you create this User account, the user will receive a welcome email like the one below, telling them how to login.
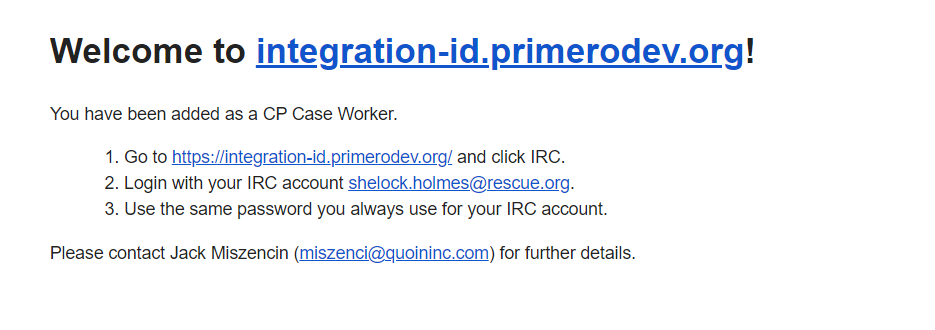
- Note: Primero administrators do not manage passwords for users who login with an identity provider account. All password management is performed by the identity provider.
Organizations Without Identity Providers
In some systems which have been configured to use identity providers, there will still be some organizations who do not use an identity provider. To create User accounts for these organizations, use the “Primero” identity provider.
Once you have selected the “Primero” provider, you will enter a username which ends in the Primero site’s URL.
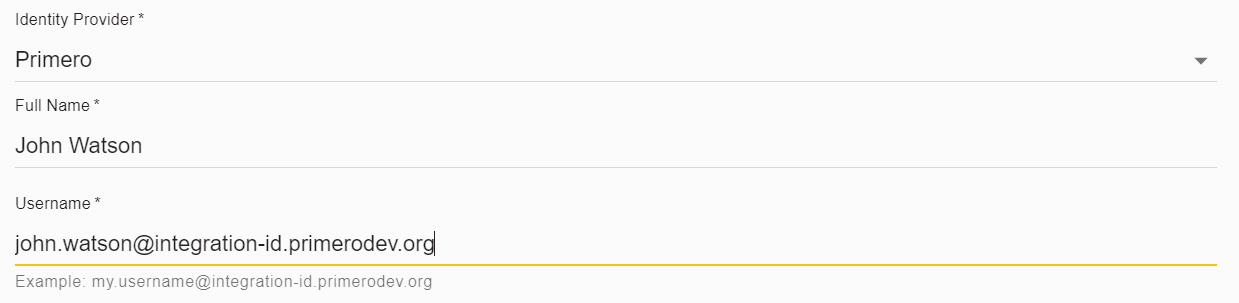
When you create this User account, the User will receive a welcome email containing a temporary password. Note: At this point, you as the administrator will be responsible for sending the user their Primero username so that they can login.
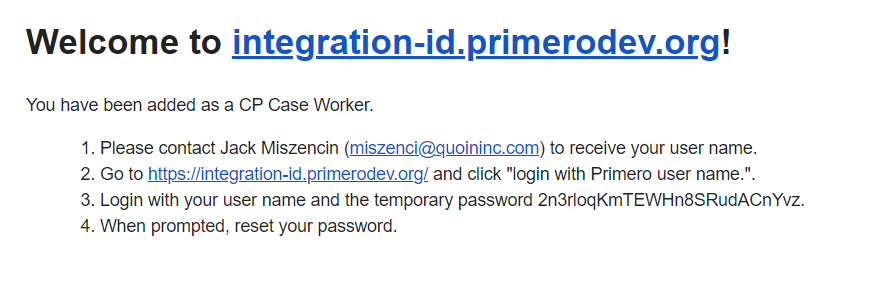
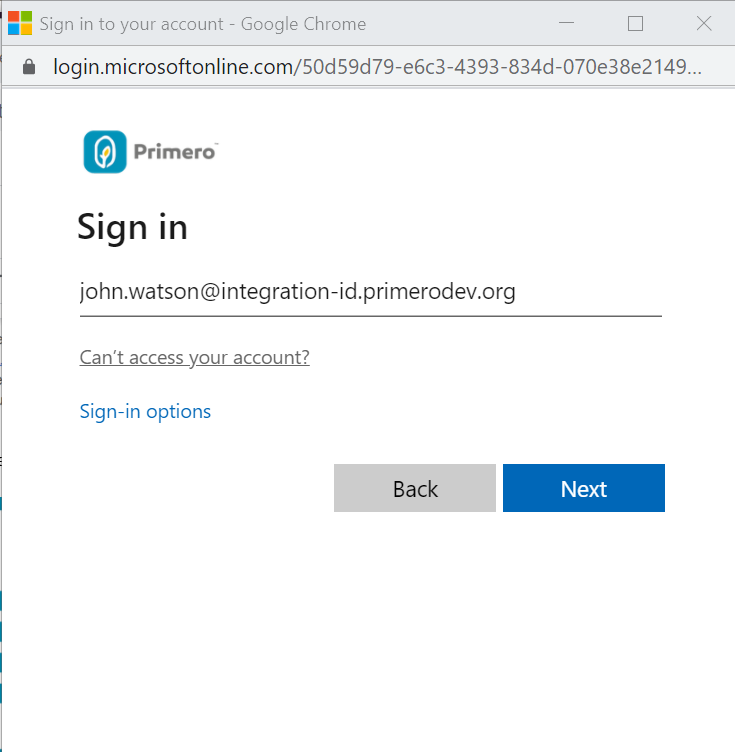
If the User clicks on the link in the email, they arrive at the Login page, where they click Login with Primero username.
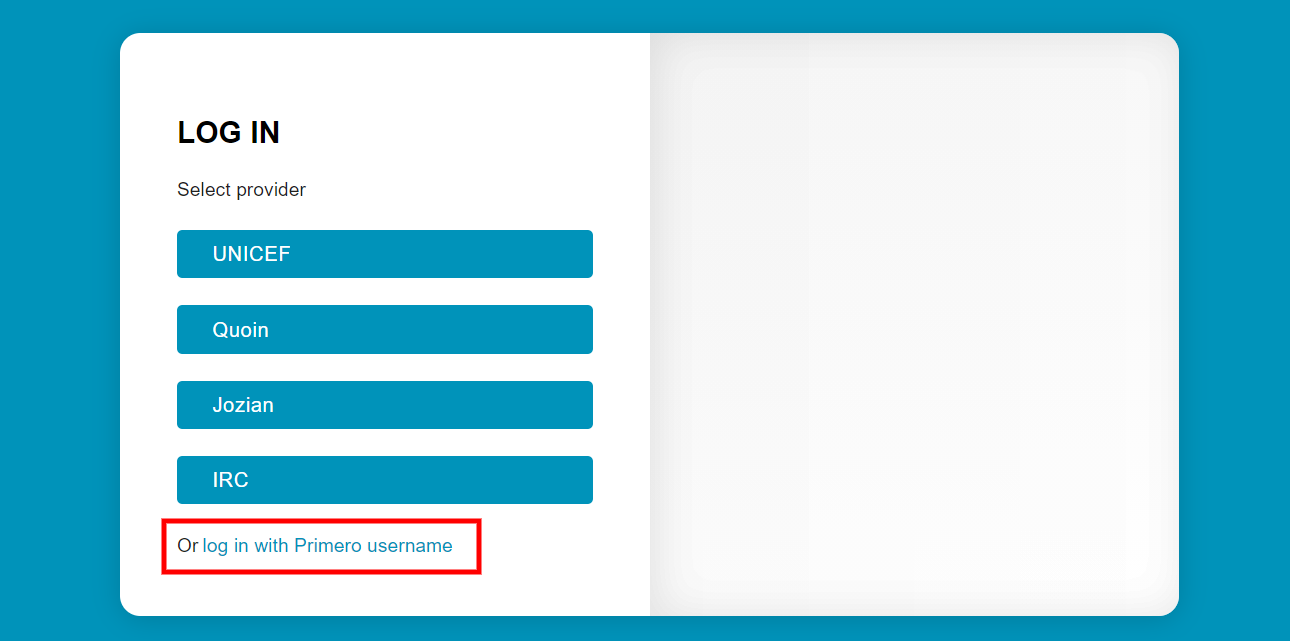
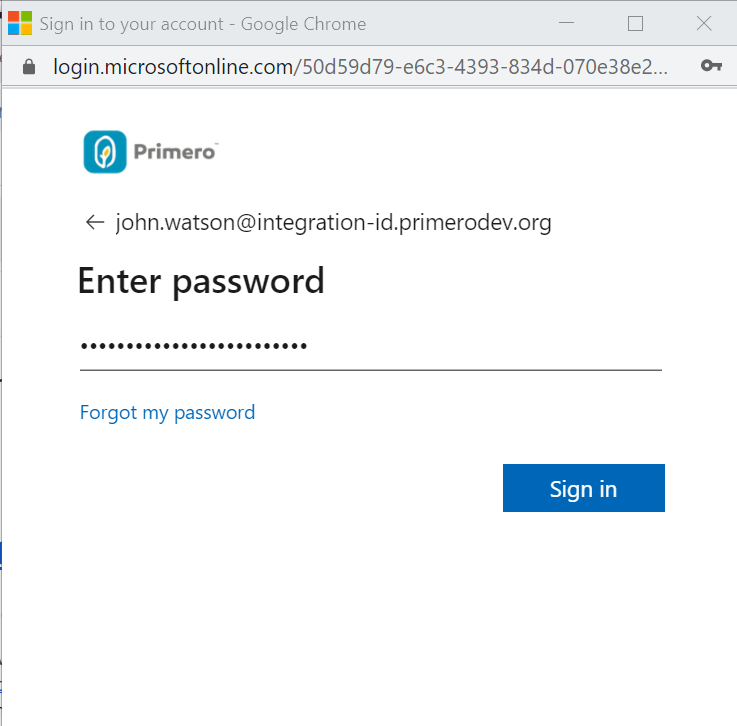
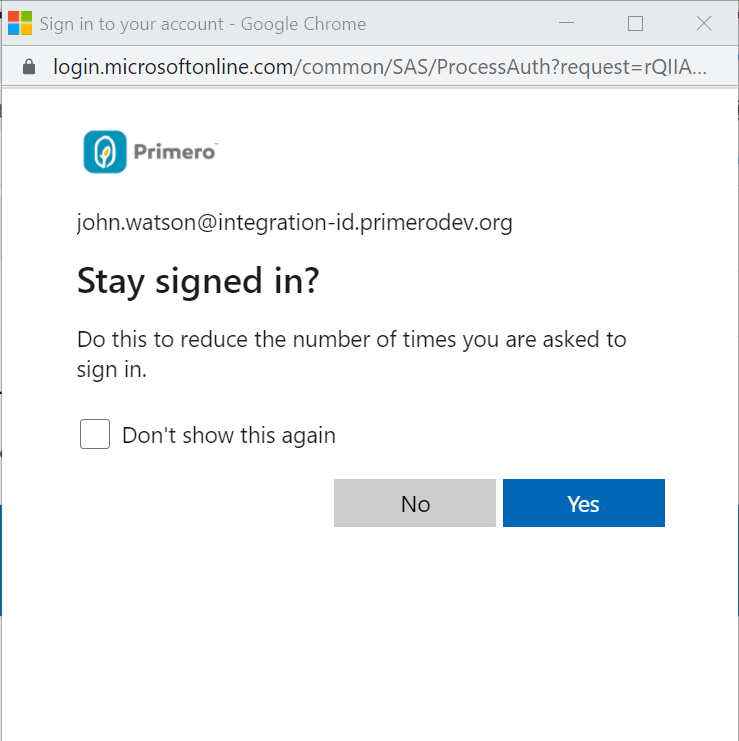
At this point, a separate window will open where the User will be prompted to enter their Primero username, then their temporary password.
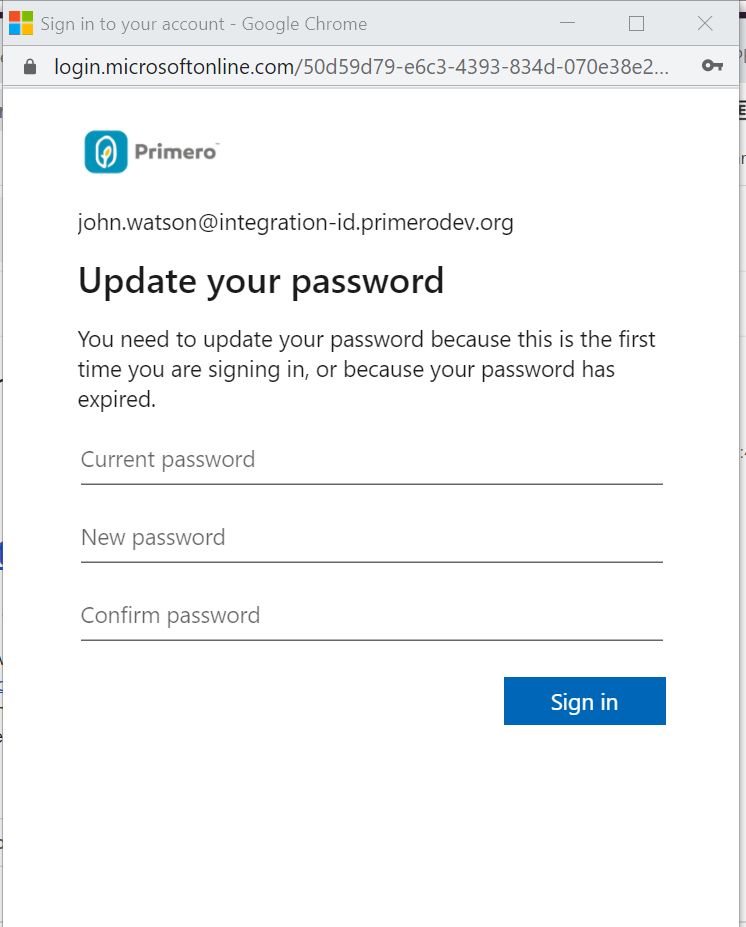
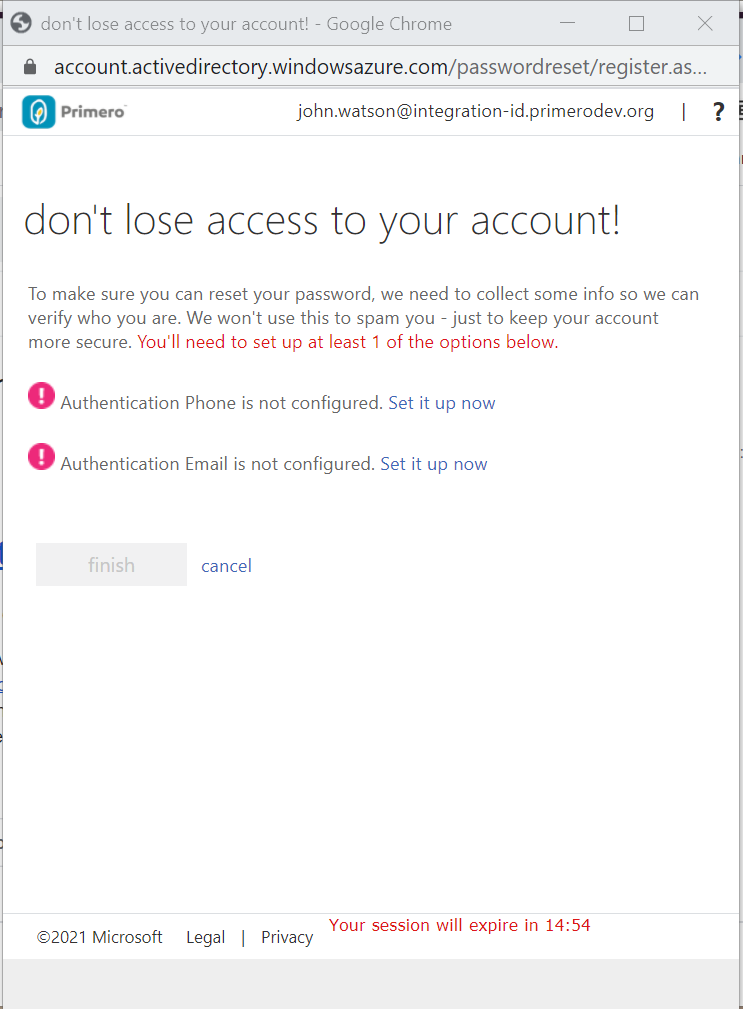
Note that, once the User resets their password and signs in, they will be prompted to set up and verify a recovery email address and phone number. This is important, to ensure that Users have a way of recovering their account should they lose access.
The User may also be asked if they would like to “stay signed in.” For security reasons, it is not recommended that Users do so.
From this point forward, all password management and resets will be handled through the Primero identity provider interface accessed through the Login page.
Disabling Users
Please note that Users cannot be deleted. Instead, administrators can “disable” a User account by editing the User, then checking the “Disabled” tick box. Disabling a username will prevent that username from being used to log in to Primero.
Other Settings
Managing Workflow Statuses
The below table outlines which fields set each Case Workflow Status:
|
Workflow Status |
How to set this status (Trigger field) |
Trigger field ID |
Developer settings |
NOTES |
|
New |
[Set by default on case creation] |
|
|
|
|
Assessment |
Fill out the Assessment Start Date field. |
assessment_requested_on |
Only appears as a workflow status if the module has the "use_workflow_assessment" attribute set to true. This attribute defaults to false, so if you do not set this attribute, this workflow status will not appear by default. |
|
|
Case Plan |
Fill out the Case Plan Initiated field. |
date_case_plan |
Only appears as a workflow status if the module has the "use_workflow_case_plan" attribute set to true. This attribute defaults to false, so if you do not set this attribute, this workflow status will not appear by default. |
|
|
Response Type 1, Response Type 2, etc. |
Service created with a Response Type value of Response Type 1, Response Type 2, etc. |
service_response_type |
Options are set in the Service Response Type lookup. If all service provisions fall under the same step in your workflow, we suggest changing the Service Response Type lookup to have a single option, labelled "Service Implementation", and set this to be the default value for the "service_response_type" field. |
Each of these is intended to represent a different category of service provision, which represents a different stage of case management. |
|
Services Implemented |
All services are implemented (Service Implemented field has value "implemented"). User sets a service as implemented by filling out the Service Implemented On field. |
service_implemented_day_time |
Only appears as a workflow status if the module has the "use_workflow_service_implemented" attribute set to true. This attribute defaults to true, so if you do not set this attribute, the status will show automatically. |
|
|
Closed |
Set Case Status to "Closed" |
child_status |
|
|
|
Reopened |
Perform Reopen action |
case_status_reopened |
|
|
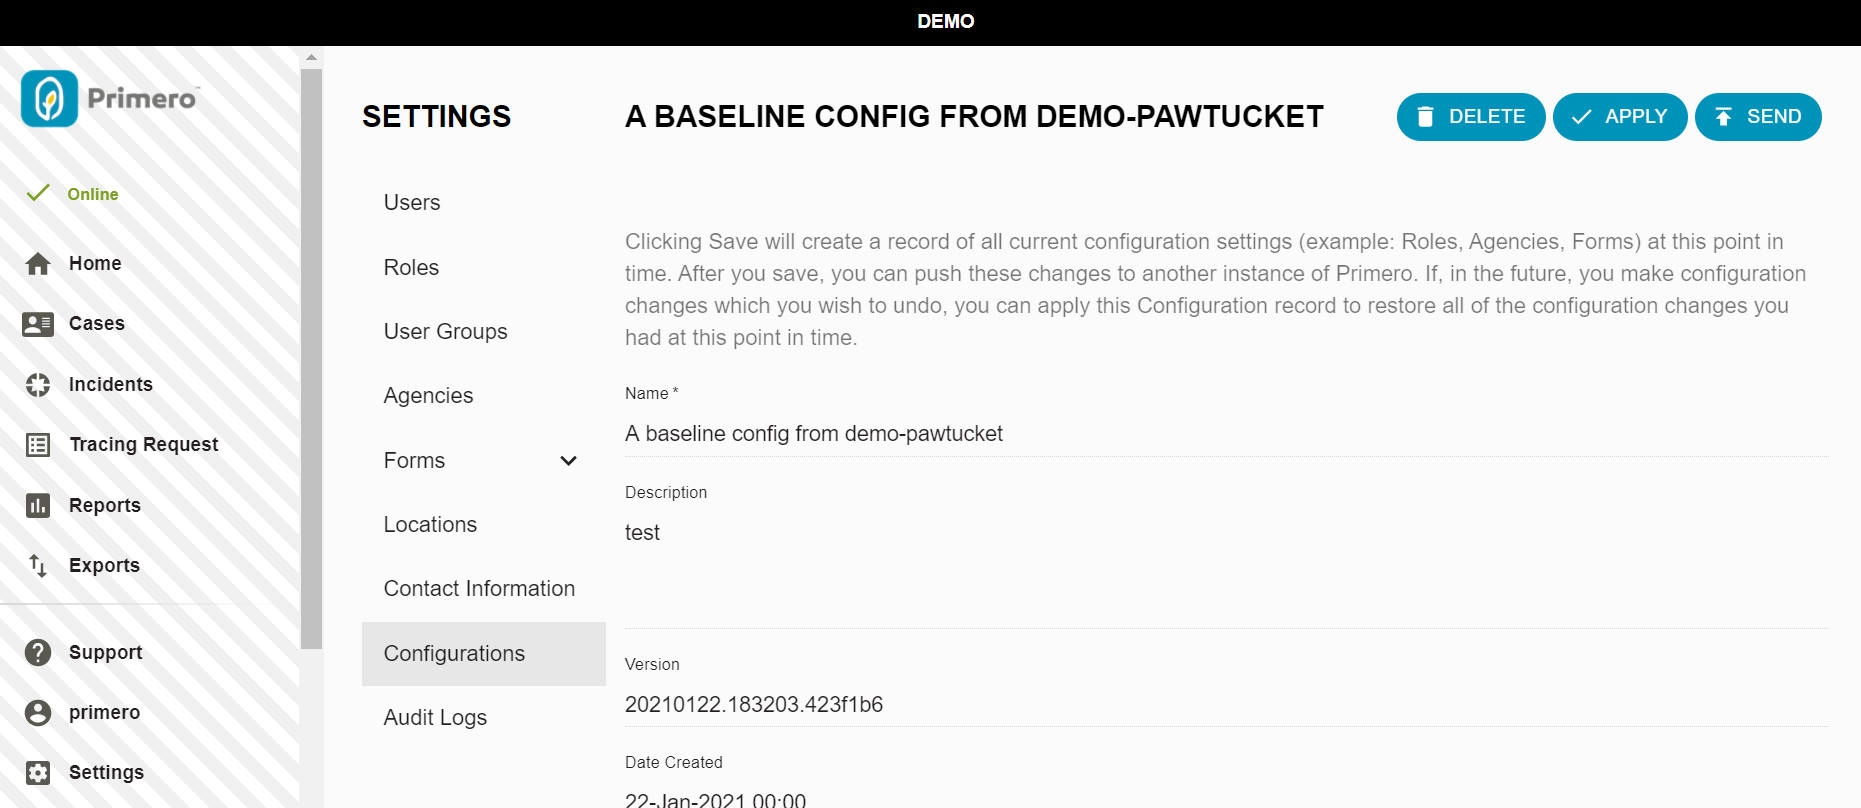
Managing Configurations
As you make configuration changes, you can save your settings in a Configuration. This acts as a snapshot of all your configuration settings at a point in time. Later, when you have made other configuration changes, if you want to undo them, you can find your saved Configuration and apply it to return your system to how things were configured at that point in time.
What do configurations include?
- Roles
- User Groups
- Agencies
- Forms
- Lookups
- Locations
- Contact Information
- Reports
What do configurations NOT include?
- Cases
- Incidents
- Tracing Requests
- Users
To view all your saved Configurations, click the Settings link in the navigation menu, then click the Configurations link in the Settings navigation menu. You will arrive at the Configurations List page.
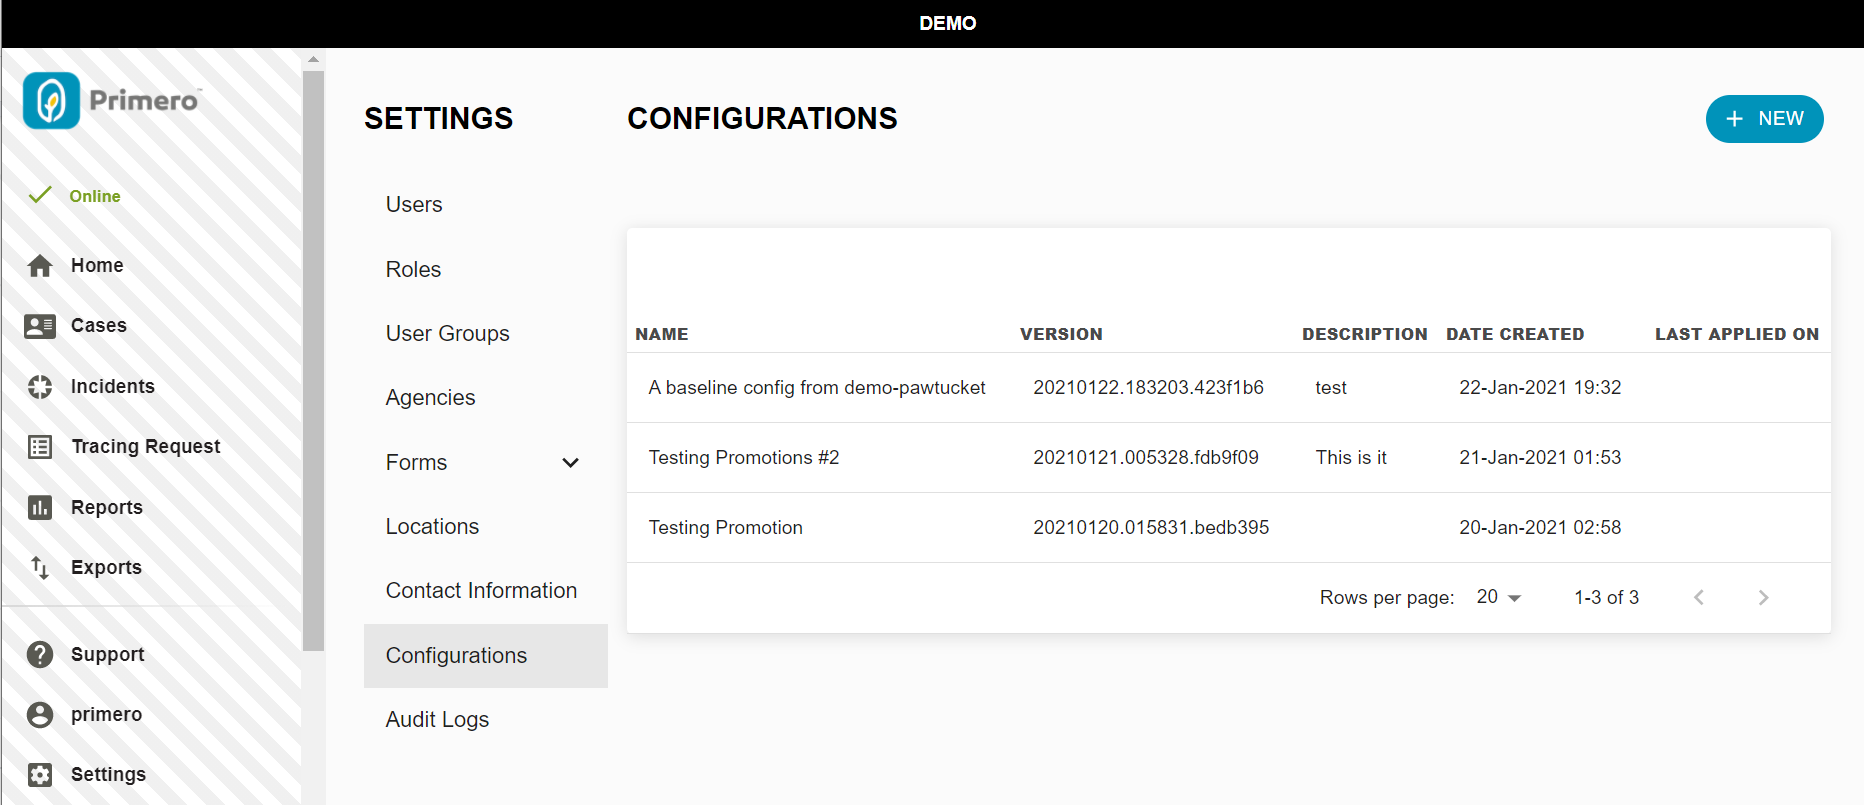
Creating Configurations
To create a new Configuration, click the New button at the top of the page.
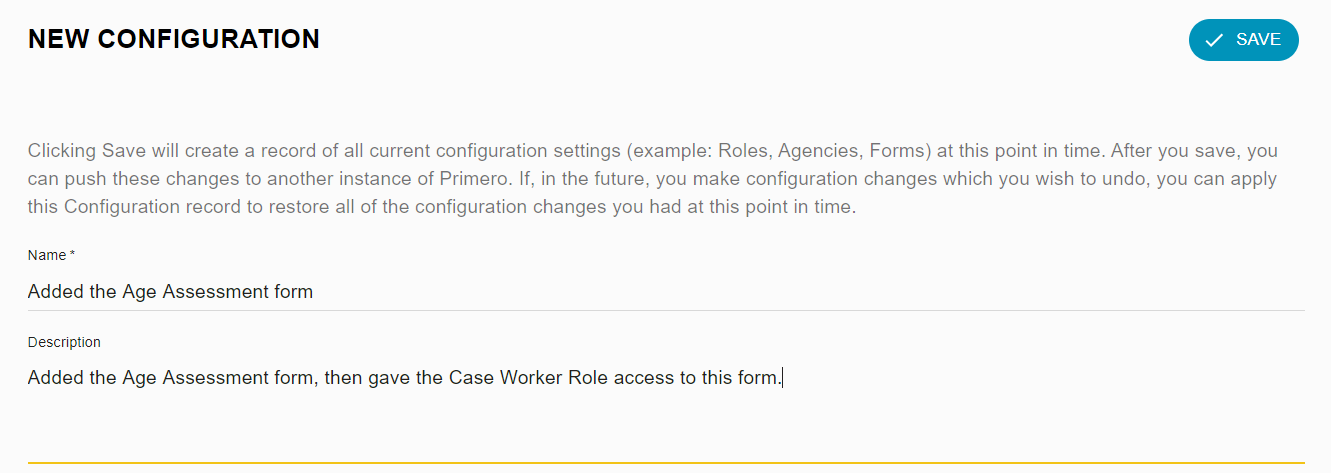
Enter a Name and Description, then click Save.
Applying Configurations
To apply a Configuration you had previously created, click into the Configuration in the Configurations list. You will see information on the Configuration, including when it was created, who created it, and when it was last applied.
Click the Apply button at the top of the page. The site will be unavailable momentarily to all users while the Configuration is applying. For this reason, it is important to only apply Configurations during periods of low site usage.

Once your Configuration has applied, Users should experience the system configuration as it existed when the Configuration was first created.
Note: You will not be able to apply a Configuration which was created on a higher version of Primero than the one you are using. For instance, if you create a Configuration on your sandbox site, which is running Primero v2.1.1, then send that Configuration to your production site, which is running Primero v2.1.0, you will not be able to apply the Configuration on production until the production site is also upgraded to v2.1.1.
Note: Applying a past Configuration will not delete configuration records such as Agencies and User Groups which were created after that Configuration was saved. Instead, these will be disabled, which will limit their visibility in the system. For instance, suppose you save a Configuration titled “Added Agency A” on March 1, then create Agency B on March 2. If, on March 3, you apply the “Added Agency A” Configuration, Agency B will still exist in your system, but will be disabled. This will mean that any Users assigned to Agency B on March 2 will still exist and function normally, but administrators will no longer be able to assign new Users to Agency B.
Sending Configurations to Production
As mentioned in the Where to Make Configuration Changes section, it is recommended that you make configuration changes on a sandbox or “demo” site, test them, then send them to your production site to be applied. This translates into the below steps:
- Make configuration changes on your sandbox site.
- Save a Configuration with your changes on the sandbox site.
- Test your changes on the sandbox site.
- Once you have tested your changes, send your Configuration to the production site.
- At a time of low production site usage, apply your Configuration on the production site.
- Note: You should always communicate your plans to apply a Configuration on the production site with implementation partners.
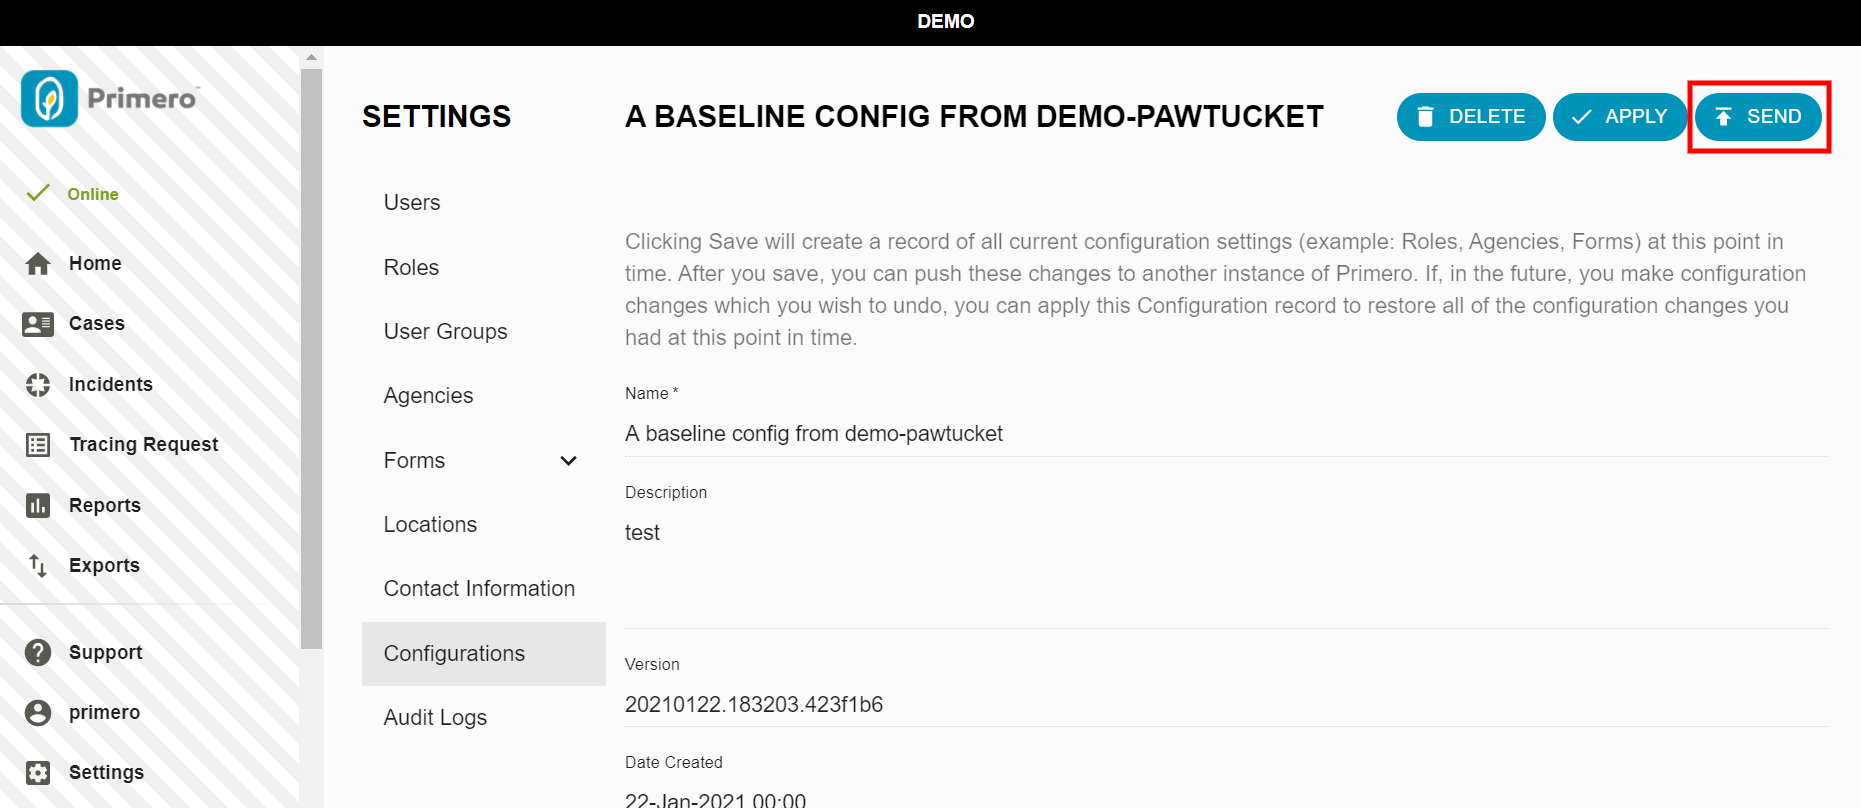
To send a configuration from your sandbox site to your production site, go to the Configurations list on your sandbox site. Click into the Configuration you want to send. Click the Send button at the top of the page.
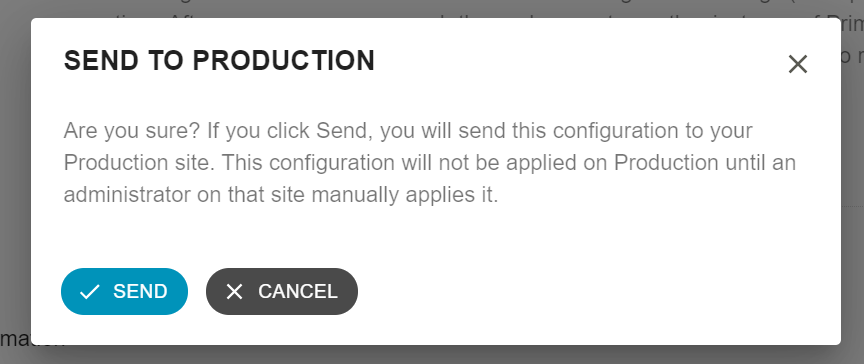
You will see a confirmation message warning you that the Configuration will need to be manually applied on the production site. Click Send again.
Login to your production site and go to the Configurations list. Find the Configuration you just sent from the sandbox site and click it. Click the Apply button to apply the Configuration to your production site.
Limits on Configuration management in Production
Note that, since you will be making most of your configuration changes on the sandbox or “demo” site, you will not be able to make some configuration changes on the production site except by applying a saved Configuration. This means you will not be able to create or update the following resources on the production site:
- Forms
- Note that this includes updates to fields and translations.
- Lookups
- Agencies
- Roles
You will still be able to make changes to the following resources on production:
- Reports
- User groups
- Users
- Contact Information
- Locations
Note: the configuration changes made to production directly do not need to be saved in production. The reports, user groups, users, contact information and locations will remain in production.
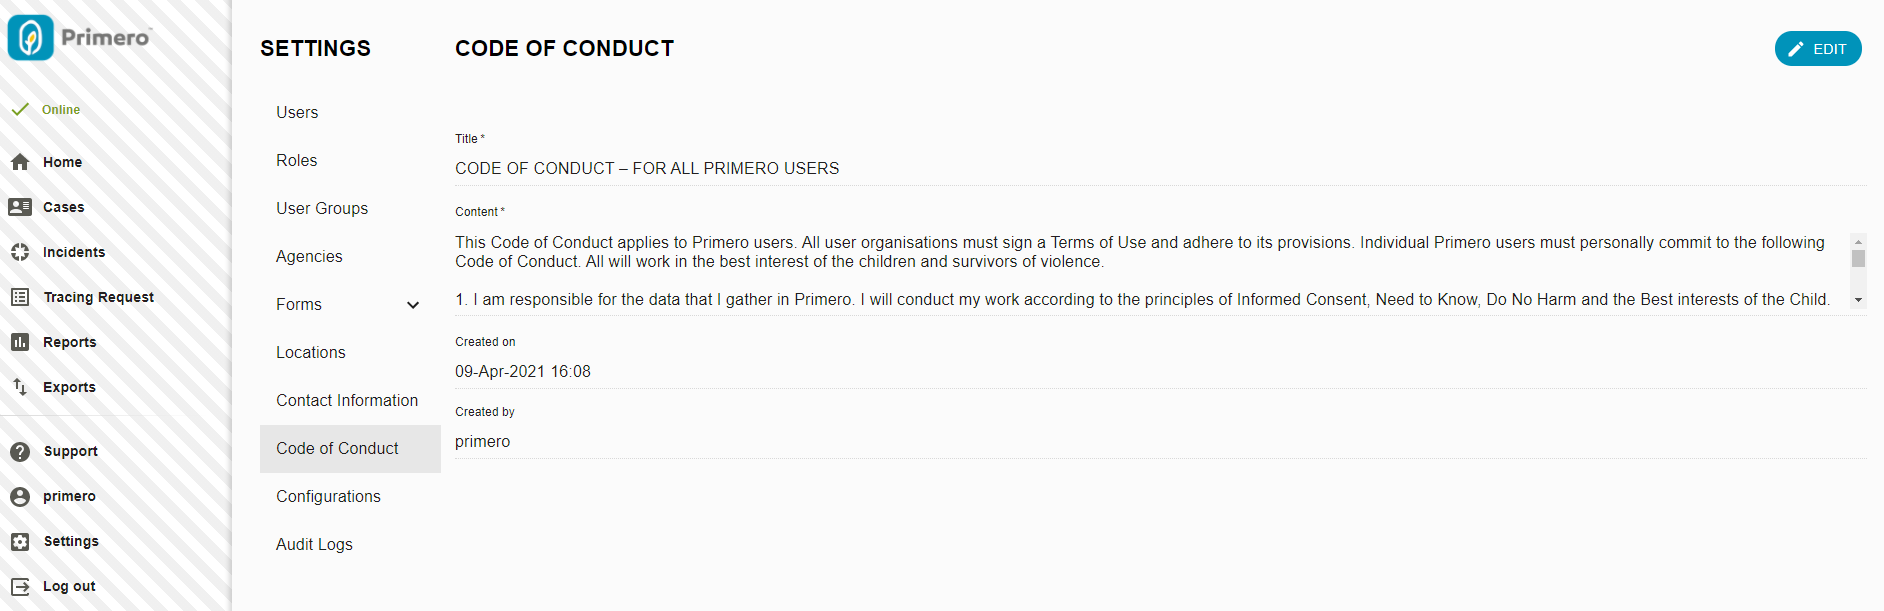
Code of Conduct
When initially logging onto Primero, users will be prompted to review and accept a code of conduct:
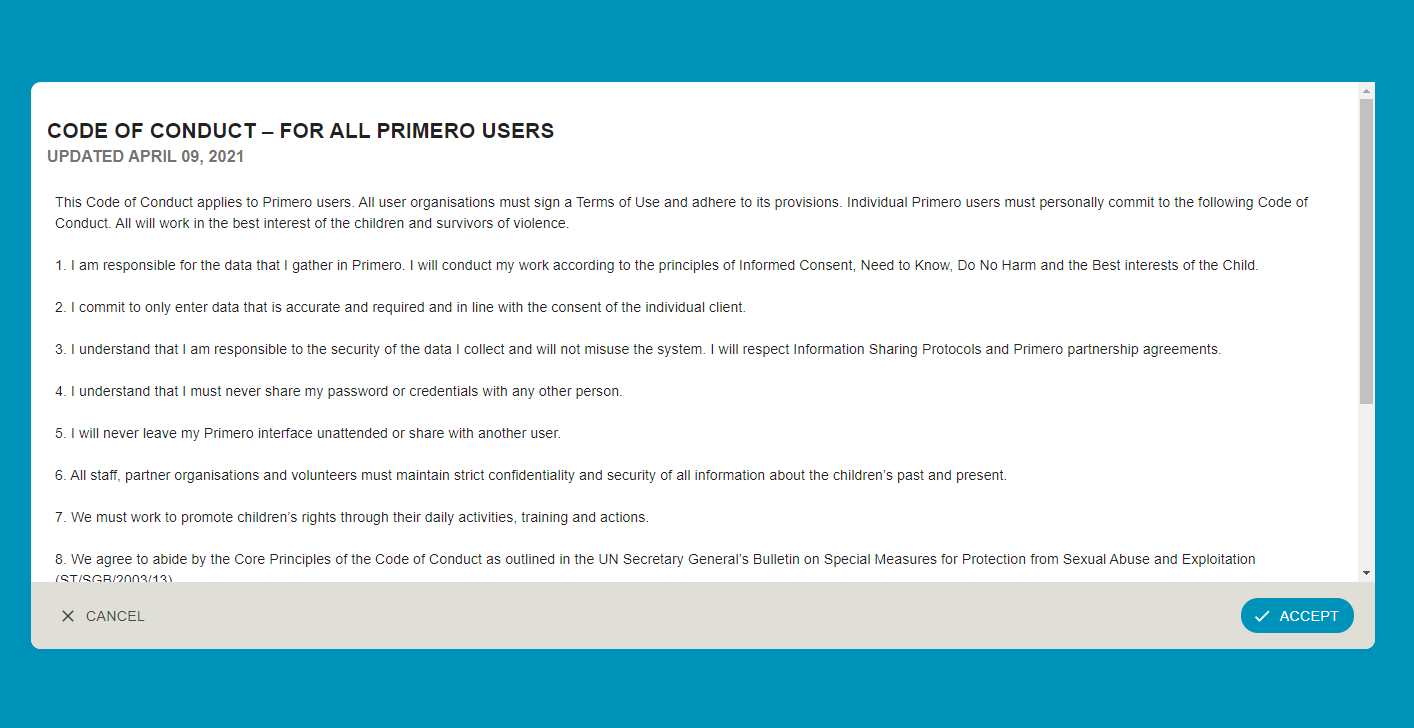
The code of conduct is editable through the “Settings” under “Code of Configuration”. Administrators can modify the terms of the code of conduct as defined by the programme.
[a]Note: This list is not complete. We may add more entries here as we get configuration-related questions from administrators which relate to "Important Lookups."
[b]NOTE: Thus far in Primero v2, we are not using this setting for anything, but I'm leaving this section in here in case we decide to leverage it for Interoperability purposes.
[c]Note, this is deprecated, and we will probably be removing it.