How it Works: The Building Blocks
Primero is an information management system that allows for data entry and reporting for child protection. The system helps intake relevant information via multiple sources, consolidates the information into relevant record types (Cases \/ Incidents \/ Tracing Requests) and allows service providers to report and make educated decisions to assist in these locations.
Components
Primero is made up of multiple components. The current implemented Primero components are:
Cases, which track an individual beneficiary\/survivor. Different information is captured for CP and GBV cases.
Incidents, specifically incidents of gender-based violence reported by individuals.
Tracing Requests, which describe an attempt by an inquirer to trace, locate, and reunify separated children.
Modules
Many aspects of Primero are configurable. This configuration is performed through modules. Modules represent how the system will be used and contain a default set of forms. Primero typically includes the following modules by default::
Child Protection (CP): This module includes child protection case management and tracing request capability to aid in family tracing and reunification.
Gender Based Violence (GBV): This module includes case management and incident tracking for gender-based violence service providers.
Each module comes with module-specific components and a default set of forms and other configurations. While there appears to be some overlap between the modules - both CP and GBV have cases - each module has a unique set of forms. In some cases, fields, like name and date of birth, may be shared among the forms across modules.
Programs
Modules belong to Programs which represent a mandate for the application as provided by the steering committee for certain programs using Primero. An example of a program is child protection work within certain zones of a particular refugee camp. Application functionality cannot be configured within a program. The program configuration only provides descriptive information about the application’s mission. This should not be edited.
Users
Primero Users are the individuals working for service-providing organizations and agencies who use the system.
User Groups
User Groups represent teams of users working together. For example, there may be a team of social workers in a particular refugee camp providing services to children. There may be another team responsible for the child’s best interest determination. A manager of a user group will have some level of access to all of the data managed by that group, but not to the data managed by a different group.
Roles
Users will have a Role, which defines what particular users are allowed to do: read records, modify records, run reports, configure the system. Examples of roles are Social Worker, \CP Manager, and CP Administrator.
Along with defining what actions the user is allowed to perform, roles also limit what kind of information is visible about individual records for a specific user. For example, a CP Social Worker may be allowed to view and edit personally identifiable information (such as name, age, and sex) about a particular client, while a CP Manager may only see a reduced set of information about that same person (age and sex, but not the name), and may not be allowed to edit any of it.
The general term for these limits to what the user can do and what a user can see is authorization.
Records
A record tracks to the components that are implemented in Primero. The three permitted record types are cases, incidents, and tracing requests.
Fields
A field (data field) is information within a record. Fields are attributes like name, age, date of birth. Sometimes one field can be used to store several values like a list of protection concerns or all the languages spoken. Fields types include:
Text
Text Area
Date
Tick Box
Select Drop Down (single-select or multi-select)
Radio Button
Numeric Field
Tally Field
Date Field \/ Date Range
Each of these field types is defined with an example in section 4.2 below.
Forms
A form contains a set of fields for a record. By configuring the Primero application, you can specify new fields on a form, reorder the fields, or allow different forms to share the same field. For example, the standard form and field set for a child protection case has a form called “Preliminary Protection Concerns” which has a field listing the protection concerns related to the individual beneficiary\/survivor where multiple values can be selected. Further down, there is a different form called “Protection Concerns” which contains the same list (for reference) and an ability to elaborate on each protection concern with an additional set of fields. This narrows the information in each form and allows the form to be targeted to a particular purpose or a step in the case management workflow.
Form Groups
A Form Group is visible in the form navigation panel on the left side of the screen and can contain a single form or be expanded to show multiple forms. When multiple forms are added to a group, it becomes expandable\/ collapsible; if the group contains one form, there is no expand or collapse functionality. This allows for the form navigation panel to be organized in concise, navigable groupings to keep the panel shorter and easier to use. For example, the Identity\/Registration form group includes all forms specific to the identity (Basic Identity, Preliminary Protection Concerns) and registration (Interview Details) of a case. The form group to which each form belongs is configured on creation or edit.
User and Role Management
As described above, each Primero user has a combination of one role and at least one user group, allowing them to access the functions and records necessary to perform their day-to-day work. User management consists of the following three elements:
Users are the individuals using Primero who each have a unique username and password. Each user is given access to one or more modules in Primero (e.g., CP for case management).
Their Role sets which actions they can perform on which records - “read,” “flag,” and export,” on Cases, but only “read” on Users and User Groups, etc. - and the breadth of data they can see - their own, their group’s, or all; as well as the roles that they can manage.
Their User Group creates teams of users who can share information. However, what the users in this group can see is governed by the breadth of data set in the role.
Each of these elements is created and edited from Manage Users functionality in the Settings option in the Main Navigation Menu across the top of the screen:
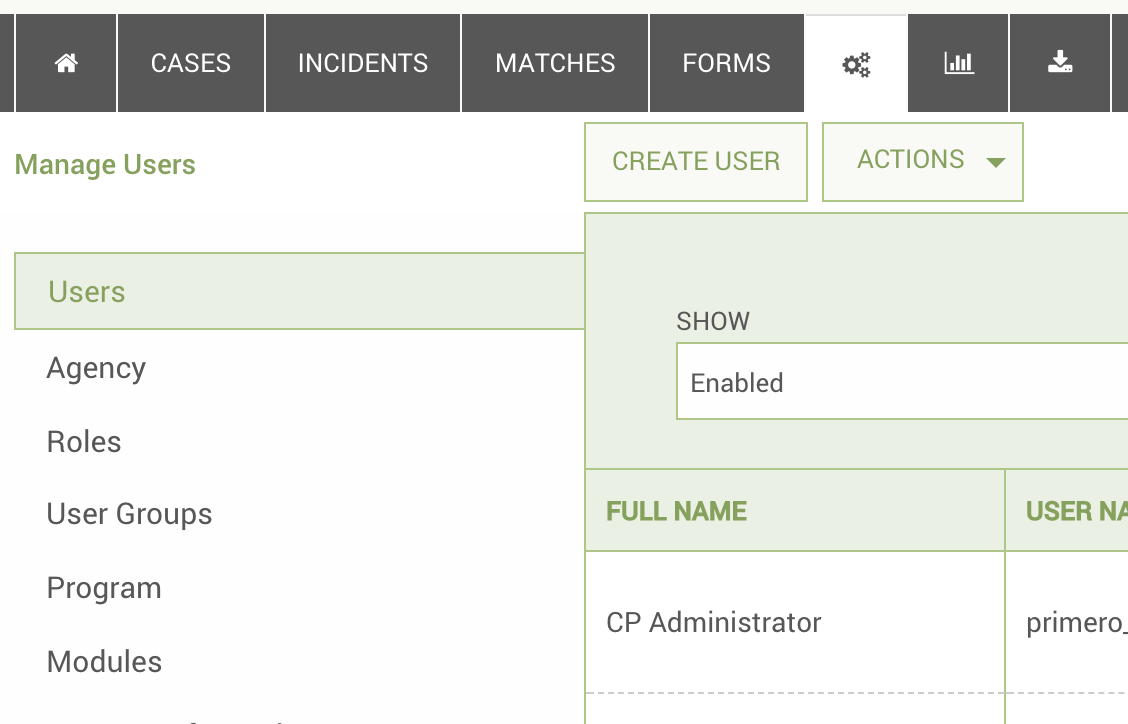
Since Users are built using Roles and User Groups, it is important to create these first before creating individual Users.
**_IMPORTANT:**_
Every user must have access to the corresponding Record Owner form on the module you wish for them to access. To accomplish this, you can select no forms at all, which will defer to pre-defined forms access. Most likely you will be selecting individual forms for each module the user’s role can access as they will not need to see all default forms. Once you select a single form for a role to access, you must select all forms you wish the role to access.
Creating and Editing User Roles
A User Role sets the following:
Permissions - What actions the user with this role can perform on which resources(i.e. read and write on Cases, but only export on Tracing Requests.) Most users will not need permissions on system-oriented resources such as Users and Groups; Roles; Forms; Lookups; and System.
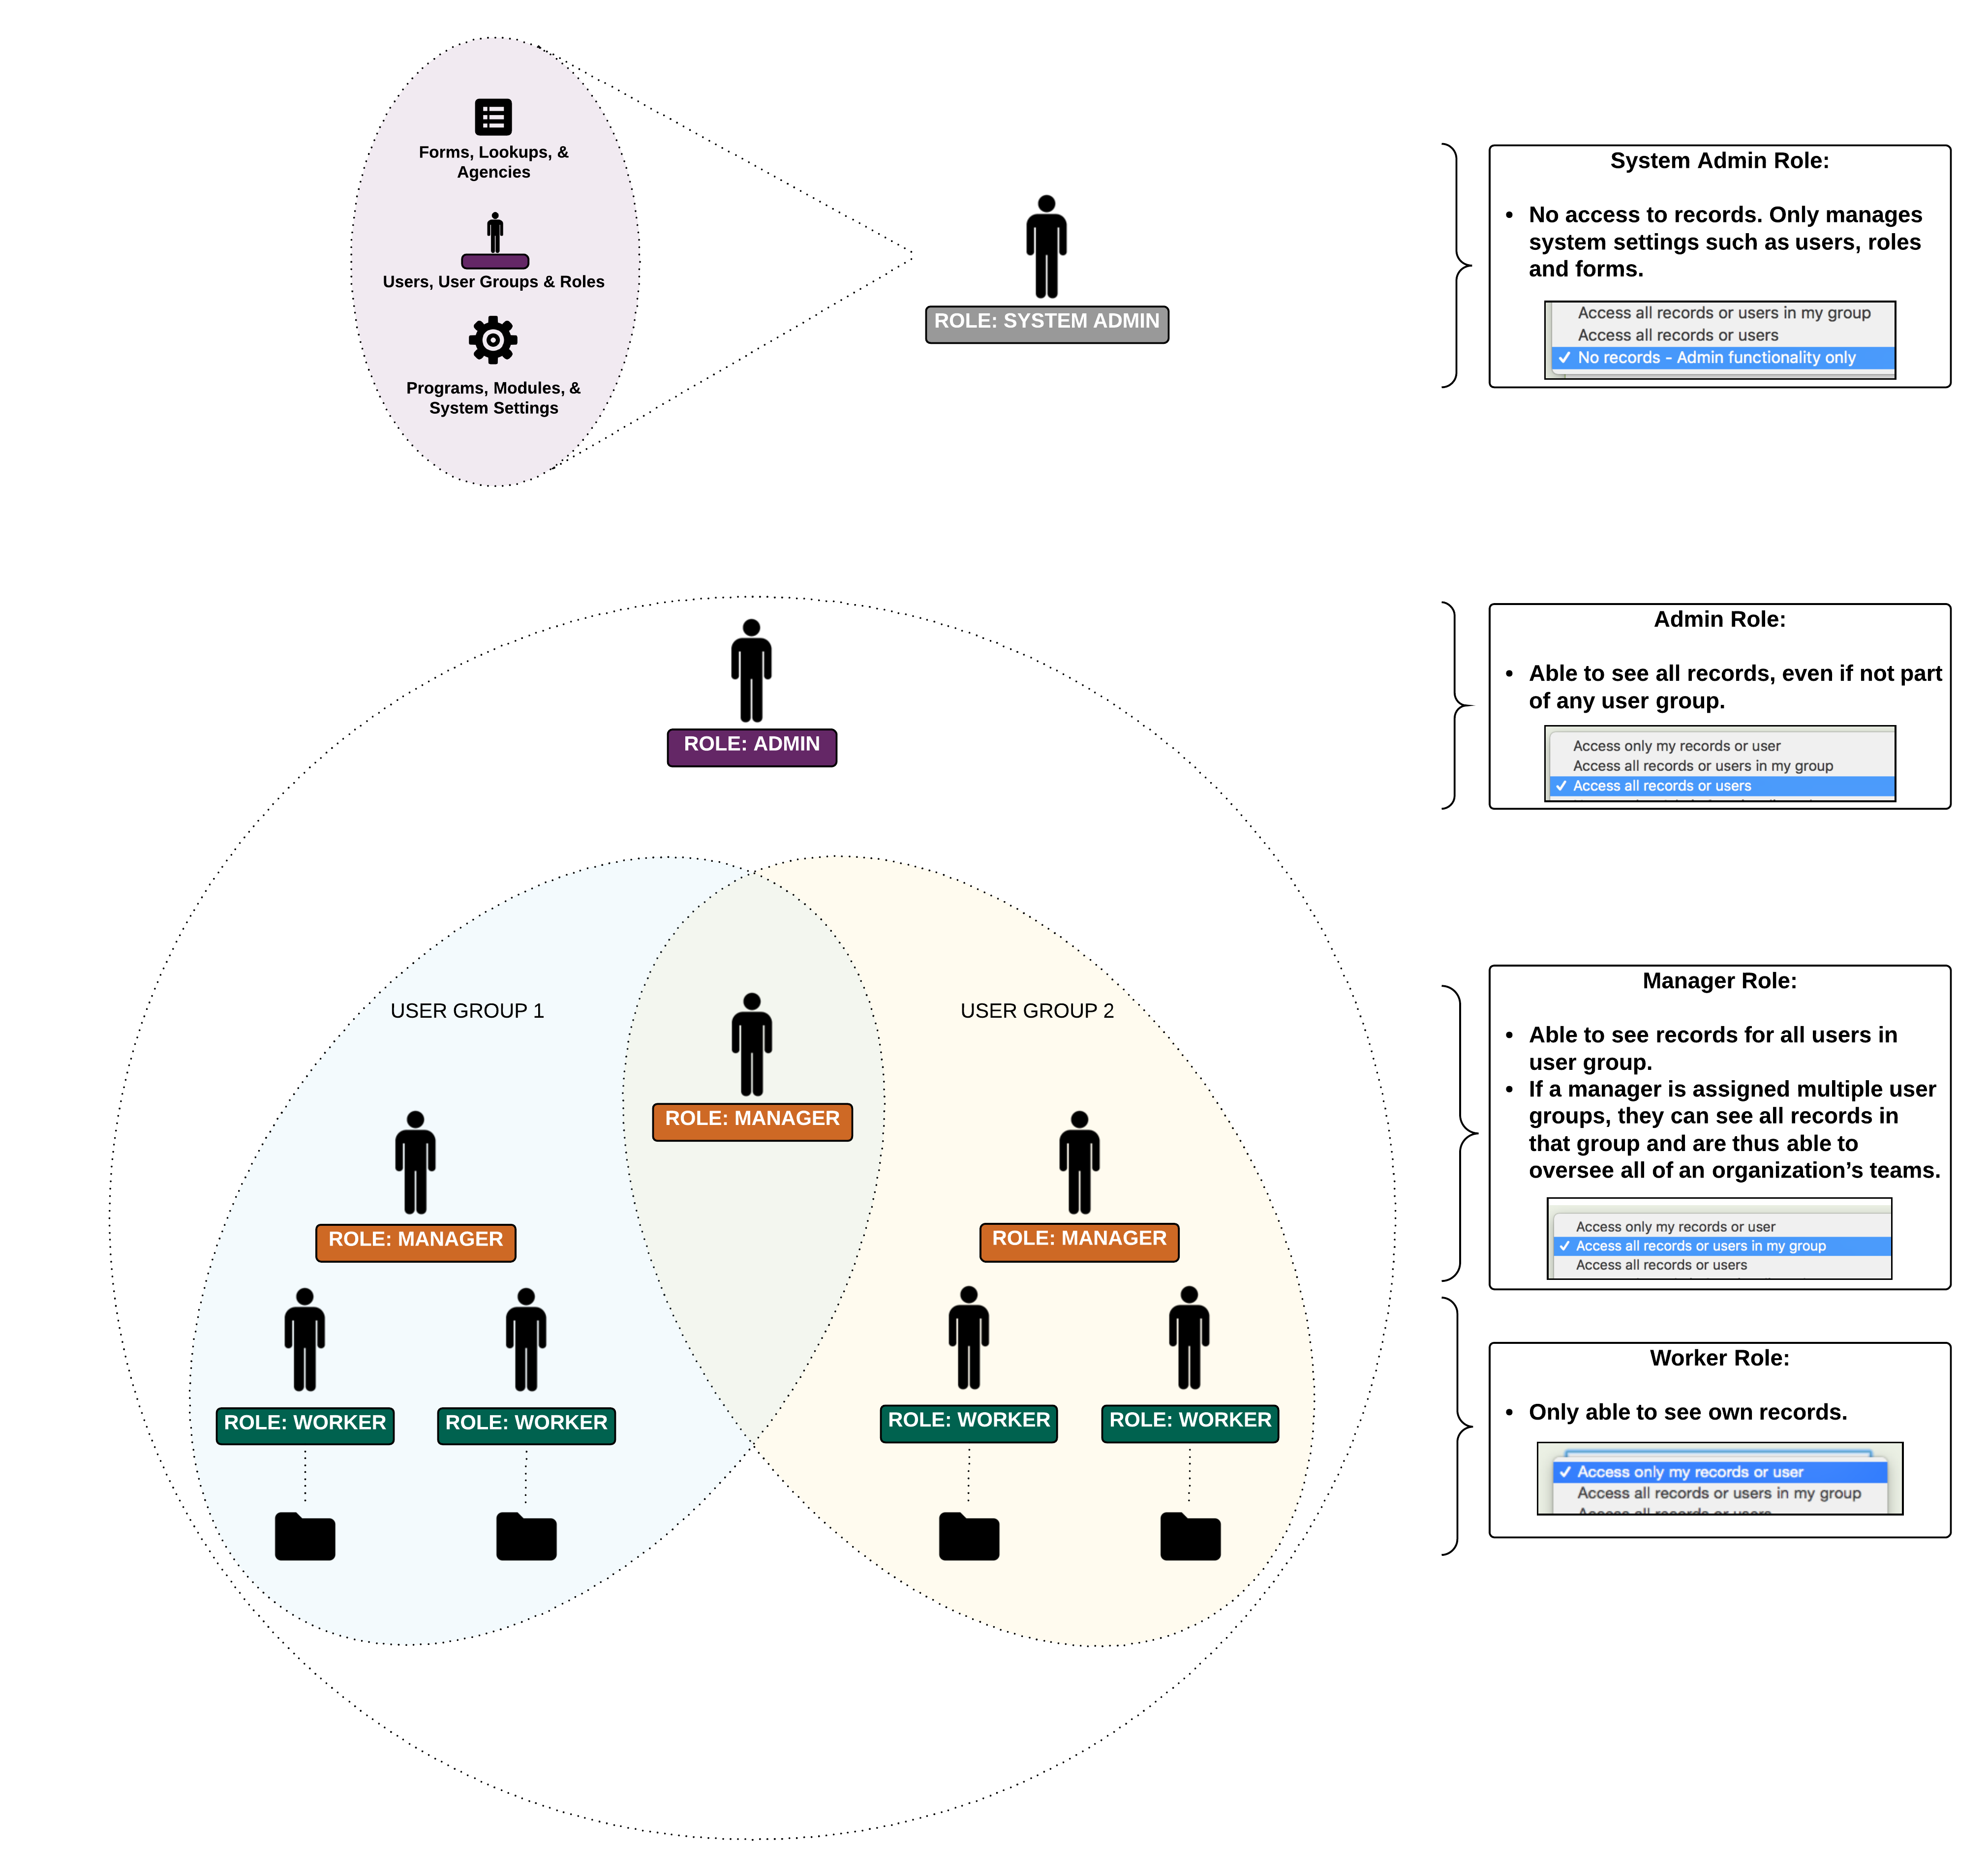
Management - The breadth of data this role can see. The options are: “Access only my records or user,” “Access all records or users in my group,” and “Access all records or users,” and "No records - Admin functionality only." As suggested, users whose roles have the first option can only see their own records and, if they have access to users and roles, can only see their own user and role. The second option suggests that a user can access users in their own user group, along with the records owned by users in their user group. The third option gives a user access to all records in the user in the system. Finally, the fourth option is for administrators who manage things like users and forms but should not have access to actual case, incident, and tracing request records.
Role Management - Which roles the role is able to manage. This setting is found as a permission under the “Role” resource.
Forms - The specific forms a user with this role sees. All fields on the form will be visible if the user can see the form.
Dashboards- The information the user will see on the dashboard when first logging in. Each of these potential options gives access to a new section of the dashboard. If “Manage” is selected, it overrides any combination of the permissions checked and gives access to all options in the section. The "Tasks View" option, rather than giving access to a specific part of the dashboard, allows a user with the role to see the Tasks View, which shows users which tasks are upcoming or overdue for their cases. For more information on this view, see the Primero CPIMS User Guide.
Audit Logs - Whether the user can see an overview of actions occurring in the system. This action is more appropriate for managers and administrators than for case workers. For more information on Audit Logs, see the Primero CPIMS User Guide.
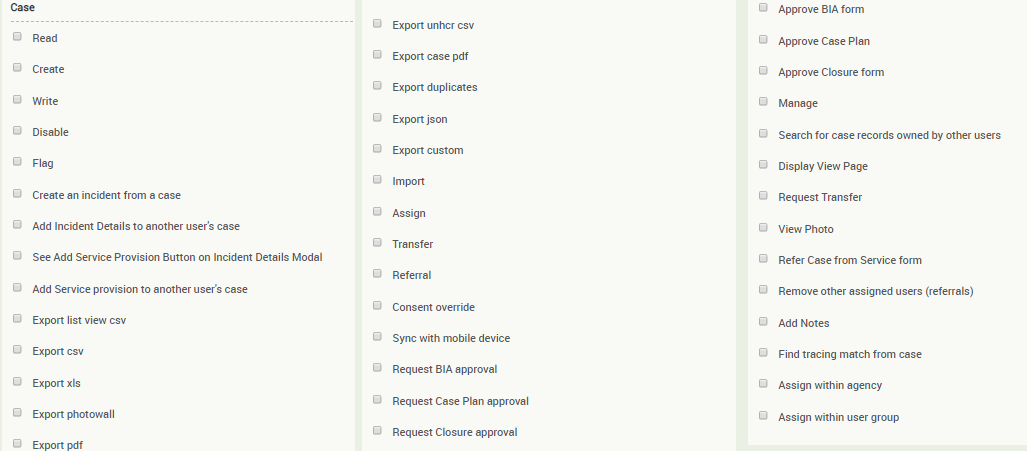
It is important to note that once a role has been created, it cannot be deleted. The role can only be disabled. It is important to reiterate that, when you are modifying a role’s permissions, you must modify them for each type of record you want the role to be able to handle. So, for instance, if you wanted a role to be able to write to, read from, and export cases, you would need to specifically check the ‘write,’ ‘read,’ and ‘export’ boxes under the ‘case’ section of the role form. If you wanted your role to only be able to read from tracing requests, you would only check the ‘read’ box in the ‘tracing request’ section. If you wanted to make sure the role had no access whatsoever to the user record, then you would check nothing in the ‘user’ section. On the other hand, if you want to grant all available permissions on a particular type of resource, you can always just check the ‘manage’ box, which will signal that the role has all permissions for that resource and save you a bit of time in the process.
To create a new role please use the following process:
Navigate to the Users page using the SETTINGS link in the navigation bar.
Select the Roles link in the left panel navigation.
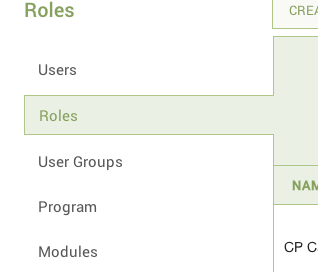
- Once selected, click the CREATE ROLE button to bring up the creation form.

In the Role Creation Form, you can set what Actions, Resources, Management, and Forms a User with this role can access. Click on the SAVE button once all the desired information is entered.
It is required that a user have access to “Record Owner” form. A user cannot edit this form, but access will be needed for the system to allow the user to access the record type.
To edit the properties of an existing role, find the name and click Edit in the options in the right column. From the Show page, click the EDIT button at the top of the screen. We highly recommend that a role never be deleted unless it was created in error as this may have a negative impact on any users who have been assigned the role. Click on the SAVE button once all the desired information has been changed or entered.
A few hints for setting roles:
When creating the role, if you do not check any forms, users with this role will see the default set of forms for the modules assigned when their username is created. However, if you check even one form in Case, Incident, or Tracing Requests, you must click all the forms the role should access in all three groups of forms.
Record Owner is a required form. If you are selecting forms, you must include Record Owner with any other forms within the group otherwise users with this role will be crippled. The Record Owner form must be selected within each group of Case, Incident and Tracing Request forms. Selecting it once is not adequate.
The list of forms for Cases contains forms for both the CP and GBV modules and, likewise. For the user to see the form, the role must have access to the form and the username must have access to the module.
Superusers and User Admins
There are two important types of roles which we must discuss here, since the system treats them differently. The first is the Superuser role.
A Superuser role is a role has the all-encompassing "manage" permission for Cases, Incidents, Reports, Roles, Users, User Groups, Agencies, System Settings, and Forms and Lookups. A superuser, meanwhile, is a user who has been assigned such a role. Since this user has a great deal of power within the system, only superusers can view or edit the attributes of other superusers. For similar reasons, superuser roles cannot be edited within Primero's administrative interface.
The second special type of role is the User Admin role. A user admin role has less power than a superuser role, but is defined as having the all-encompassing "manage" permission for Roles, Users, User Groups, Agencies, System Settings, and Forms and Lookups. Once again, a user admin user is a user who has a user admin role. Only superusers and other admin users can view or edit the attributes of user admin users. Similarly, only superusers can edit a user admin role.
The Agency Read Attribute
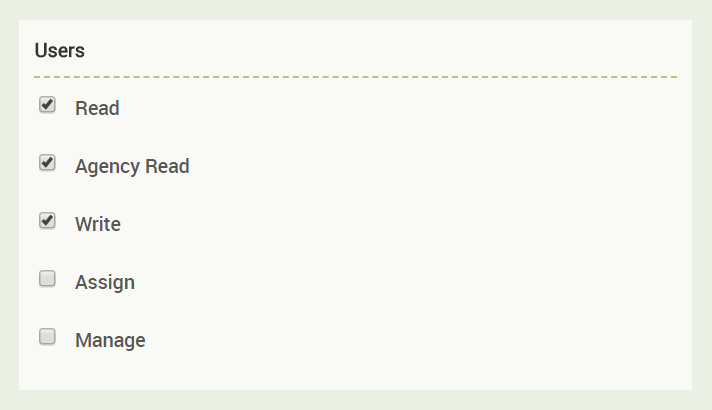
Another specialized permission level exists in the Agency Read permission given to a user role with respect to that role's access to users. This permission level only exists with respect to users and denotes that the given role can perform actions on users only within the current user's agency. As an example, suppose an administrator named Ahmad at a local NGO named "ABC" needs to be able to manage the organization's users: resetting passwords, disabling users, and creating new user accounts. Ahmad's user account gets a role with the read, write, and agency read permission for users. Because of this, Ahmad will only be able to view and edit user accounts which, like Ahmad's user account, have their agency set to "ABC." This means Ahmad can only access, and is only responsible for, cases within his organization. An administrator attempting to create a role like Ahmad's would choose the options in the picture below when creating the role.
Creating and Editing User Groups
User Groups are used to create teams of users and allow different levels of access to records within the group. As with Roles, this should be set up before creating individual users. Access to the records within a User Group is determined within the role as follows:
Access only my records or user
Access all records or users in my group
Access all records or users
No access - Admin functionality only
The actions the user can perform once they have access to a record are driven by the privileges set with their role. These permissions given to a user apply to all records they have access to. If a user has write access to their own records, and also happens to have access to the records of anyone in their user group, then their write access will also apply to their user group access, meaning they can make changes to any files owned by members of the user group. A user whose role has access to all records, and has write access for cases, would obviously be able to make changes to any case. Some users, however, may have a role with no record access. These roles are meant for users who act solely as system administrators--managing users, forms, agencies, etc.--without being able to access cases, incidents, and tracing requests.
The following diagram helps explain the relationship between Users, Roles, and User Groups through a hypothetical Role\/User Group setup, where the different roles are given specific permissions regarding their ability to see records within different User Groups:
To create a new user group, use the following process:
Navigate to the Users page using the SETTINGS link in the navigation bar.
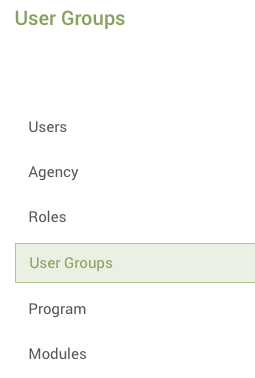
Select the User Groups link in the left panel navigation.
- Use the CREATE USER GROUP button to bring up the creation form.

A name for the group is required; no other information is necessary. Click on the SAVE button once all the desired information is entered.
Membership to the User Group is given when the specific user is created. Access to the records of the group is determined by the role that user has.
To edit the name or description of an existing user group, find the name and click Edit in the options in the right column. From the Show page, click the EDIT button at the top of the screen. We highly recommend that a user group never be deleted unless it was created in error as this may have a negative impact on any users who have been assigned the group. Click on the SAVE button once all the desired information has been changed or entered.
Creating and Editing Agencies
Agency is a required field for setting up users so these should be configured before creating users. This also configures the logo(s) that appear in the top right corner of the Primero application as shown below:
To create a new Agency, use the following process:
Navigate to the Users page using the SETTINGS link in the navigation bar.
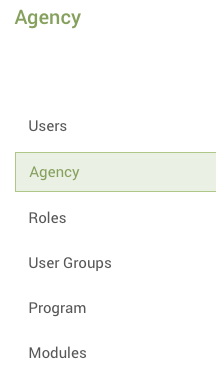
Select the Agency link in the left panel navigation.
- Use the CREATE button to bring up the creation form.
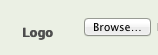
A name for the agency is required; no other information is necessary. To add a logo for the Agency, use the BROWSE button to navigate through the files available and select the appropriate image.
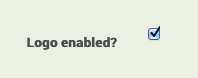
For the logo to appear at the top right of the screen in the Primero application, check the box at the bottom of the form as shown below and click on the SAVE button once all the desired information is entered.
To edit an existing agency, find the name in the list of agencies and click Edit in the options in the right column. From the Show page, click the EDIT button at the top of the screen. Click on the SAVE button once all the desired information has been changed or entered.
It is important to note that once an agency has been created, it cannot be deleted. The agency can only be disabled.
Creating and Editing Users
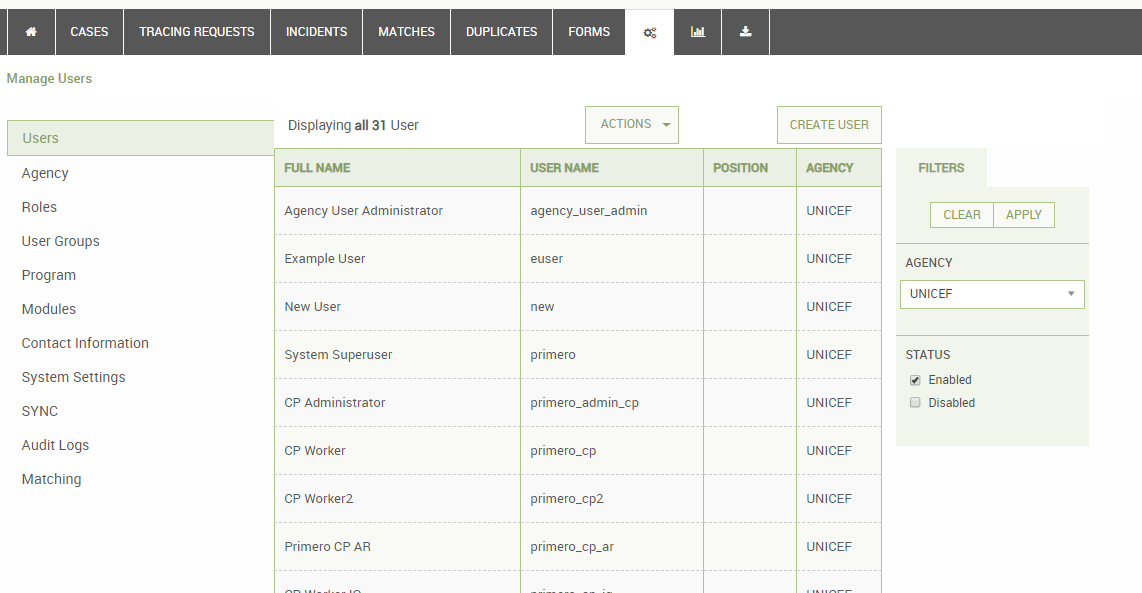
Users are the individuals using Primero who each have a unique username and password. Before setting up users, the role, user group and agency for that user must be set up. To see the users in the system, click on the SETTINGS link in the navigation bar, then select the Users link in the left panel navigation. You can filter users by agency using the dropdown in the right-hand filters panel.
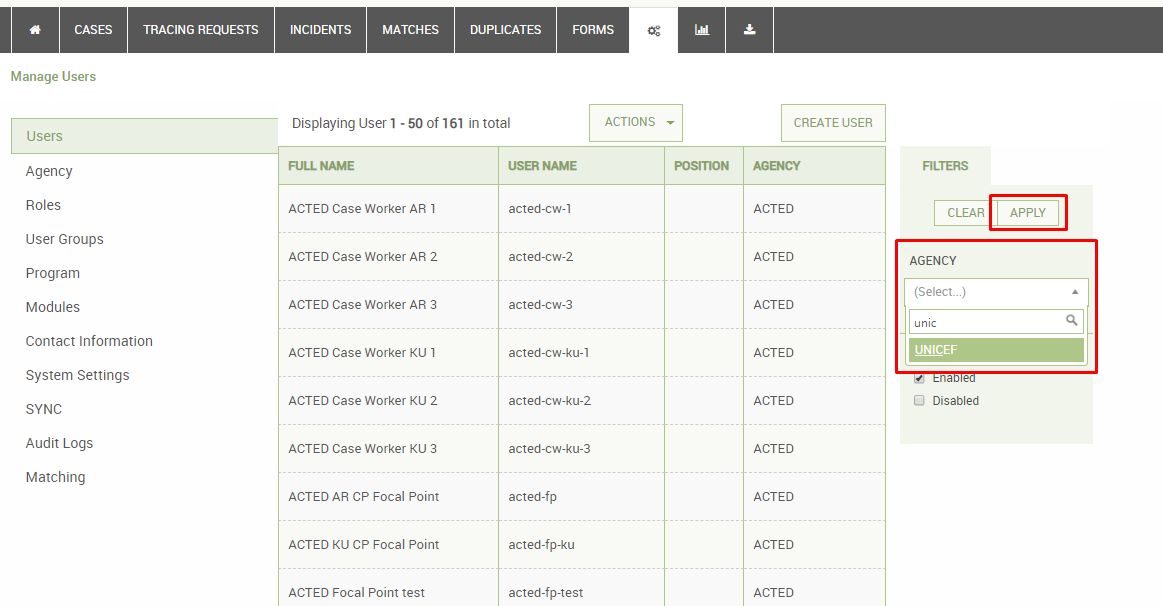
Once you select an agency from the dropdown list and click "Apply", the list will only show users from the selected agency.
For each individual user, the following information is specified:
Username - This should be unique across all the instances in the deployment.
Password - Currently, there is no way for a user to reset their password so a standard password should not be given for all users with the expectation that they can change it.
Role - Must be an existing role as defined in the section above.
Modules - A user is given access to one or more modules in Primero.
User Groups - Must be an existing user group or groups as defined in the section above.
Agency - The agency to which the user belongs.
Location - The location where the user is based.
Services - The services which the user is capable of providing.
The last three attributes - Agency, Location, and Services - are used to filter users for referring and transferring cases. For instance, suppose a case worker wants to refer a child in their care to UNICEF for a medical service, and wants the service within the child's camp (we will call this "Camp 11"). In the referral modal, before selecting a recipient user for the referral, the case worker will be able to select an Agency of "UNICEF," a service of "Medical Service," and the Location "Camp 11." When the case worker clicks on the User dropdown, only users belonging to the UNICEF agency, located in Camp 11, and capable of providing a medical service, will appear as options.
For this reason, agency administrators should regularly update their users' accounts with information on Agency, Location, and Services. For more information on how to refer and transfer cases, as well as how to filter the list of potential recipients for these actions, see the Primero CPIMS User Guide.
Please note that, while users may sometimes be able to edit their own user accounts, no user may edit which role, user groups, modules, or agency are assigned to their user account. Primero uses this precaution to ensure users do not grant themselves additional power and endanger the data confidentiality of clients.
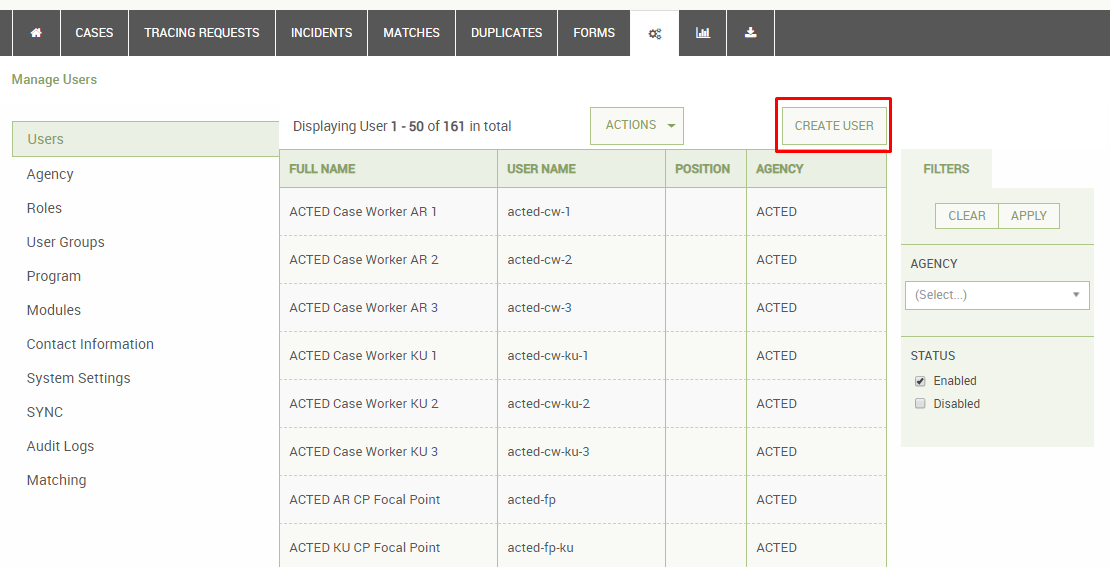
To create a new User, go to the Users page, then click the CREATE USER action button to bring up the creation form:
As described above, there are a few fields that are mandatory to create a user:
- Full Name
- User Name (must be unique)
- Password and Password Confirmation
- Role (sets the permissions of the user)
- Agency (You will choose from a dropdown selection list of the Agencies created in the system).
In addition, you can select one or more options for the following user attributes:
- Module - The field of work within which the user will operate (e.g. CP, GBV, etc.)
- User Groups - Positions the user within a structure of teams, with managers having oversight access to the cases of any users in the group.
If this user will be managing a team of social workers or performs any administrative work, be sure to select the "Manager" tickbox. This attribute gives the user the ability to see dashboards and filters which help with managing a team.
Click on the SAVE button once all the desired information is entered.
To edit an existing user, either find the name and click Edit in the options in the right column from the list view or from the Show page, click the EDIT button at the top of the screen. Click on the SAVE button once all the desired information has been changed or entered.
Disabling Users
We highly recommend that a user never be deleted unless it was created in error to avoid issues with record ownership or other negative impacts. Instead, it is recommended that a user access be disabled. Disabling a username will prohibit that username from being used to log in to Primero.
To disable a User, follow these steps:
Navigate to the Users page using the SETTINGS link in the navigation bar.
Select the Users link in the left panel navigation.
From the list of users, find the username to be changed and click Edit in the options in the right column. If the record for the Username is already open, click the EDIT button at the top of the screen.
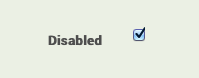
Check the box at the bottom of the form as shown below to disable the Username and click on the SAVE button once all the desired information is entered.
Configuring Programs and Modules
Configuring Programs and Modules should not be done without the guidance of the appropriate Steering Committee. Site administrators should never configure or edit Programs and Modules without approval and assistance. Modules are higher level components in which country, regional, and international decisions need to be made for its purpose and use cases. While creating or editing Modules and Programs will not be a frequently-used feature, should it become necessary, the instructions are provided below.
Configuring Programs
Programs represent a mandate for the application as provided by the steering committee for using Primero. As such, Site Administrators should never configure or edit Programs and Modules without approval and assistance. An example of a program is child protection work within certain zones of a particular refugee camp. In the current release, the program configuration only provides descriptive information about the application’s mission. While the Program does not currently impact application behavior or configuration, it could in future releases. In the default configuration of Primero, there is one program, Primero, it should not be edited or deleted.
To add Programs, with the understanding that this will have no impact and should be done with caution and guidance, follow these steps:
Navigate to the SETTINGS option in the main navigation bar.
Select the Program link in the left panel navigation.

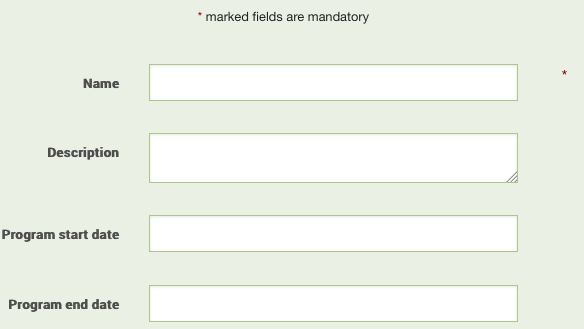
- Use the CREATE PROGRAM action button to bring up the creation form:

- The only field that is mandatory to add a program is the Name of the program. The other fields such as Description, Program Start Date and Program End Date are optional. Click on the SAVE button once all the desired information is entered.
To edit an existing Program, either find the name and click Edit in the options in the right column from the list view or from the Show page, click the EDIT button at the top of the screen. Click on the SAVE button once all the desired information has been changed or entered.
Configuring Modules
Modules represent how the system will be used and contain the default set of forms. Site administrators should never configure or edit Modules without approval and assistance. Primero will include the following default modules that should not be deleted:
Child Protection (CP): This module includes child protection case management and tracing request capability to aid in family tracing and reunification.
Gender Based Violence (GBV): This module includes case management and incident tracking for gender-based violence service providers.
Each module comes with module-specific components and a default set of forms and other configurations. While there appears to be some overlap between the modules - both CP and GBV have cases - each module has a unique set of forms. In some cases, fields, like name and date of birth, may be shared among the forms across modules.
To add more Modules, with the understanding that this should be done with caution and guidance, follow these steps:
Navigate to the SETTINGS option in the main navigation bar.
Select the Module link in the left panel navigation.
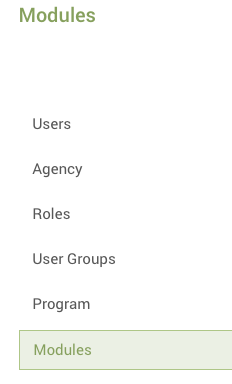
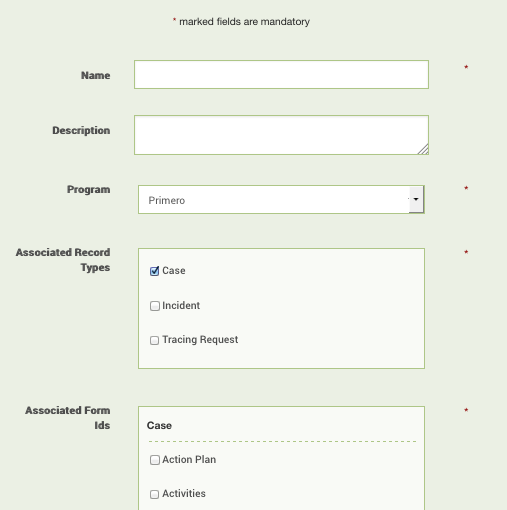
- Use the CREATE MODULE action button to bring up the creation form:

- Name and Program are mandatory fields. At least one Associated Record Type must be selected. Once the Associated Record Type(s) is selected, the forms only field that is mandatory to add a program is the Name of the program. The other fields such as Description, Program Start Date and Program End Date are optional. Click on the SAVE button once all the desired information is entered.
To edit an existing Program, either find the name and click Edit in the options in the right column from the list view or from the Show page, click the EDIT button at the top of the screen. Click on the SAVE button once all the desired information has been changed or entered.
System Settings
Just like the Programs and Modules, the settings located in the System Settings tab should not be edited without the guidance of the appropriate Steering Committee. These settings are important and should be changed only with the appropriate approval and assistance.
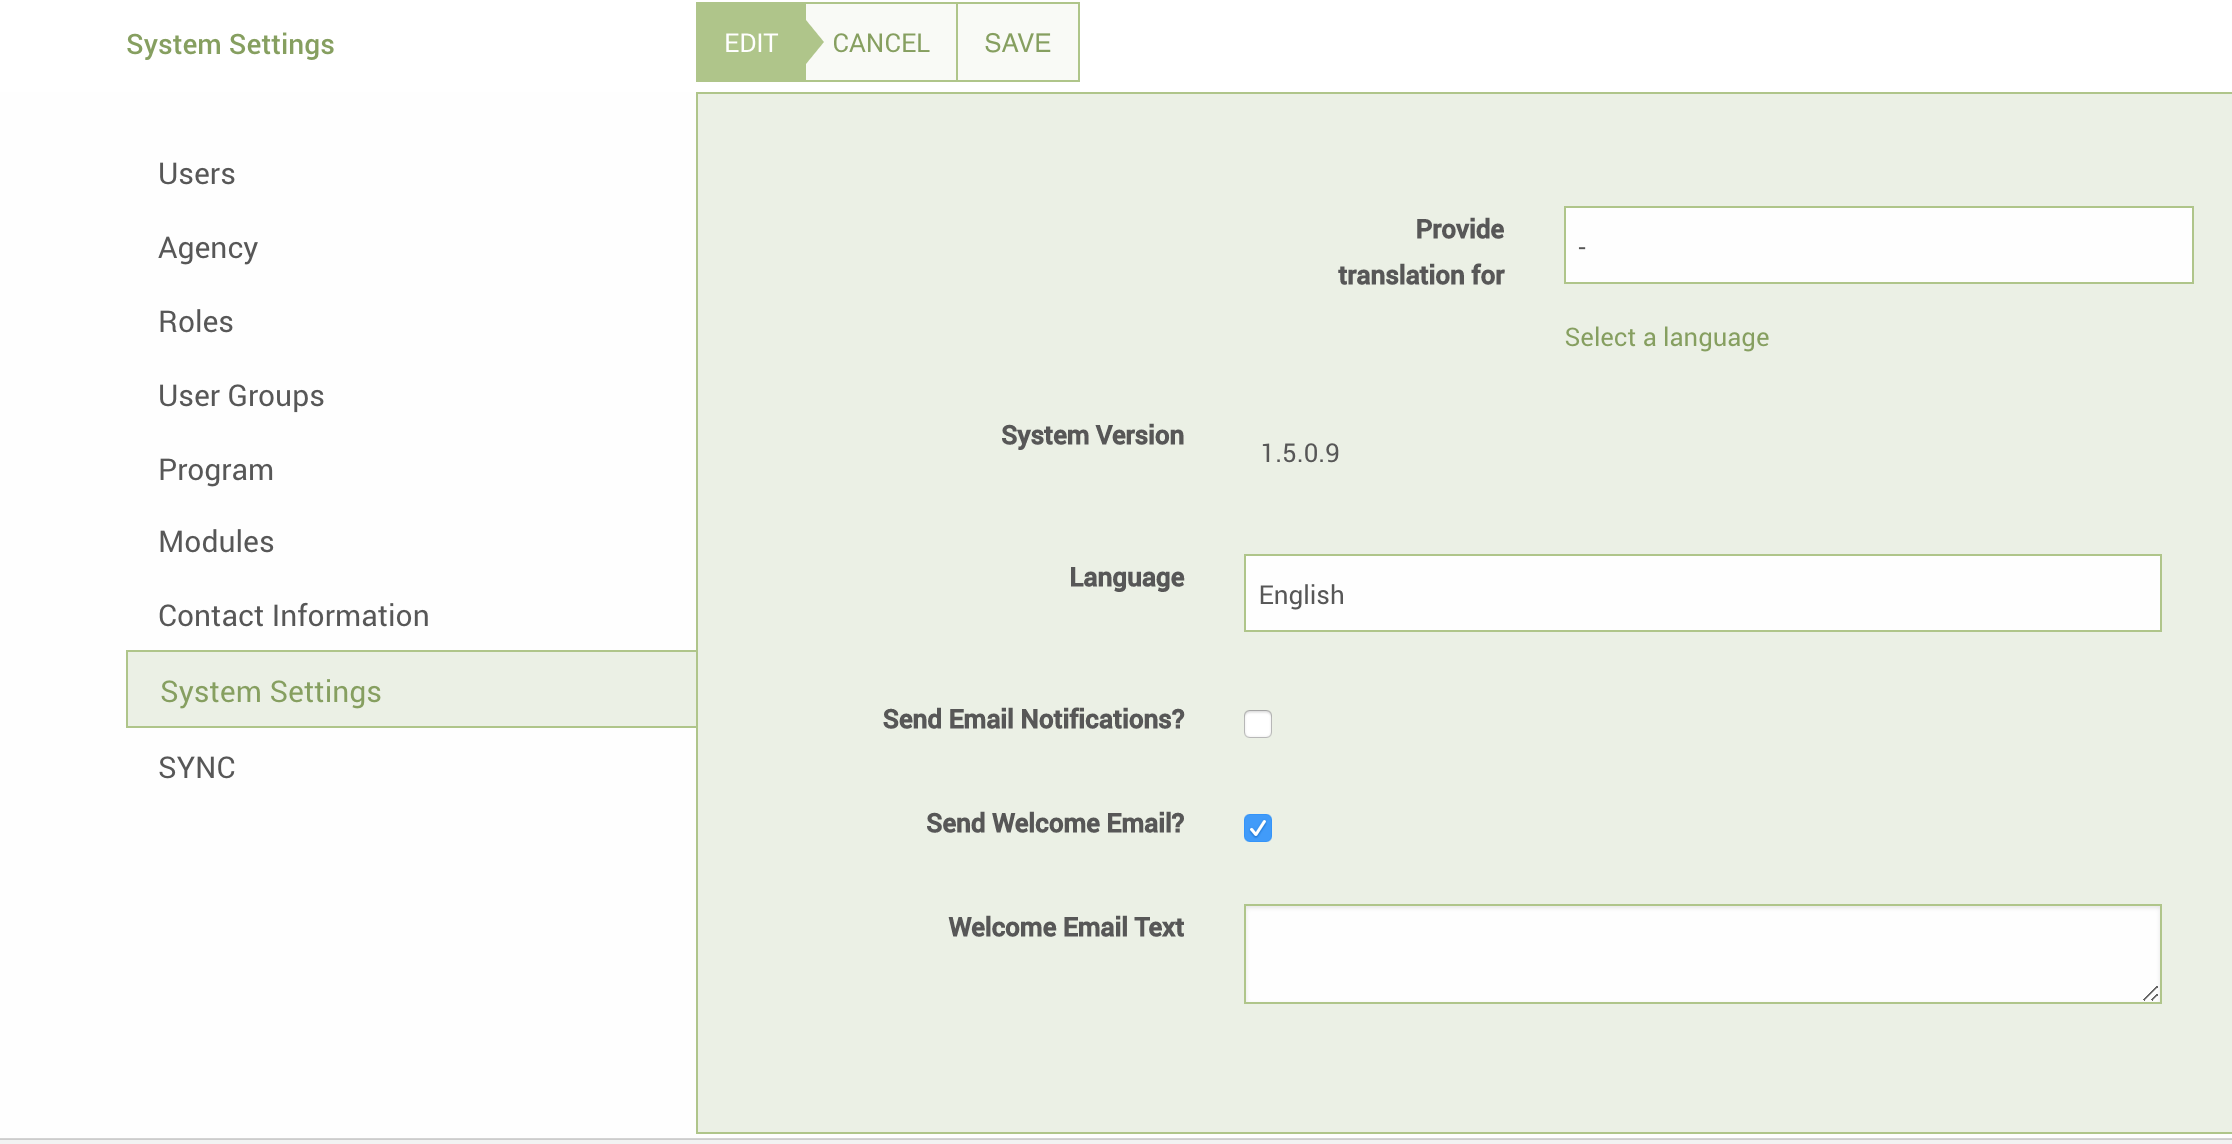
On the System Settings page, you will see the current version of Primero which is running, as well as fields for the default system language, the sending of email notifications, the sending of welcome emails, and the default welcome email text. The first of these fields is self-explanatory: it controls the language used by the application. Checking the "Send Email Notifications?" box will allow the application to send emails to users when certain milestones are reached in the case management process: when they receive a case via assignment or transfer, when another user requests that they approve a case plan, etc. For more information on the various types of notification emails, please see the Primero CPIMS User Guide.
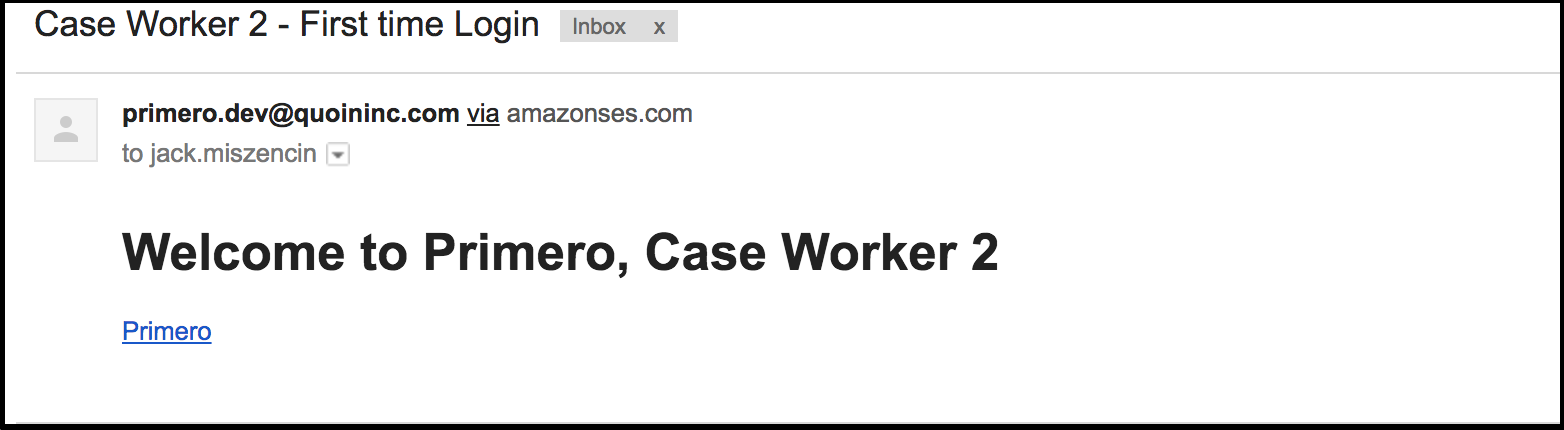
Checking the "Send Welcome Email?" box will tell the application to automatically send emails to newly-created users which welcome them to Primero and send them a link to the home page. Similarly, the "Welcome Email Text" field determines the content of this welcome email. Below is an image of the default email text.
As per usual, clicking the "Save" button will preserve any changes you have made to the System Settings.
[Note: Since the settings in the following two sections can only be set manually in the user bundle, these sections are only for developers working on the user bundle.]
Setting users to receive notification emails
As a quick note, although the above options can enable notification emails in the application, users accounts can be specifically modified to not receive notification emails. Users are set to receive notifications by default, and, in order to change this, administrators must export a user bundle file, manually modify the setting for the given user in this file, and then re-import the user bundle. Each user whose details are contained in the bundle will will have its own JSON object. The attribute on this object which dictates whether a user receives notifications is the send_mail attribute. Set this to true for a user to receive notification emails, or to false to exclude a user from receiving notifications.
Using appointment dates for services
Another attribute in the System Settings portion of the configuration bundle which cannot be edited through the administrator interface is that which controls how services become due. The 'due_date_from_appointment_date' attribute, set to be false by default, can be manually set to true in order to make each service become due based on the the "Appointment Date" field (or any field on the services subform with the id "service_appointment_date"). When this attribute is instead set to false, a service instead comes due based on the "Implementation Timeframe" field (or any other field on the services subform with the id "service_response_timeframe"). For more information on how services become due, please see the Primero CPIMS User Guide.
Managing Available Languages
[Note: Adjusting this element of the system settings requires some programming knowledge. Therefore, it is only intended for ICT officers deploying the Primero application to a server.]
Primero takes its available languages or "locales" from a configuration file in the application directory. If you navigate to the config directory within the Primero repository, you will see a file labelled locales.yml.example. When you open the file, you should see the following.
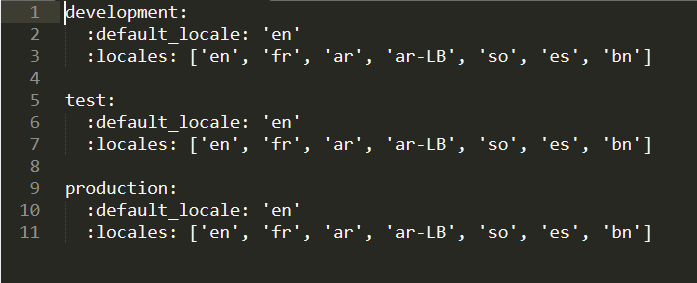
This is a template file which you should save as locales.yml in order for the application to recognize it. You can then adjust its contents as necessary. If no locales.yml file is present in the config directory, your users will not be able to use Primero in multiple languages.
Each of the sections in this file (development, test, and production) represents a potential environment for the application. To change the locales available for your production environment, edit the settings under production. The :default_locale attribute represents the language which will be used as a fallback for all translations. So, if the value here is 'en', any label in the system lacking a translation in the current user's preferred language will appear in English instead. We recommend using English as the default locale, since all features are originally developed for English, meaning it is highly unlikely a translation will be missing for this language.
The :locales attribute, meanwhile, is an array representing all of the languages which will be available for use in the system, including in the language toggle. The :default_locale language should be included in this array.
As of v1.7.0, these are the locale codes and corresponding languages which may be used in Primero:
'en': English'fr': Français'ar': Arabic'ar-LB': Lebanese Arabic'so': Somali'es': Spanish'bd': Bangla'id': Bahasa / Indonesian'ku': Kurdish
Form and Field Configuration
A form contains a set of fields for a record. By configuring the Primero application, you can create a new form, modify the existing forms, specify new fields on a form, reorder the fields, or allow different forms to share the same field. Forms are organized by components - Cases, Tracing Requests, and Incidents - and Modules - CP and GBV.
A field (data field) is information within a record. Fields are attributes like name, age, date of birth. Sometimes one field can be used to store several values like a list of protection concerns or all the languages spoken. The same field can be ‘shared’ on different forms so that you can enter a date of birth on one form and see it on multiple forms. Fields can only be shared within a component, such as Case. A field cannot be shared across components, such as Cases and Tracing Requests. There are a variety of Field types that are available including:
Text
Text Area
Date
Tick Box
Select Drop Down (single-select and multi-select)
Radio Button
Numeric Field
Tally Field
Date Field / Date Range
Forms are created first and then the fields on those forms are added once the form is created. Forms can only be created or modified by a user with the appropriate permissions. The following sections describe how to configure the forms and fields within Primero.
Creating and Editing a New Form
It may be necessary to create a new form when the core set of forms does not satisfy the needs of documenting something within a case, incident or tracing request.
To create a new form, follow these steps:
Navigate to the FORMS link in the top navigation bar.
Within the Form Builder, select the proper form set using the drop downs for record type and module (i.e. Case and CP; Incident and GBV; etc.)

- Once in the proper form set, select the NEW FORM SECTION actionbutton in the anchored header.
Fill in the following information about the form:
Form Name - this is the name of the Form that will appear in the List of Forms in the Left Navigation panel.
Description - this a description of the Form and is not displayed
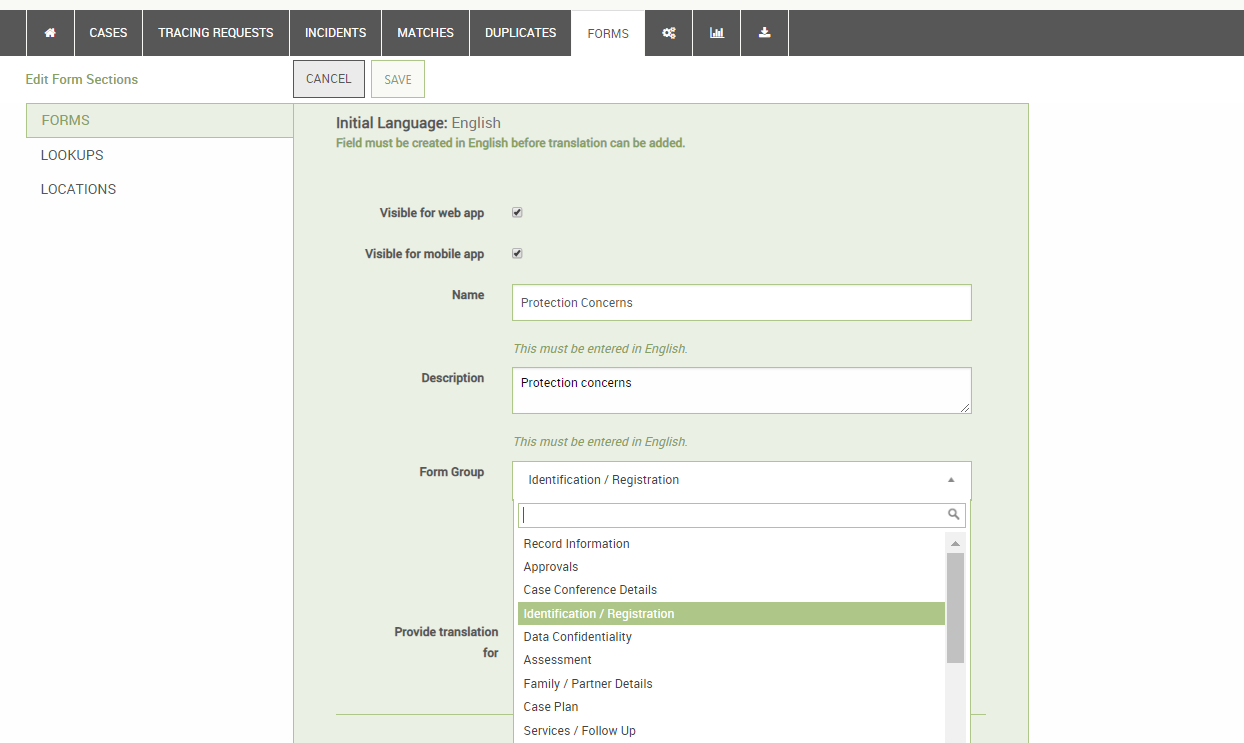
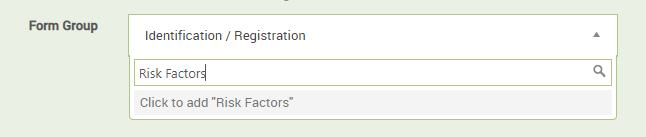
Form Group Name - this is the name that displays in the Left Navigation Panel at the top level when forms are grouped. The Form Group has a dropdown carrot to the right of the name in the Left Navigation Panel. Clicking on this carrot expands or contracts the Form Group. To add the Form Group Name, you can select an existing Form Group from the dropdown list or add a new one. To add a new one, type the desired name in the box directly below the field and then click on the phrase ‘Click to add <form group name>‘ directly below that:
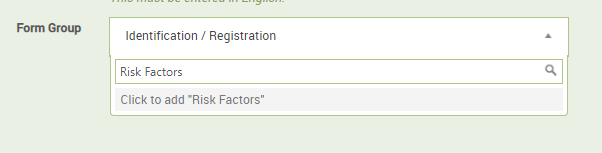
If you create a new form group for your form, it will appear later in one of the Form Group lookups. You will be able to edit and provide a translation for your form group there. For more information on how to edit form groups, see the section Managing Form Groups
If you want the form to appear by itself and not as part of a group at the top level in the Left Navigation Panel, you must enter same the Form Name in the Form Group Name field by using the instructions to add as described above. The system will default to making this form visible. If you do not want it visible, simply uncheck that tick box.
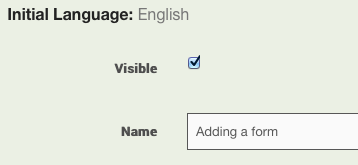
Press SAVE when all the desired information is entered. Once you have saved the form, you can add fields to the form using the instructions below.
To edit an existing Form, either find the name in the list of forms and click Edit in the options in the right column from the list view, or from the Show page, click the EDIT button at the top of the screen. Click on the SAVE button once all the desired information has been changed or entered.
Creating and Editing Fields on a Form
You must create and save the Form before you are able to enter the fields to be displayed on the form. Once you have saved the Form, you will see the following at the bottom of the form creation page:
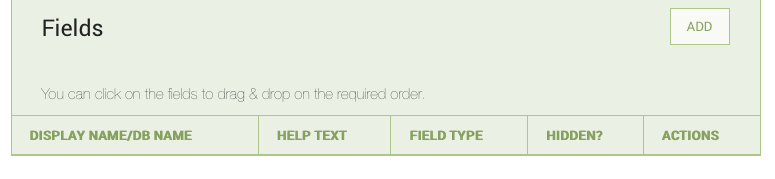
To add a field to the form, select the ADD button, the following will appear:
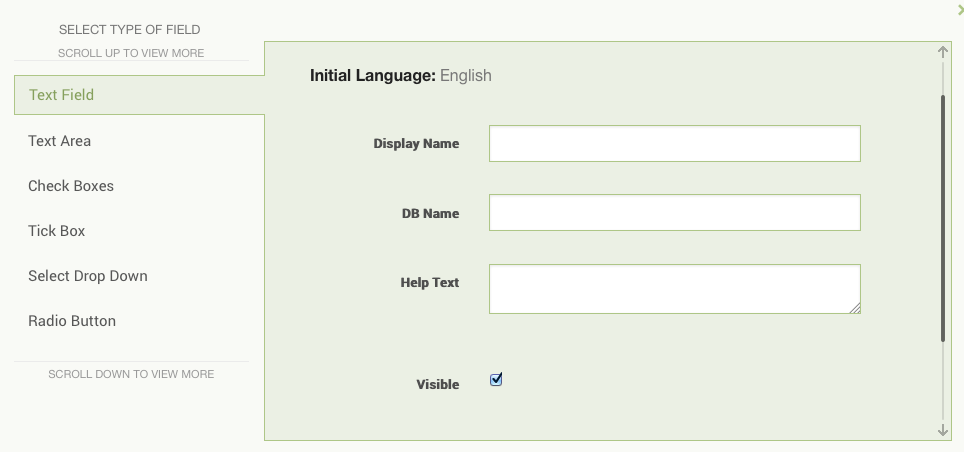
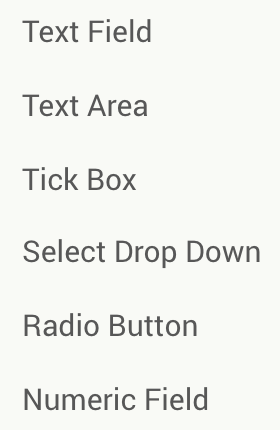
There is a SAVE button to save the changes to the field but you must also save the form after fields have been added. The left navigation panel in this window, lists the types of fields that can be added to a form (below).
Once a type of field is selected, the fields required to create that type of field will appear. All field types will ask for at least the following:
Display Name - This is the name that will display on the form
DB Name - This is the name for the database field. If you leave this blank, the application will name the database field for you. This is important to note if you want to share fields as described later.
Help Text - The help text will appear below the field and only in Edit mode. The help text is not visible when you are only viewing the record. This allows you to provide some guiding language to give the user a frame of reference for the proper answer or how to come to a conclusion based on information provided.
Visible - Use this indicator to have the field show on the form (check the checkbox to do this) or hidden on the form. It is highly recommended that you hide unwanted fields rather than delete them. The exception is in the case of a field created in error or duplicated. Once a field has been in use, it is preferable to hide it rather than delete it.
When you have entered all the information for the field, press the SAVE button at the bottom of the field modal to save the field. You must also save the form using the SAVE button at the top of the page.
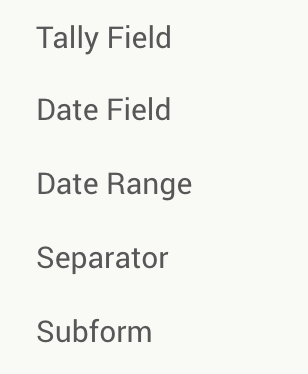
A brief description of each field type and any additional information to build the field is detailed below:
Text Field - A Text Field is used for brief pieces of text.Unlike a Text Area, it will not expand to fit the text entered. Text will not be truncated but it is not easy to view.
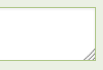
Text Area - Unlike a Text Field, a Text Area will expand to fit the text entered. A Text Area field is differentiated by the hash marks in the bottom right corner:
- Tick Box - A tick box is a checkbox with one selection as shown below:

Tick box inputs will display in Edit mode. In “View” mode, only the text of the option will appear. In some cases, even when the tick box is not selected, the opposite value will show in “View” mode. For example, if the value of the tick box is ‘Yes’ and it is unchecked, the field may contain ‘No’ in “View” mode.
- Select Drop Down - A select drop down field allows the user to pick a value or values from a defined list of options as shown below:
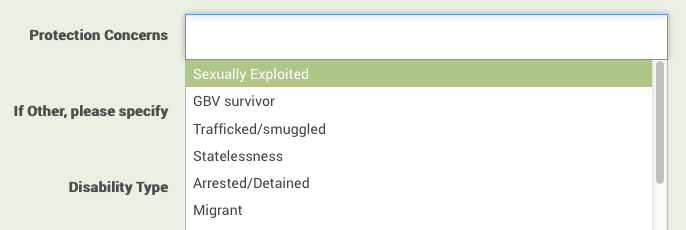
To configure a select drop down, there are some additional fields in the window:

The “Options” field is one way to configure the list of items that a user will see when they access this field. To add options, each option must be on a separate line. The Lookups field is a way to indicate that the list of items should come from a Lookup, which is a list of items that may be referenced by multiple fields. For instance, fields such as “Nationality,” “Ethnicity,” or “Language” have potential values that are consistent across Primero. The Lookup must be created before the field. See the section on Lookup Management for instructions. The “Multiple Selection” check box indicates if the user is allowed to pick more than one item from the list. If the box is unchecked, only one selection is allowed. In cases where there are a large number of options, the user will be able to begin typing upon clicking the dropdown, and options that match the entered text will appear. To select an option, the user can either click on an option or simply hit enter to choose the currently selected item.

- Tally Field - The tally field is used to record a count for several different pieces of information. For instance, if I wanted to know how many children and how many adults were living in a given household, I could create a tally field with “Children” and “Adults” as fields.. For a tally field, you can specify up to three fields:

The application will automatically add the three values and display a total.
Date - The date field type will automatically validate that what the user enters is a valid date field. The standard date format for Primero is dd-mmm-yyyy.
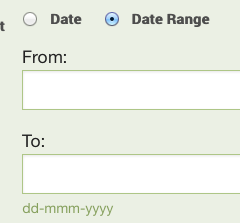
Date Range - The date range type allow the user to enter a “From” and “To” date as shown below:
Within a form there are two additional field types that are unique from other field types and they are used for different purposes:
The Subform, also referred to as a Nested form, is a section of a form where a user can collect the same set of data for multiple occurrences within the same case, incident or tracing request. This is used throughout Primero to collect information where a case may have multiple follow up visits, protection concerns etc.. For example, when recording a child’s living situation in the “Care Arrangements” form, a worker may fill out the same “Care Arrangement” subform each time the child’s current arrangement changes.
A Separator identifies a new section within the form. For example, on the ‘Closure’ form, a separator marks the address portion of the form to set it apart from the rest of the fields on the page. This is not a sub-form because you only need to enter information into it once.
Adding a Subform
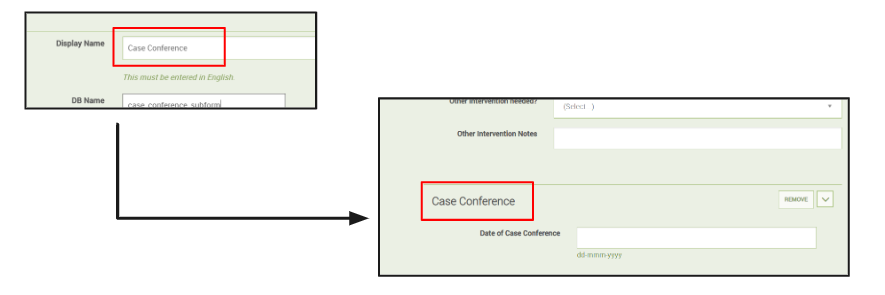
A Subform is created in two steps. First, add a field with a type of "Subform". Note that whatever you enter in the "Display Name" field will appear as the header for each subform entry.
Once you have created the "subform" field, it will appear in the list of fields on the parent form. Click the Edit Subform link which appears next to this new field.
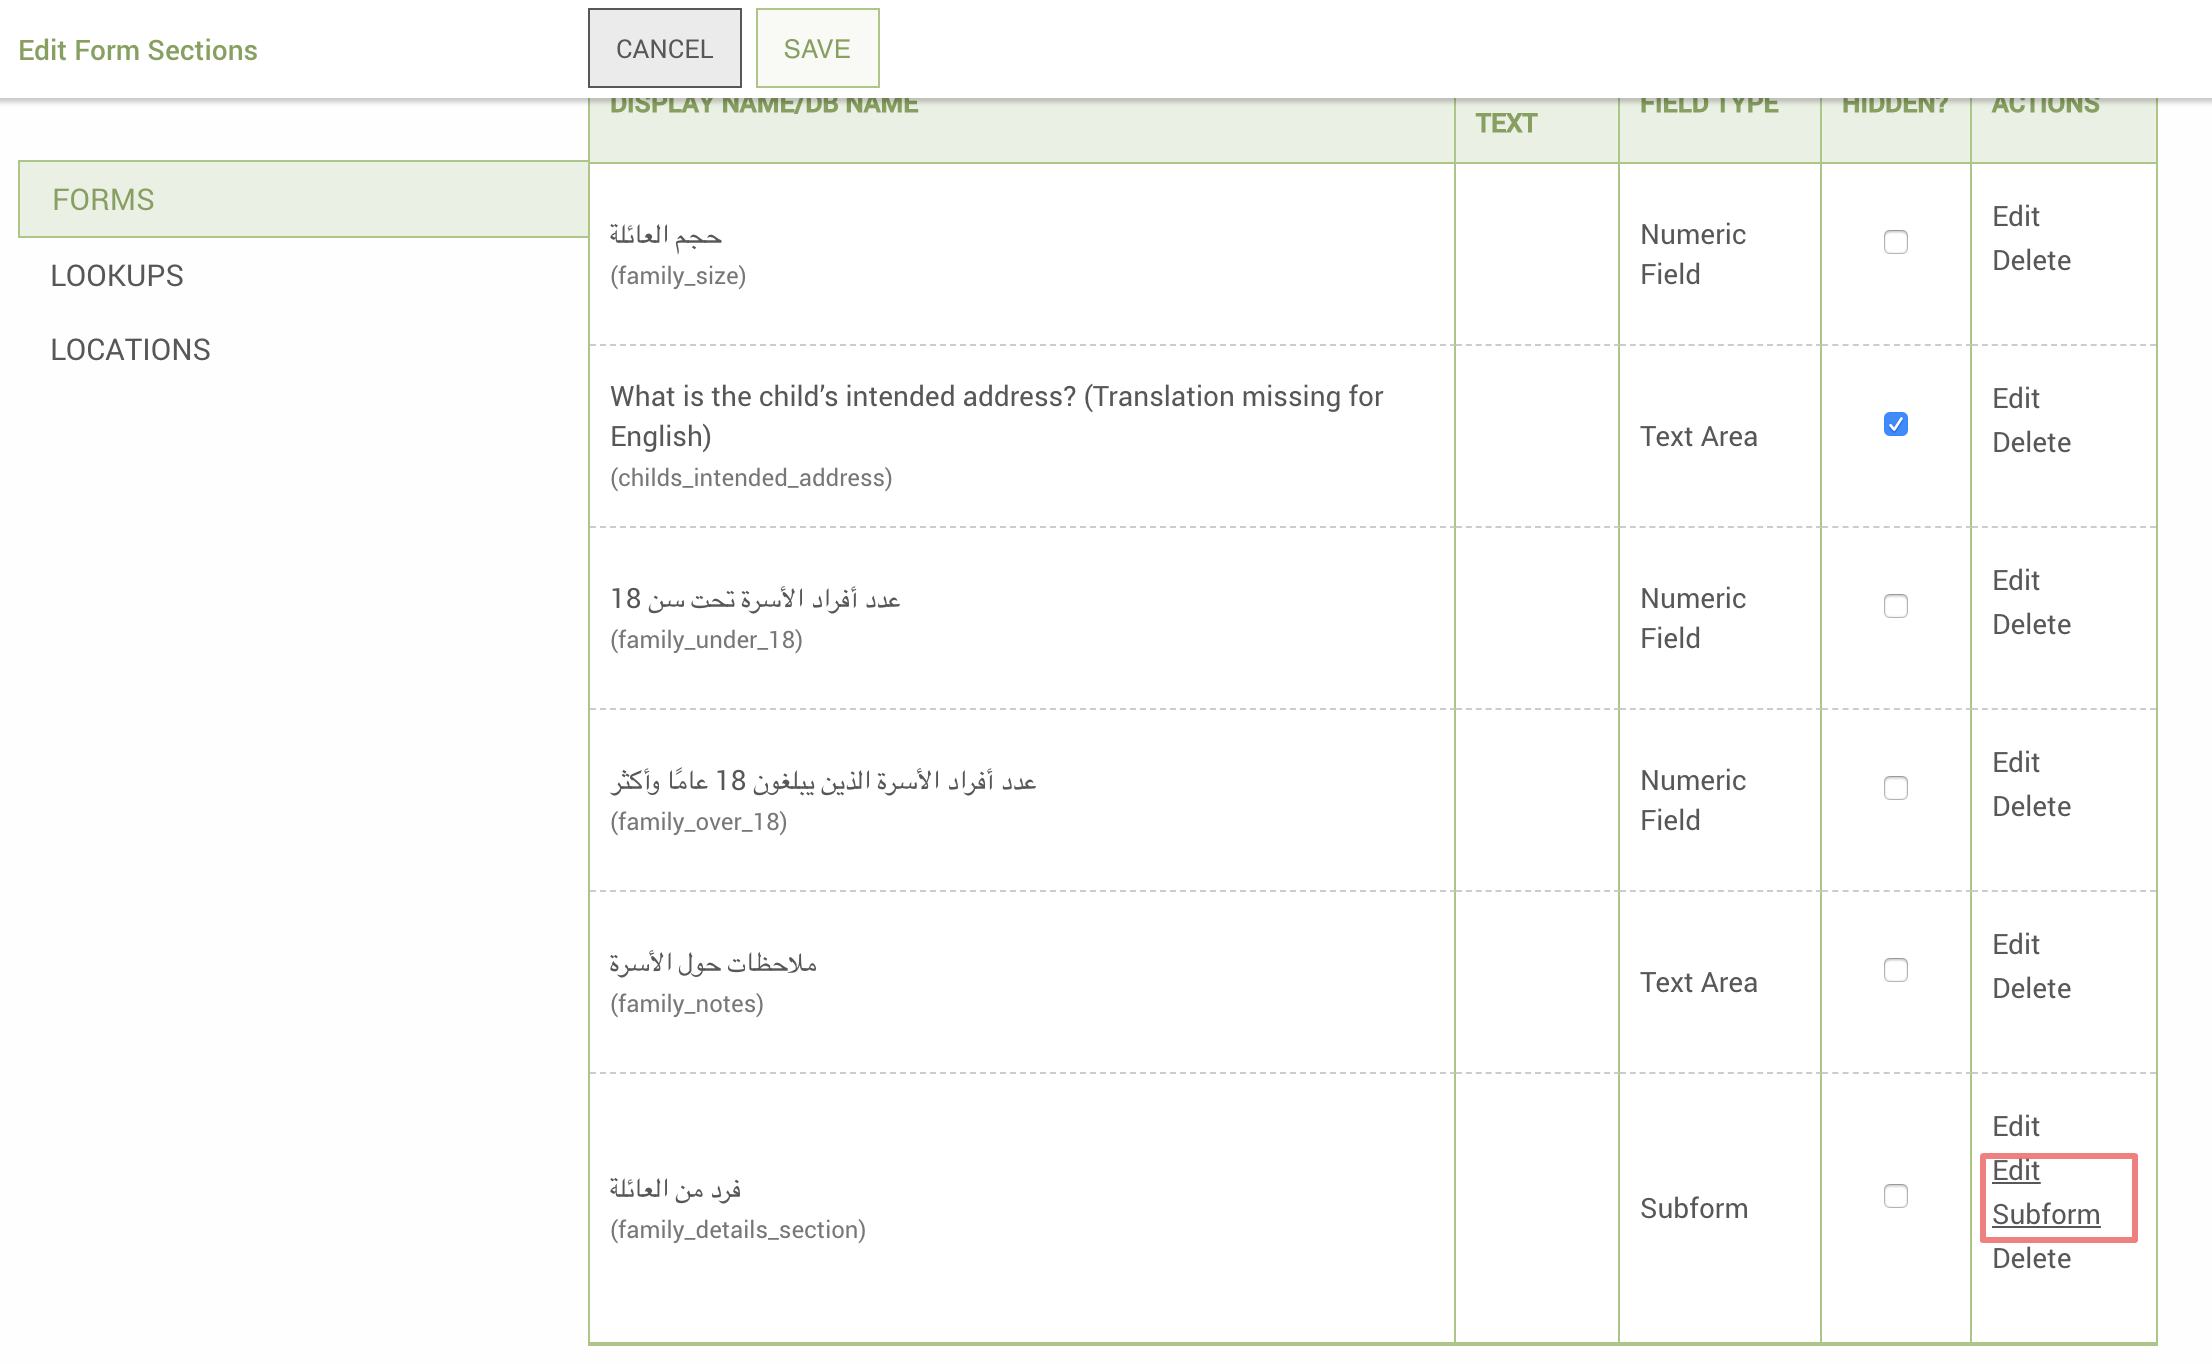
You will now arrive at the Edit Form page for the subform you just added. You can now add fields to this subform just like you would with any other form.
One option which only appears on subforms is "Selective Syncing."
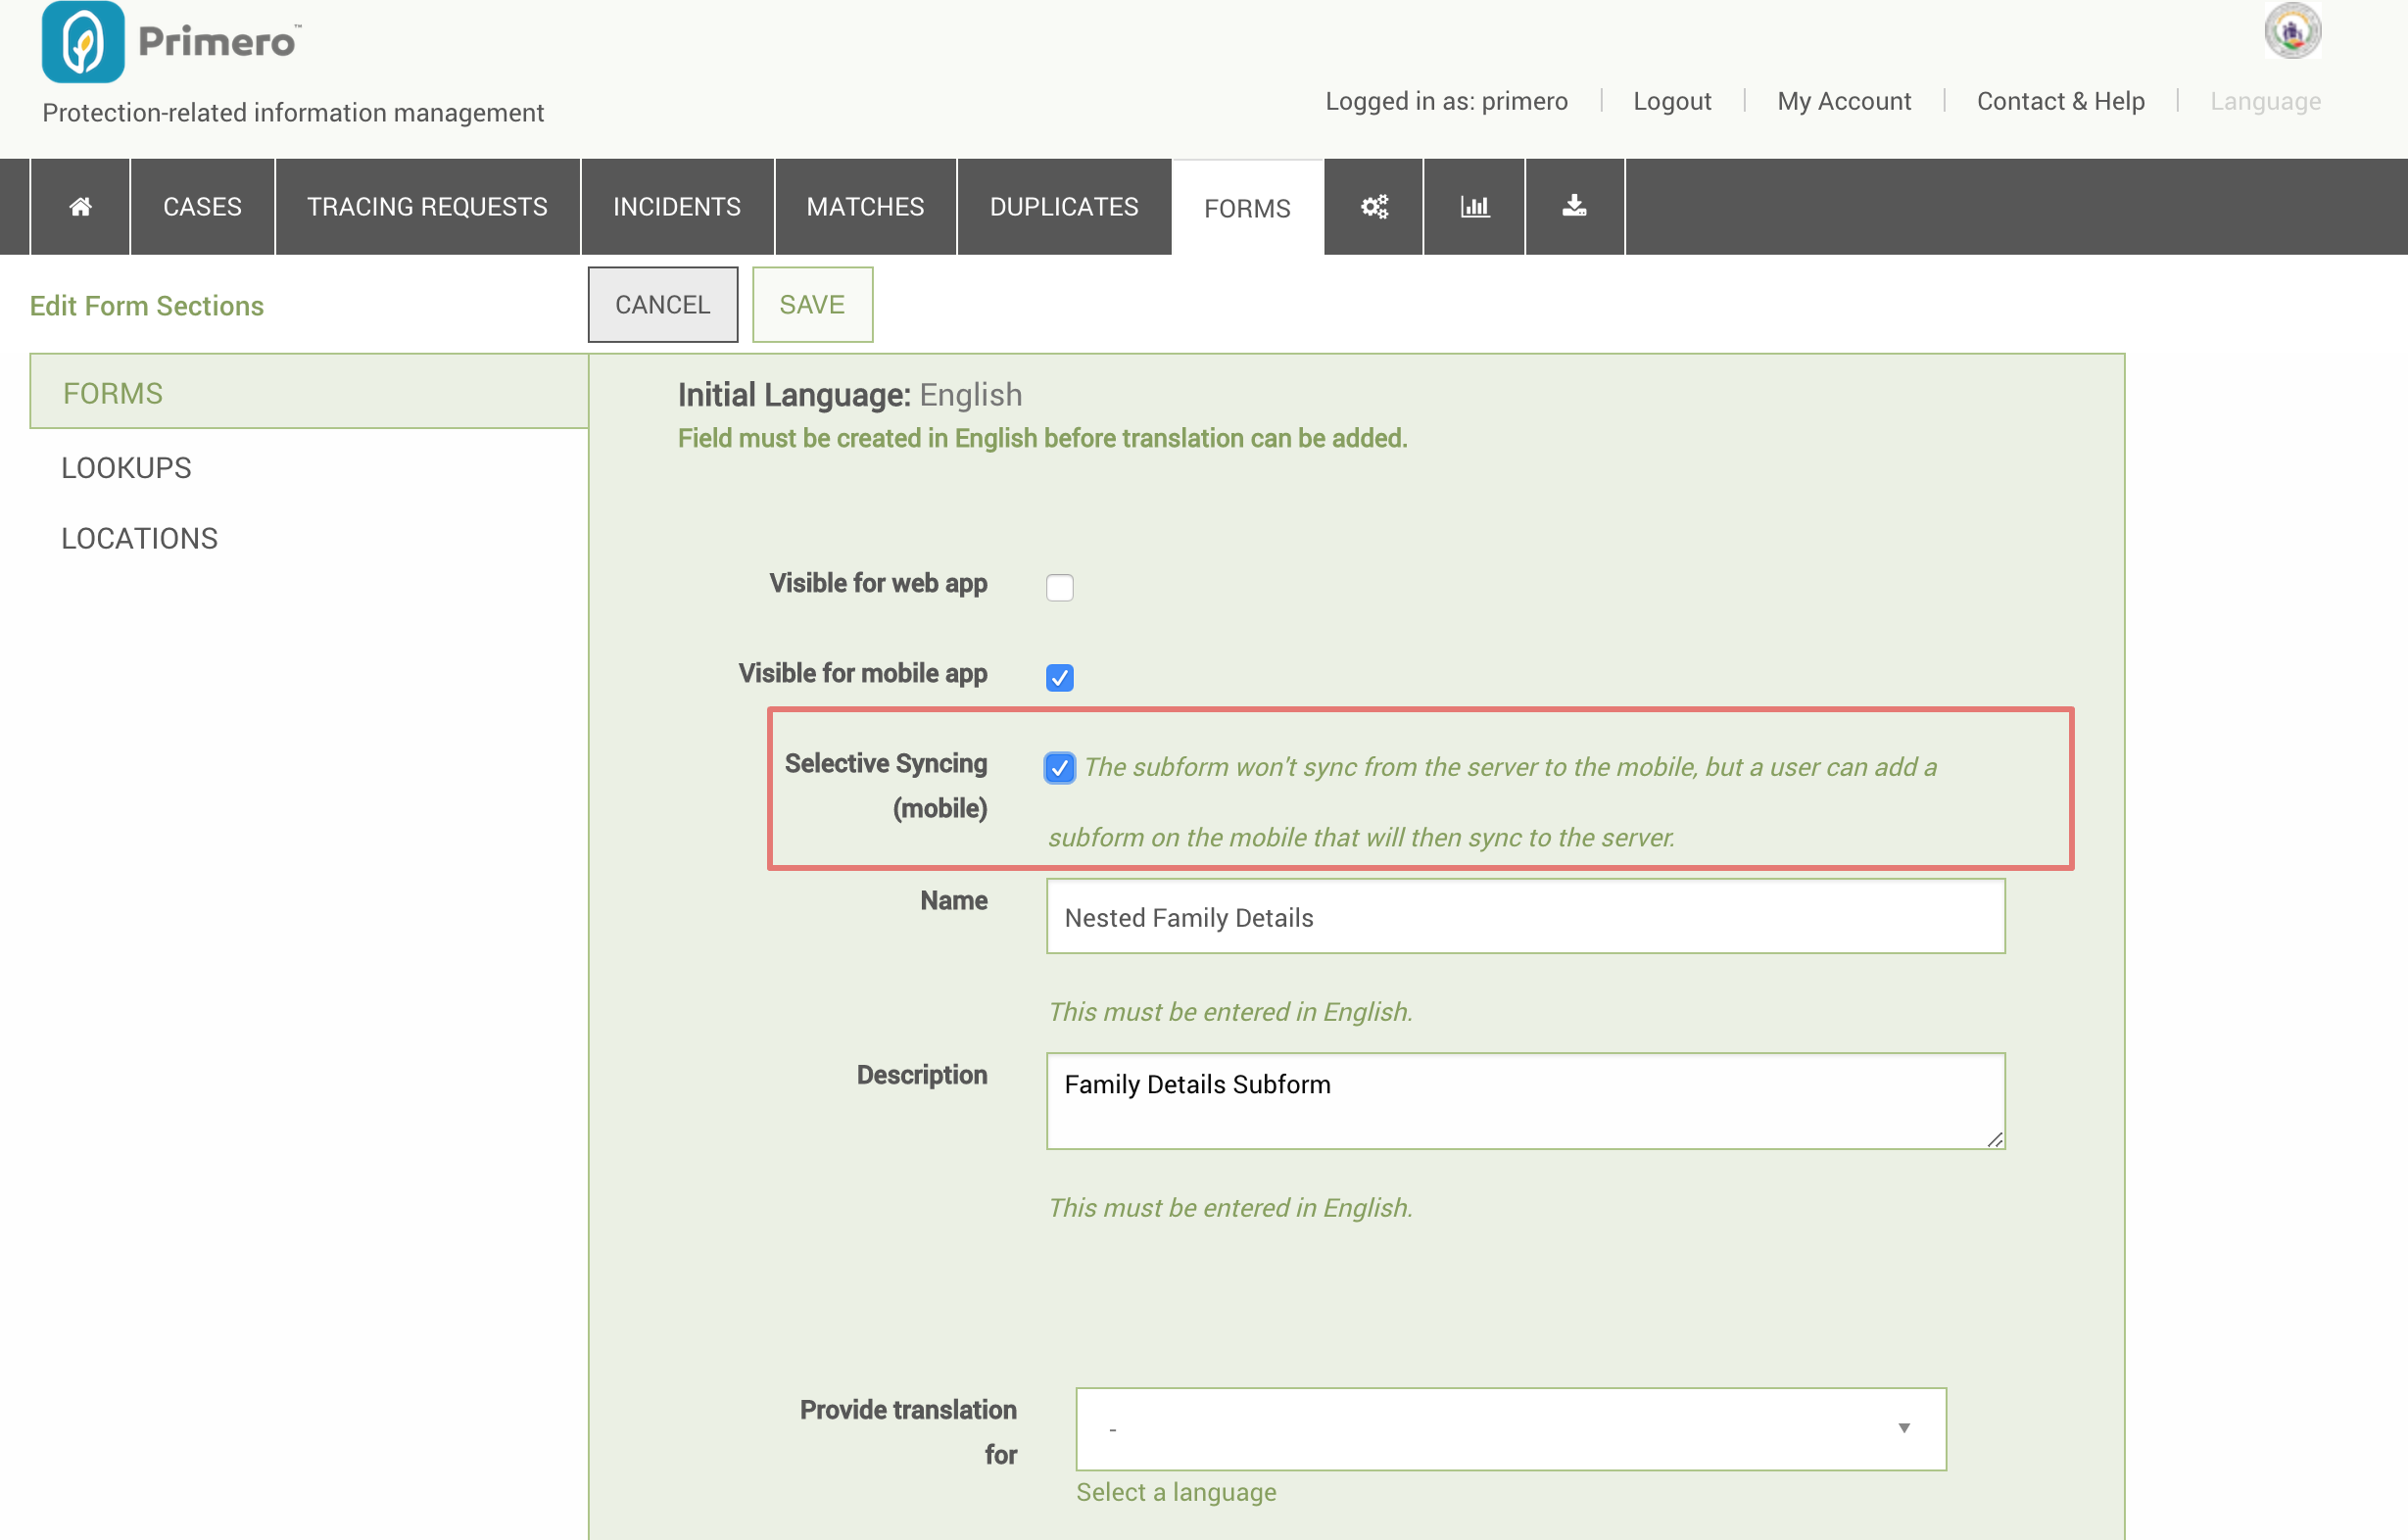
Selective Syncing means:
- Subform entries on the web will not sync down to mobile.
- When a user adds a subform entry to a case on mobile, then syncs, the new entry will sync up to the web app, but will disappear from the case record on the mobile device.
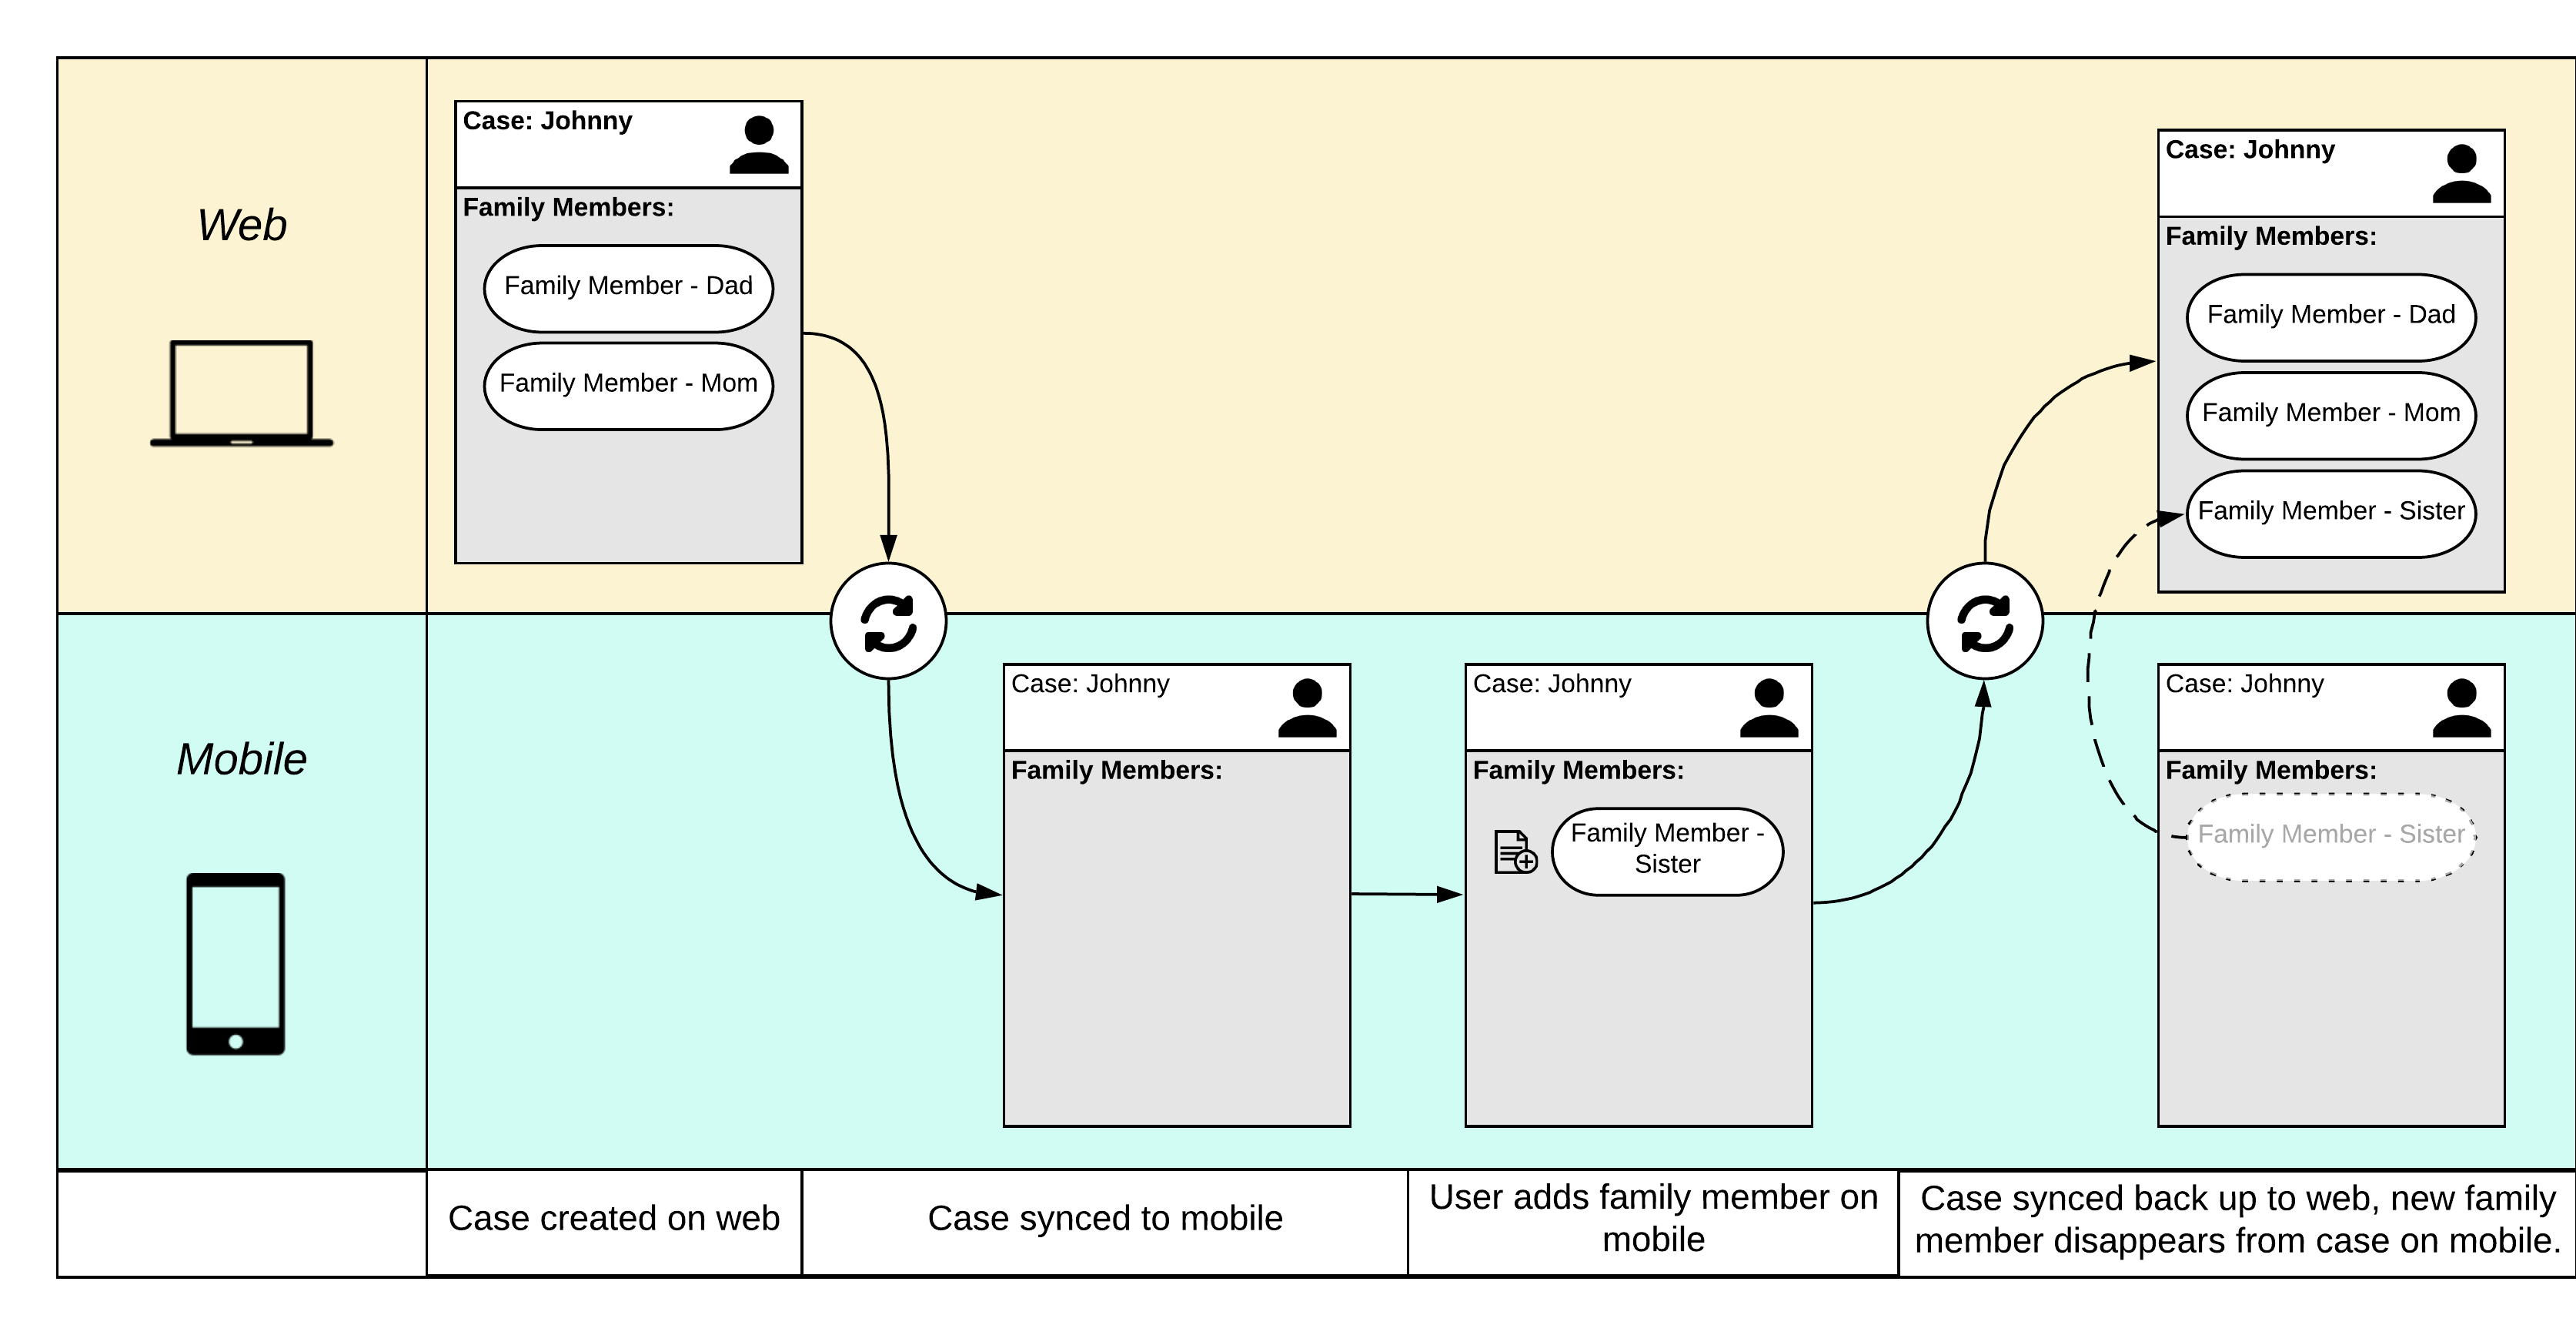
This allows mobile users to add subform entries for things like services and follow ups while using minimum data for syncing. The below diagram explains how selective syncing would work in a situation where the "Family Details" form syncs selectively.
Making a Field Required
[Note: Since the settings in this section can only be set manually in the configuration bundle, these sections are only for developers working on the configuration bundle.]
To make a field required, a developer must manually edit the configuration bundle. To make the appropriate edit, the developer should search for the JSON object containing the field in question and then set the required attribute to true. This works for fields on standard form sections as well as fields on nested subforms.
Oftentimes, you will want to avoid having the user fill out a required on a nested subform when a case is first created. For instance, you may want to make it required that a user fill out the name field for each Family Details subform added to a case, but you also may not want to force the user to add information about family members when the first created. One way to fix this problem is to set a subform to start out with zero entries. This change also must be made manually in the configuration bundle by a developer. To make the change, the developer should search for the JSON object defining the subform in question. In this object, you should see the attribute initial_subforms. Set this attribute to the number of subform entries that should display in the forms when the case is first created. So, if we find the definition for the Family Details subform and, in this definition, set initial_subforms: 0, this will make it so that no Family Details subform entries initially upon case creation, meaning that the user will not have to fill out any of the required Family Details fields.
Editing an Existing Form
Similarly to creating a new form, you can edit an existing form to show, hide, or change existing fields. You should only change fields which are outside the core data set. This means the fields that are inherent to the Primero deployment when you first receive it should not be edited, but can be selected to be invisible in the form and field level forms.
Navigate to the Form Builder using the FORMS link in the navigation bar
Within the Form Builder, select the proper form set using the drop downs for record type and module (i.e. Case and CP)
The existing forms will show in the list view. Find the desired form to edit, and click the “Edit” link in the far right column
Once in edit view of the form, scroll to the field you’d like to edit, or add a new field as described earlier.
Change an Existing Field
The functionality to change a field from one type to another is currently not supported. It is necessary to create a new field with the desired type and then hide the field you are replacing. If you want the data in the existing field to appear in the new field, make note of the database name of the existing field. Create a new field with the proper type and use the existing database name. You will need to create a unique field label - the text that appears on the page. Once this is done hide the field you are replacing.
Change the Field Order within a Form
You may click and drag a single field to anywhere in the form to change the order in which they appear on the form. You must do this one field at a time.
Change the Form Group
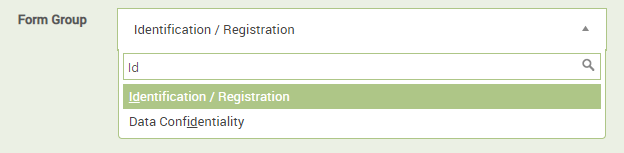
While creating or editing a form, you can change the form group by clicking into the Form Group field. Begin typing the name of the form group you want and then select one of the results that appears.
To add a new form group, type the name of the new form group in the field. The following will appear:
Use the mouse to click “Click to add” and it will create the new form group. Click the SAVE button when you are done making changes to the form.
Lookup Values Management
“Lookup” is the term used for a set of values that might be used in the dropdown selection for multiple fields. For example, it may be more efficient to define the values for fields such as “Language,” “Ethnicity,” and “Nationality” once and then reference them for several fields throughout Primero. This will ensure certain data points are consistent and improve data entry speed and accuracy.
To create a new Lookup:
Navigate to the Form Builder using the FORMS link in the navigation bar
Select the NEW LOOKUP action button in the anchored header. The following will appear:
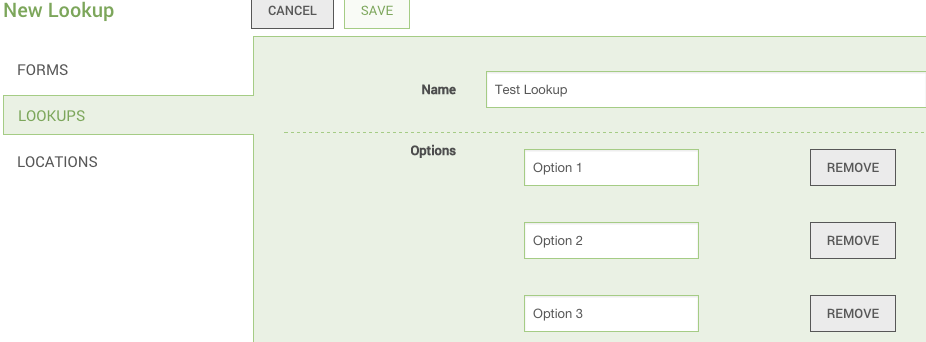
Add a name for the Lookup you are creating.
Add a single option in each “Option” field adding new fields or removing as needed.
Once a Lookup is created, you can add to a field type and select whether you can pick one or more of the values.
To edit the properties of an existing Lookup, find the name and click Edit in the options in the right column. From the Show page, click the EDIT button at the top of the screen.
Managing Form Groups
As you scroll through the list of lookups, you will notice that there is a lookup for the form groups for each type of record. Earlier, when we were creating a case (in the section Creating and Editing a New Form), we added our form to a new form group. When looking at the lookup labelled "Form Groups Cp Case," you will see that the form group you added appears here.
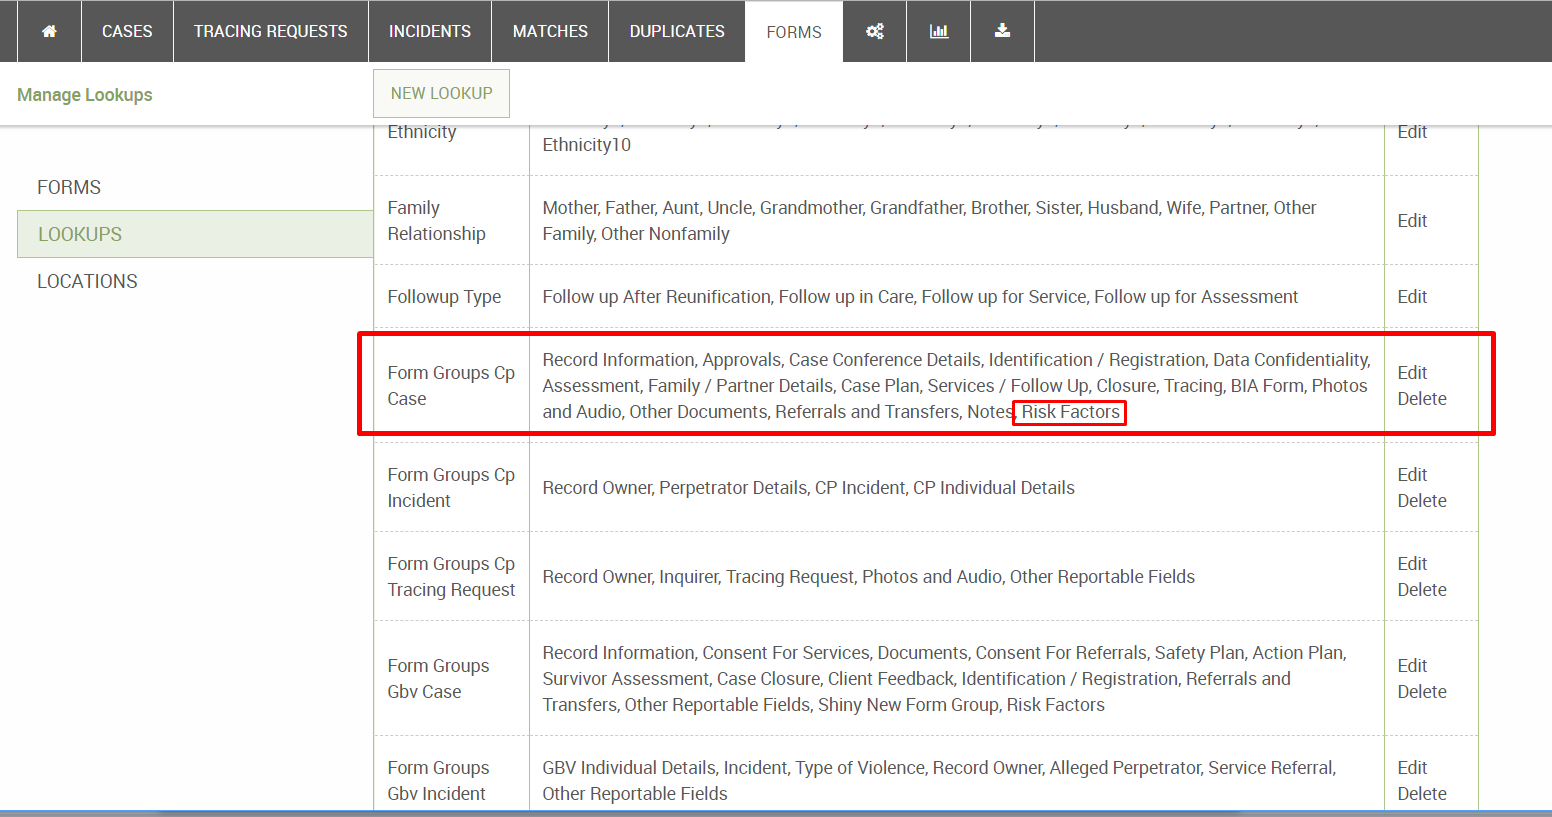
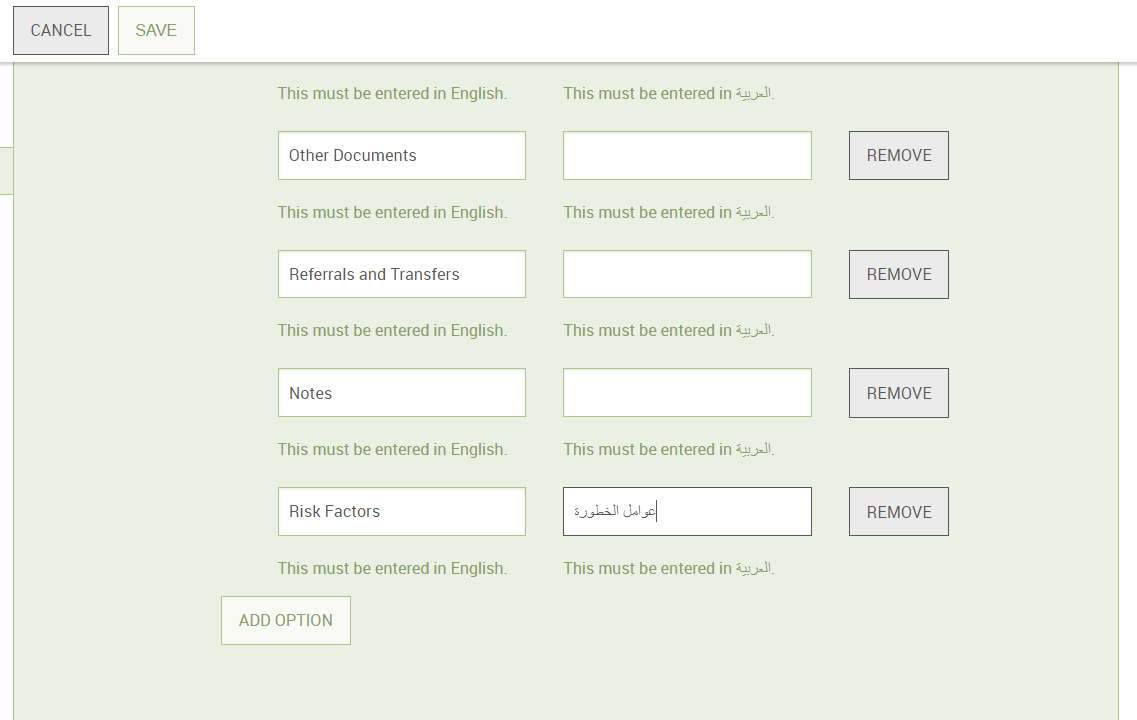
To edit the list of form groups for Child Protection cases, click the "Edit" link for the "Form Groups Cp Case" lookup. Here, you can edit, remove, or provide translations for any of the items in the lookup. Note that if you remove one of these form groups, you will need to go back and edit any forms which used to belong to that form group.
Locations
When a user selects from a dropdown to indicate where something happened (e.g. child's current location, location where incident occurred), they are using Locations. Locations are similar to lookups in that they are stored in a single list, which can be used to provide options for multiple fields. They are different from lookups in that they are nested. This means that a location for "Manhattan" is considered a sub-location of the "New York City" location, which in itself is a sub-location of "New York State" and "United States." This way, if a user clicks a location dropdown field and types in "New York City," Manhattan is one of the locations that will appear as a result.
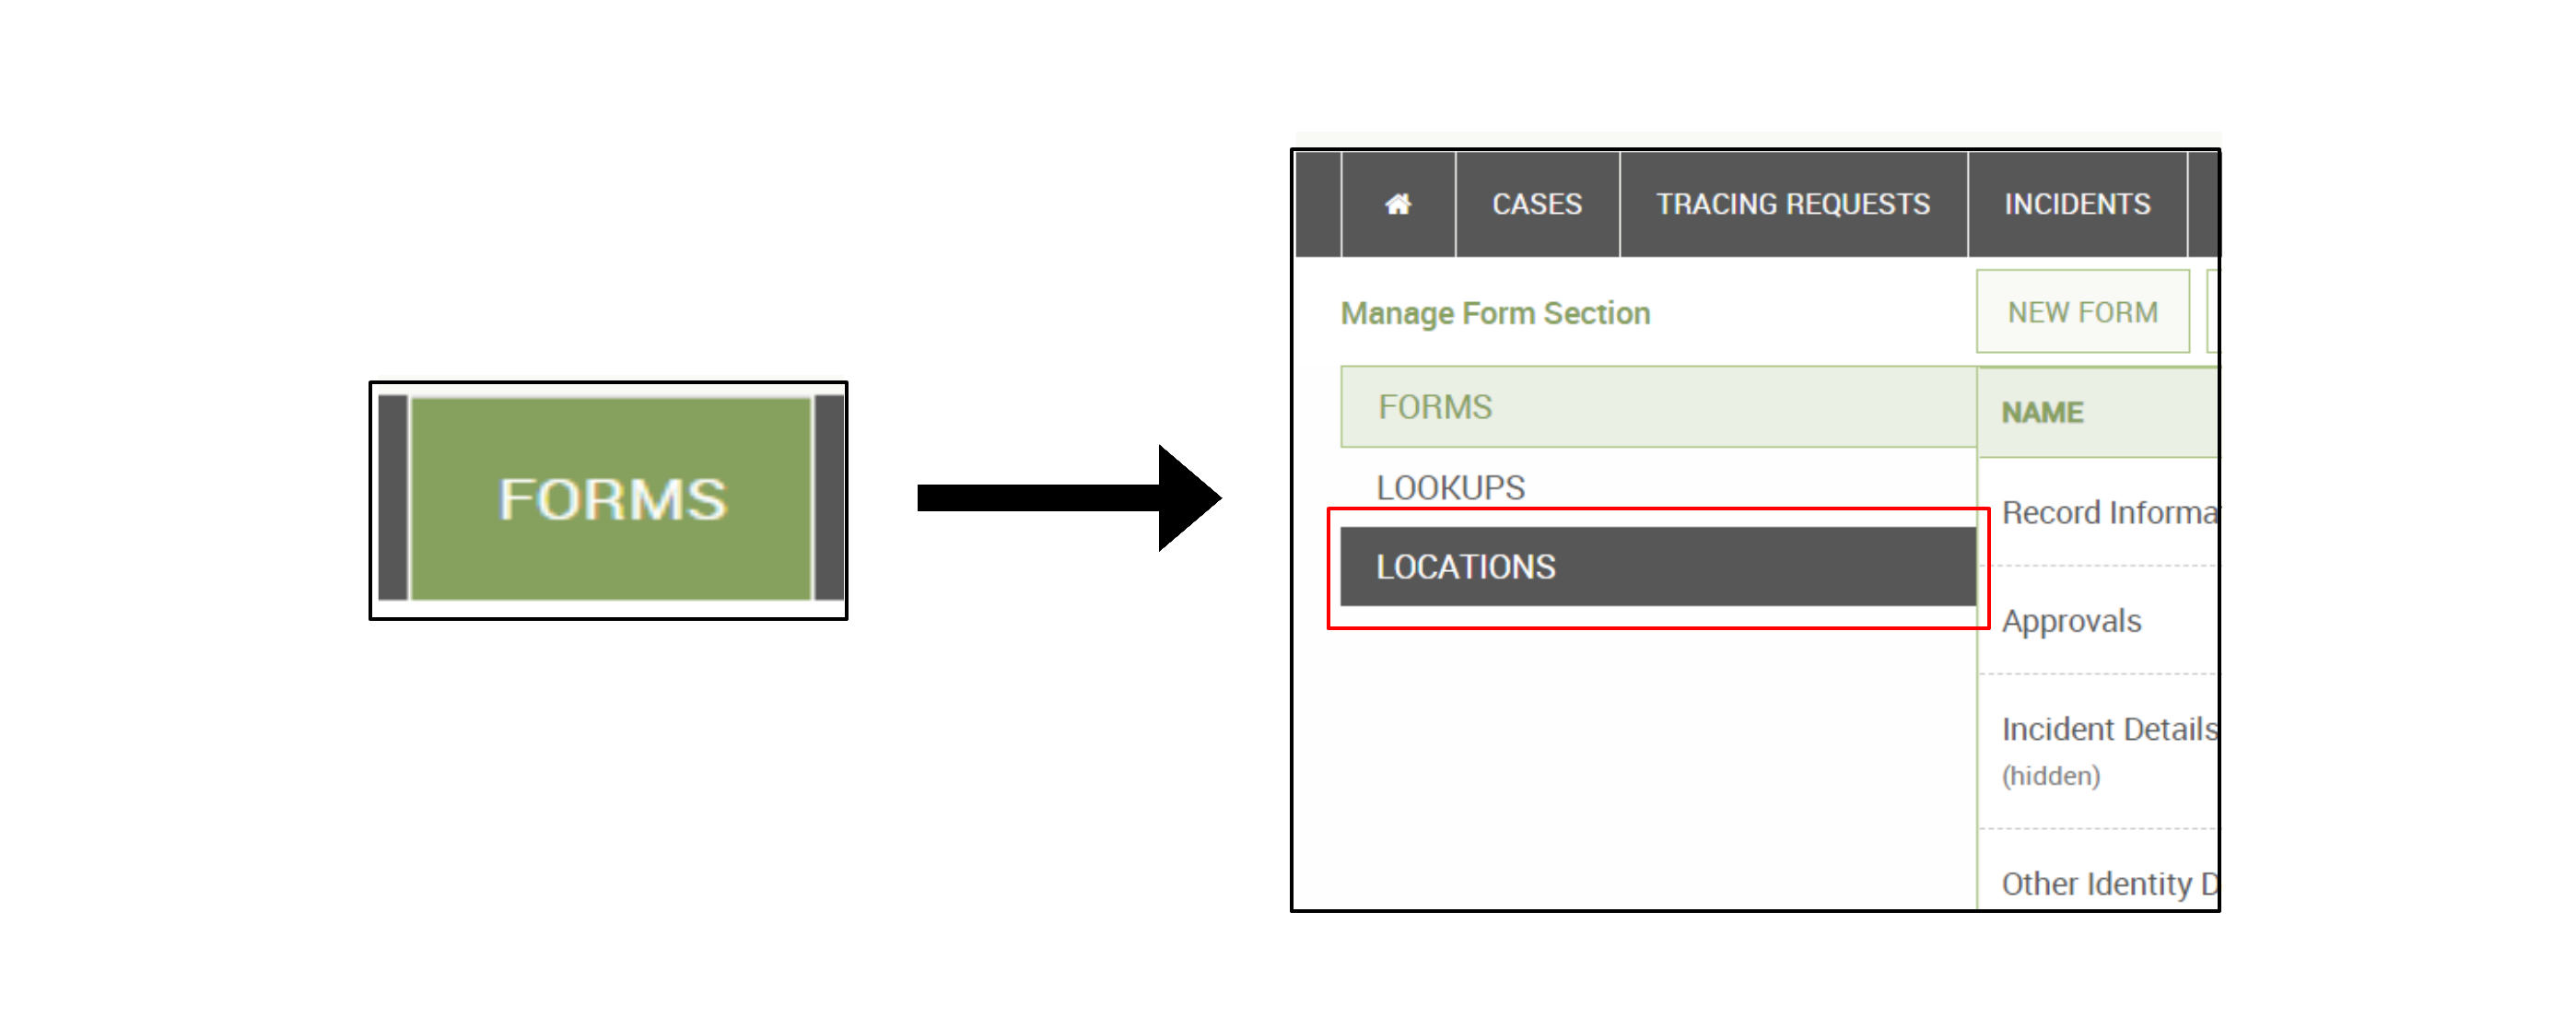
To edit Locations, click the FORMS link in the navigation bar. Then click the Locations tab in the side navigation bar.
Once you have reached the Locations page, you will see a list of all locations in the system.
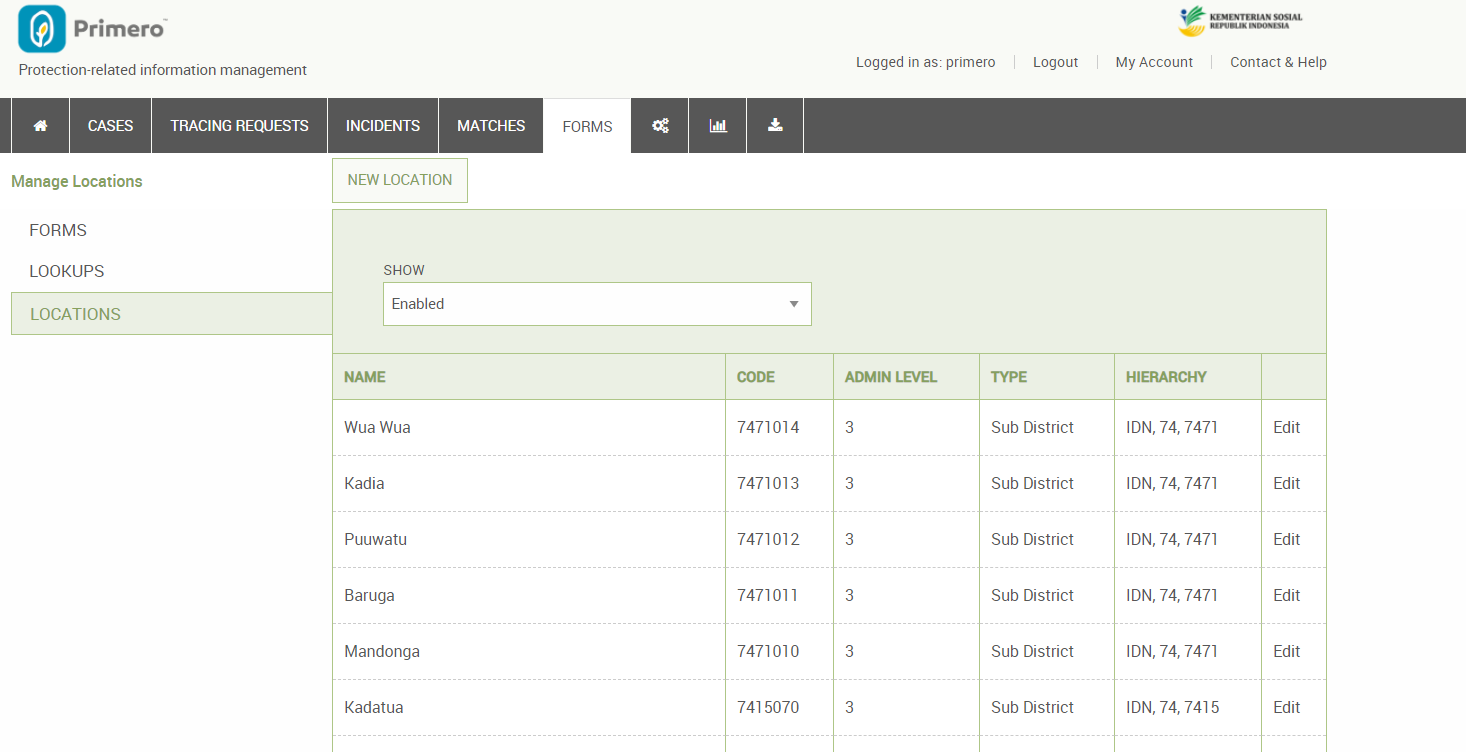
The columns on this page show some important attributes of locations:
Code: Also called "Location Code," this is an abbreviation code (usually taken from an official UN dataset) which will be used by Primero to generate attributes like custom case IDs, and to determine the order in which locations are nested.
Admin Level: This number determines where in a hierarchy a given location sits. The "highest" level, usually a country, is 0, with 1, 2, etc. representing progressively subservient administrative subdivisions.
Type: This is a name used to classify the location, such as country, province, district, sub-district, city, or ward.
Hierarchy: This is a list of location codes representing, in order, the locations under which the given location is nested. For instance, with the first location in the list above, "Wua Wua," the hierarchy "IDN, 74, 7471" represents the locations with those codes: the country of Indonesia, the province of Sulawesi Tenggara, and the district of Kota Kendari.
To edit a location, simply click the 'edit' link in the location's row in the list. NOTE: Please make any edits to locations on a VM for practice before transfering changes to a live production environment.
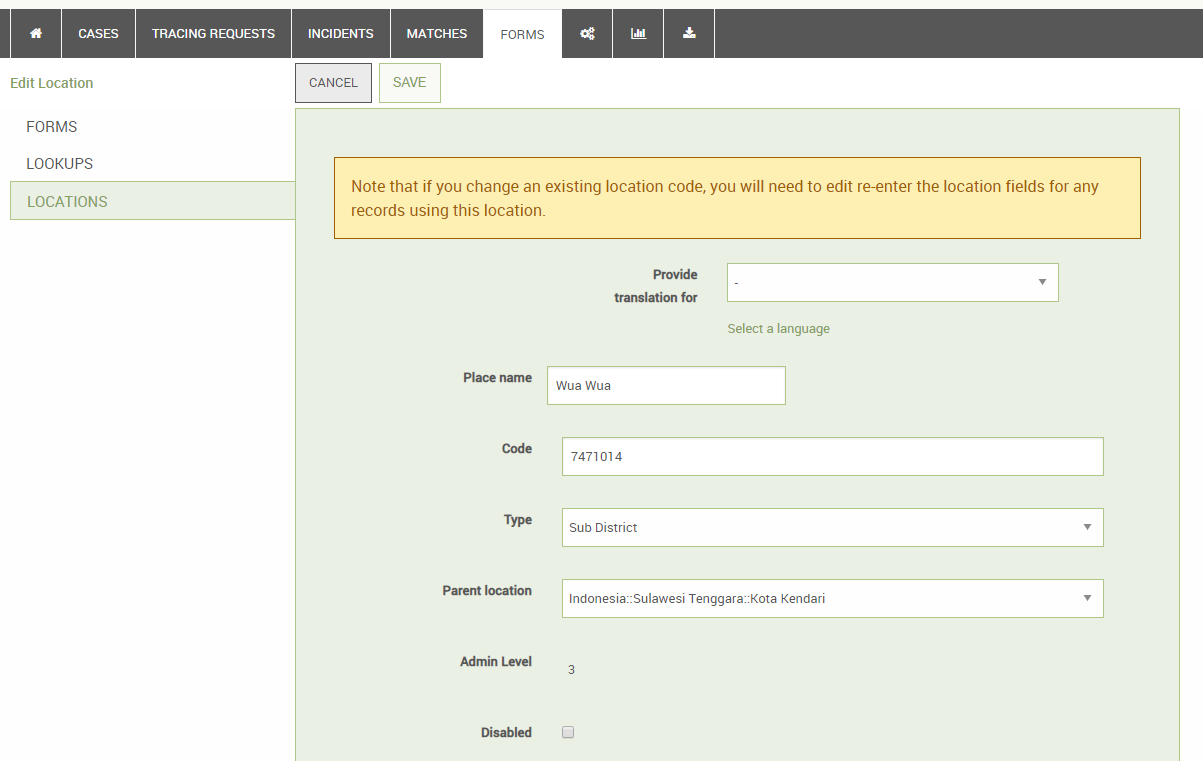
On the Edit Location page, you can change details of the location. Notice the "Location Code" field shown above. As the warning message in the image above states, changing this code is hazardous and is not recommended for those not familiar with Primero. If you do change this code, you must update the Parent Location attribute for any locations nested under this location.
Once you have made edits to the location, simply click save to submit your changes.
Since some contexts have a massive set of locations, locations load asynchronously from the rest of Primero's configuration. This means that, when you make a change to locations through the admin interface, it may take up to five minutes for this change to be reflected for end-users making changes to a record.
Technical Note on Locations
[Note: Since the following text discusses working manually in Primero's codebase, it pertains only to developers.]
As noted above, locations can take a while to load, since some contexts have several thousand location entries. To ease the burden of loading these, Primero caches location data in a series of files on the application server, eliminating the need to pull them from the database every time a user tries to designate a child's current location or place of separation. These files are stored in the public/options/ directory of the application. A job runs every five minutes which checks for changes to the locations in the database and then updates these cached location files. This is the reason for the five-minute delay in location updates mentioned in the section above.
Matching Configuration
Using either the Primero admin interface or the configuration bundle, administrators can change which case and tracing request fields are used to perform matching.
To edit the Matching Configuration in the admin interface, first navigate to the Users page using the SETTINGS link in the navigation bar, then click the Matching link in the left navigation panel.
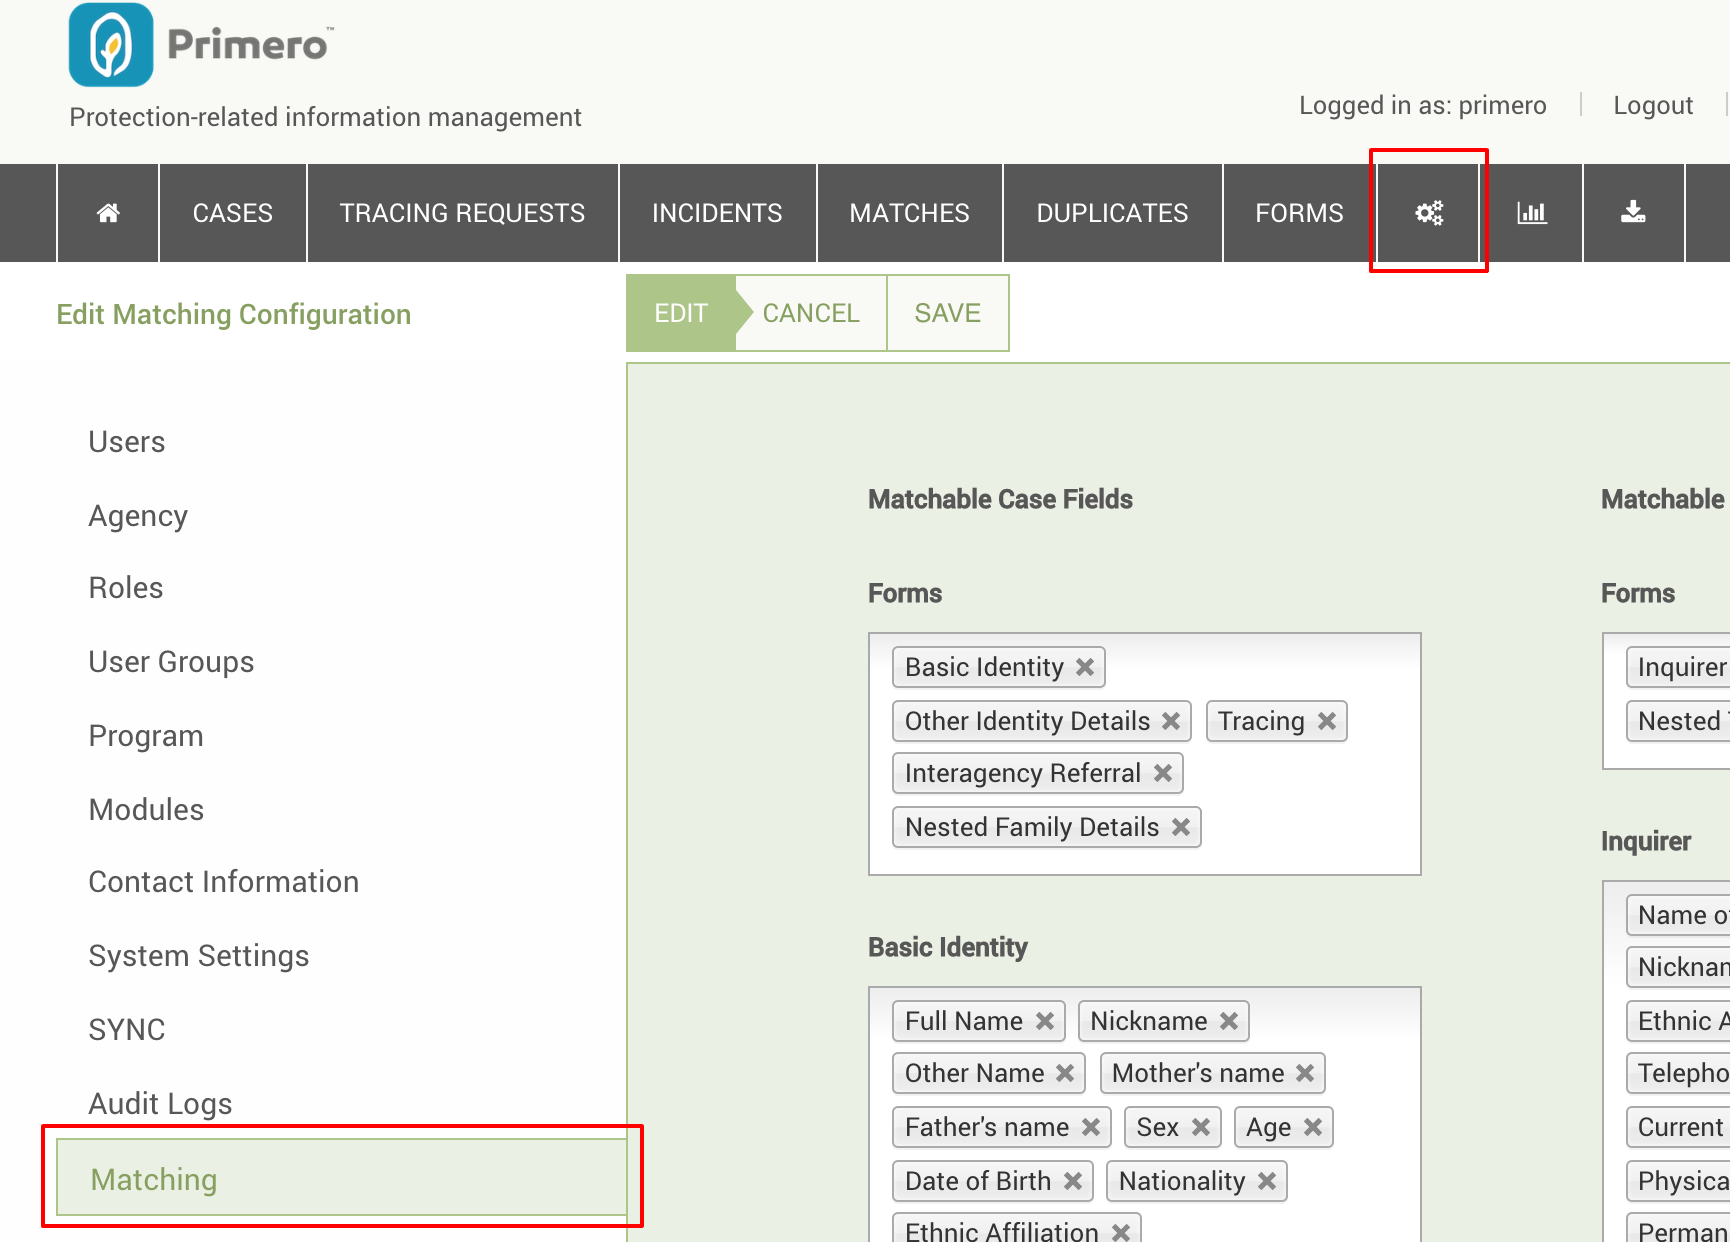
You will now see see many large multi-select fields organized into two columns: the one on the left contains fields used for matching on cases, while the right contains fields used for matching on tracing requests.
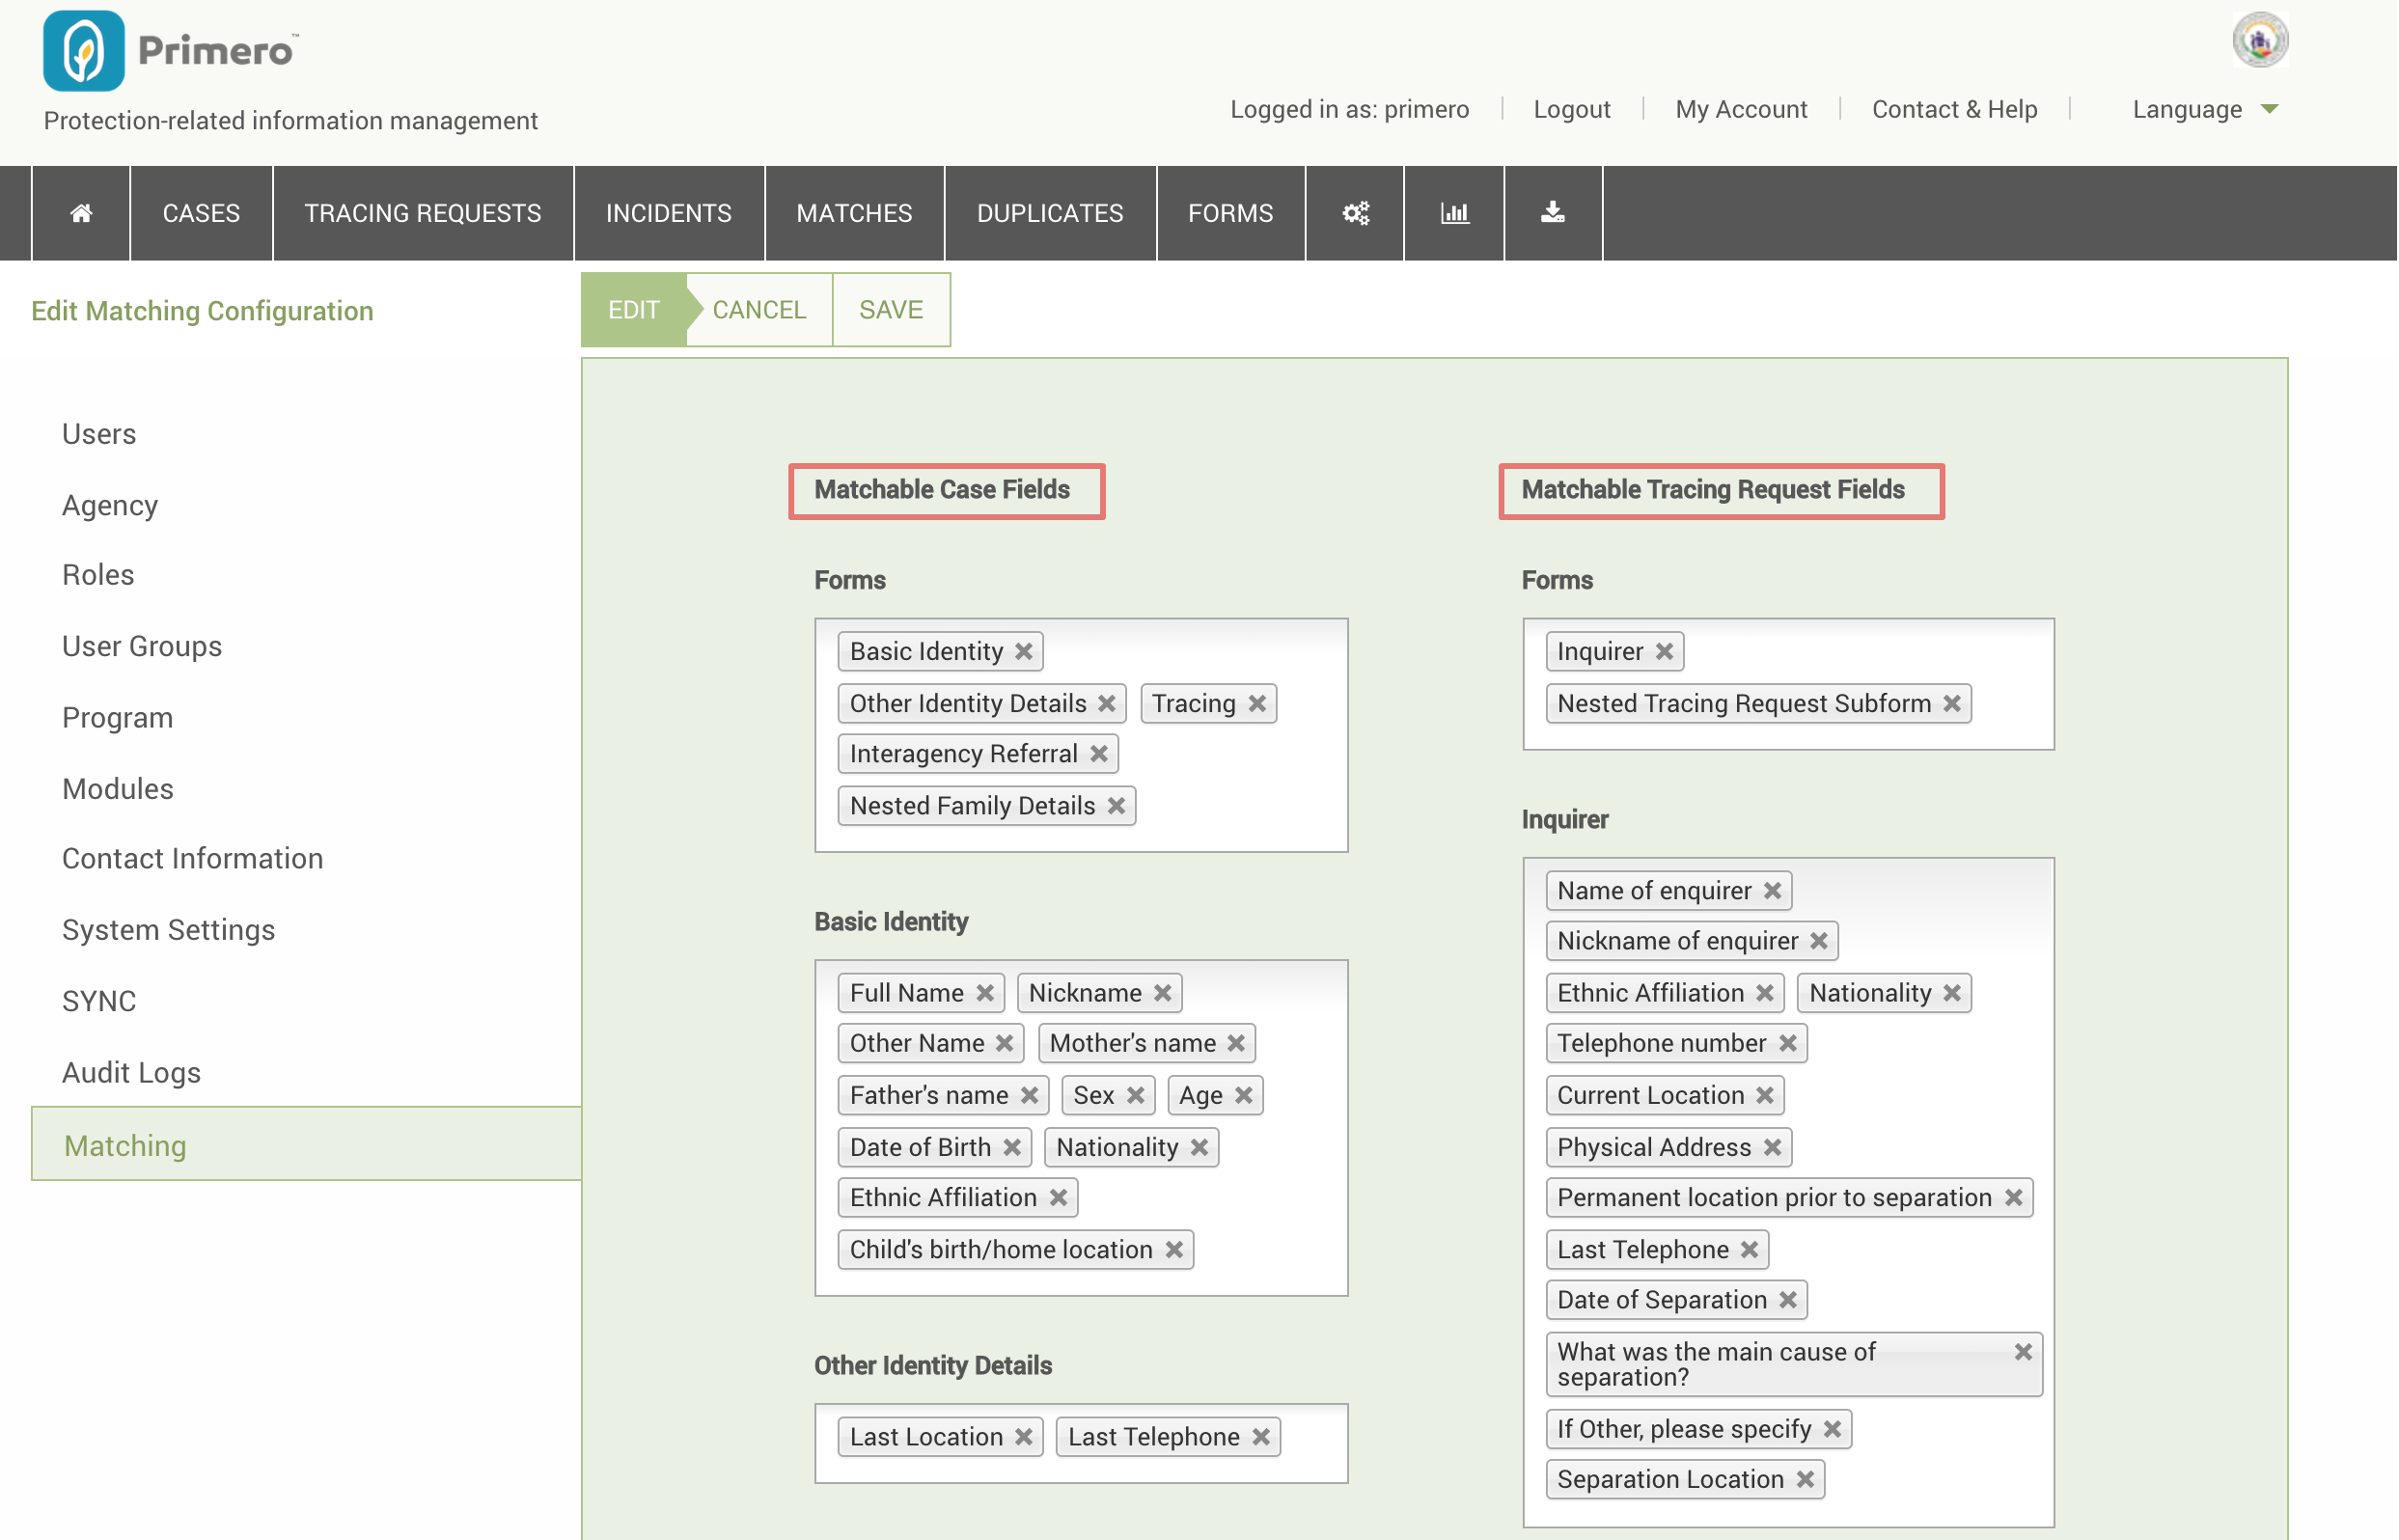
To remove a field from the list, click the 'x' at the right of the field's box. To add another field, click into the multi-select input and begin typing the name of your field. Select one of the suggestions that appears. You can then save these changes by clicking "Save."
The Matching Configuration dictates which fields are used for matching searches between cases and tracing requests, as well as the criteria which are available for the Duplicate Search. While users performing matching searches between cases and tracing request can remove matching criteria for individual searches, they cannot add criteria to their individual searches which are not first added to the system-wide Matching Configuration. For more details on how to change criteria for individual searches, as well as information on the Duplicate Search, please see the Primero CPIMS User Guide.
[Note: Since the following text discusses working manually in the configuration bundle, it pertains only to developers.]
To edit which fields are used for matching within the config bundle, you must first find the field which you want to make matchable or non-matchable. Each field has a matchable attribute. To use the field for matching, set this attribute to true. To make sure the field is not used for matching, you can set the attribute to false or simply delete the attribute from the field's JSON object.
Managing Workflow Statuses
A combination of lookups and attributes in the System Settings can be used to control the various workflow statuses that a case can have. Please note that any changes to the workflow statuses should only be made after significant testing on VMs and discussion with the local steering committee.
Three workflow statuses are always enabled, and will display in the workflow bar no matter what values exist in the lookups. These are "New," "Reopened," and "Closed." It is important to note that only one of the first two of these will display at a given time, with "New" appearing in the bar by default, and "Reopened" only appearing if the case has been reopened after being closed. In this scenario, the "New" status will not appear at all.
Some statuses (associated with the service currently being implemented) come from the "Service Response Type" lookup. The default values for this lookup are "Care plan," "Action plan," and "Service provision." However, any entries made here will appear in the workflow status bar. If a user adds a non-implemented service to an open case and gives it a response type, the case's workflow status will be set to this new service's response type. For example, if I have an open case, and I have added a service that has not yet been implemented and has a response type of "Action plan," the workflow status for the case will then be "Action plan." If multiple non-implemented services have been added, the case's workflow status will be the response type of the most recently-added service.
[Note: Since the settings in the following section can only be set manually in the user bundle, this section is only for developers working on the user bundle.]
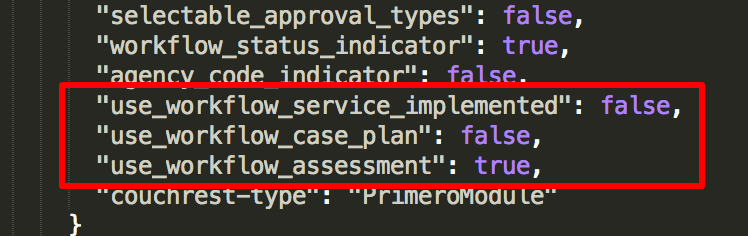
There are three more potential workflow values: "Assessment," "Case Plan," and "Service Implemented." Although none of these are set to appear in the workflow status bar by default, each can be enabled for a given module using the use_workflow_assessment, use_workflow_case_plan, and use_workflow_service_implemented attributes, respectively, for whichever module where you want to use the status. Set any one of these attributes to true to use the corresponding workflow status. For instance, to enable the "Assessment" workflow status in the default configuration bundle, search for "PrimeroModule." You should come to a list of all the modules in the system. By default, there should be only one, with an id of "primeromodule-cp." Within the object representing this module, set the use_workflow_assessment attribute to true. You may end up with something looking like the lines pictured below. If you then re-import the bundle with this change, you should see the "Assessment" workflow status show up in the workflow status bar.
For more information on the fields which must be filled out on a case record in order for each workflow status to be applied, please see the Primero CPIMS User Guide.
Rules for Importing Data into Primero
Importing information into Primero is a strict process. This helps make sure that data is not incorrectly input into the system. There are some rules as to how and what you can import:
Imports from a Primero instance to a Primero instance must be “Primero file format” (or JSON)
CPIMS Imports to Primero must be done via a migration following the migration steps outlined in a separate document.
Imports from the GBV Incident Recorder to Primero must be done via CSV using the migration steps outlined in a separate document.
CSV files can be used for importing but must be done by an administrator. This format will:
Update existing records using the Long ID field
This format should not be used for creating new records
Requires that any data being imported is strictly formatted according to the existing values in Primero - Locations, Protection Concerns, Violation Types, etc.
- If you are performing an initial migration of data, then be sure that you have decided on and loaded your configuration before making changes to your migration file and importing it. Failing to do so can cause you to lose data in fields whose database names have changed in the configuration.
For additional questions or concerns, you may discuss with your site administrator or the proper authority.
Exporting and Importing the Configuration Bundle
Configuration Bundles allow you to export and import the configuration for a Primero instance. This allows you to duplicate the configuration of one instance and can greatly simplify the setup of a new instance by exporting the desired configuration from an existing instance and importing it into the new instance. The Configuration Bundle includes all other data in the system except for the record data itself. Everything under the FORMS option from the main navigation bar and everything except Users under the SETTINGS option is included in the Configuration Bundle. There is a separate export and import process for Users which is described in the next section.
A bundle import will preserve any existing data that isn’t part of the import, but will overwrite data that is part of the import. For example, if you had an agency IRC in an instance and then imported a Configuration Bundle with the agency Save the Children, you would have an instance with both of those agencies. If you had an existing agency Save the Children with a telephone of +1-555-555-5555 and the same agency in the bundle had a telephone of +1-444-444-4444, the latter phone number would exist in the system after a bundle import.
Exporting the Configuration Bundle
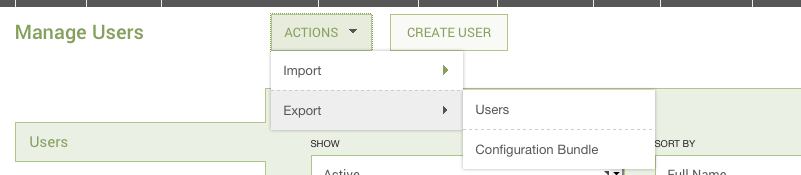
To export the Configuration Bundle, login in as a user on this instance with permissions to access the SETTINGS option in the main navigation bar. Select the SETTINGS option from the main navigation bar. While on the Users form in the left navigation list, you should see the Action button with the options to Export as shown below:
To export a Configuration Bundle from an existing instance:
When logged in as the System SuperUser or another user with access to the SETTINGS option, select that option from the main navigation bar at the top of the screen. The Users form in the left navigation list will be selected by default; remain on this option.
From the ACTION BUTTON, select the Export option and then the Configuration Bundle option. You will then be presented with a popup window asking you for a password and an optional file name.

A password is required and it is highly recommended that you choose a strong password that you can remember. A filename is optional. After completing the password field, click on OK and you should receive a zip file containing the Configuration Bundle. If you do not enter a filename, the filename will start with ‘configuration_bundle’ and end with ‘json.zip.’
It is highly recommended that if the Configuration Bundle is to be distributed, the zip file that is encrypted and password protected be distributed and the password sent separately rather than distributing the extracted, unencrypted file.
Importing the Configuration Bundle
To import a bundle from another instance, you will need the zip file created in the export step and the password for that file. However, before doing the import, you will need to extract the .json file from inside the zip file that you received when you exported the Configuration Bundle in the previous step. Once the file is extracted, use the steps below to import the configuration into the desired instance.
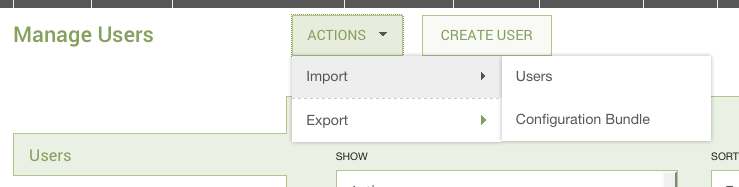
To import the Configuration Bundle, login in as a user with permissions to access the SETTINGS option in the main navigation bar. Select the SETTINGS option from the main navigation bar. While on the Users form in the left navigation list, you should see the Action button with the options to Import as shown below:
To import a Configuration Bundle from a file:
When logged in as the System SuperUser or another user with access to the SETTINGS option, select that option from the main navigation bar at the top of the screen. The Users form in the left navigation list will be selected by default; remain on this option.
From the ACTION BUTTON, select the Import option and then the Configuration Bundle option. You will then be presented with a popup window asking you for a file name.
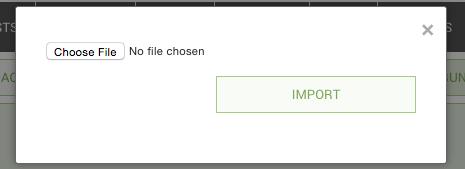
This is the .json file that was contained inside the zip file that you received when you exported the Configuration Bundle in the previous step. You cannot upload the zip file itself, however, since it is encrypted. Therefore, you must extract the file out of the zip file to a known location on your computer, and then find it and select it in the import popup window. To do this, double click the zip file, enter in the password for the exported file and your computer will open a .json file. Select this file for import. After clicking OK, the system will process for a moment and then present you with a message whether the import succeeded or failed. (Please note that it may take a few seconds for all your configuration changes to load once you have imported the configuration bundle. If you do not see your changes show up immediately, wait fifteen seconds or so, reload your page, and check again.)
Troubleshooting the Import of the Configuration Bundle
Sometimes a bundle import will succeed and the ‘File was imported successfully’ message will appear, but the process does not apply the full set of bundle changes. For example, some Forms or Lookups may go missing. If that is the case, the bundle will need to be reapplied again using the Import process until the full set of configuration changes are observed. It helps to keep a list of expected Forms, Lookups, and Roles and then double check that this list appears in the configured Primero instance. It is important to note that existing core case and incident data will not be erased if the bundle is partially applied.
Testing the Configuration Bundle
Once a configuration bundle imports successfully or any changes have been applied, it must be tested to make sure the new fields and formats are correctly configured. The best way to verify your changes is to simply save a record. Either open a new record, or edit an existing one. From here, try to make changes to all different field types: Add an item to a multi-select, check a tick box, add a value for a date of birth. Be sure, as well, to add entries to nested forms on form sections such as Family Details. As you are going through the various form sections, also take a minute to make sure that the fields look the way you imagine they should look. When you click on a drop down, do the options you specified for that drop down appear?
Below is an example of simple steps that can help in this verification:
Navigate to the form\/fields that were changed or added
Are they in the right location\/group?
Are they the right type of field\/form?
Are the labels correct?
If you have chosen to hide in view page, does it hide correctly?
Add similarly formatted test information into each of the new fields and forms and save (example: do not attempt to add “Old” in Age field, add the type of information the form is expecting)
Does it save properly?
When you navigate away from the form, then back, is any information lost?
Export the form\/fields you created into Excel
- Did they show up in your export correctly?
When you are finally done adding information to your record, save it, and see if your information saved correctly. If they did, and you have encountered no errors, try creating and then exporting a report as well. If all of this proceeds without error, it is time to export a configuration bundle so you can save the changes you have made so far.
Exporting and Importing a Group of Users
User import and export is a similar process to the Configuration Bundle. This functionality only applies to Users. This function exports and imports all users in the instance; you cannot pick users to export or import. Also, it does not export the underlying building blocks of Users
- Agencies, Roles and User Groups. These can be exported and imported using the Configuration Bundle functionality described above.
Exporting a Group of Users
To create the User Export, login in as a user with permissions to access the SETTINGS option in the main navigation bar. Select the SETTINGS option from the main navigation bar. While on the Users form in the left navigation list, you should see the Action button with the options to Export as shown below:

To create a User Export from an existing instance:
When logged in as the System SuperUser or another user with access to the SETTINGS option, select that option from the main navigation bar at the top of the screen. The Users form in the left navigation list will be selected by default; remain on this option.
From the ACTION BUTTON, select the Export option and then the Users option. You will then be presented with a popup window asking you for a password and an optional file name.

A password is required and it is highly recommended that you choose a strong password that you can remember. A filename is optional. After completing the password field, click on OK and you should receive a zip file containing the user export. If you do not enter a filename, the filename will default to ‘primero_user.json.zip.’
It is highly recommended that if the User Export is to be distributed, the zip file that is encrypted and password protected be distributed and the password sent separately rather than distributing the extracted, unencrypted file.
Importing a Group of Users
To import a User Export from another instance, you will need the zip file created in the export step and the password for that file. Unlike the import for the Configuration Bundle, the user import accepts the zip file without the need to extract the .json file; however, you must provide the password for the file in the import prompt.
To import the User Export, login in as a user with permissions to access the SETTINGS option in the main navigation bar. Select the SETTINGS option from the main navigation bar. While on the Users form in the left navigation list, you should see the Actionbutton with the options to Import as shown below:

To import a User Export from the zip file:
When logged in as the System SuperUser or another user with access to the SETTINGS option, select that option from the main navigation bar at the top of the screen. The Users form in the left navigation list will be selected by default; remain on this option.
From the ACTION BUTTON, select the Import option and then the Users option. You will then be presented with a popup window asking you for a filename and password.
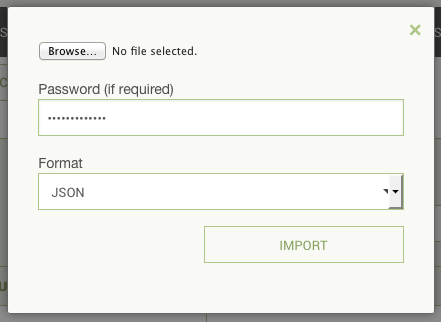
The file should be the encrypted export file, which defaults to the filename ‘primero_user.json.zip’ unless another name was specified during the export process.
Enter in the password for the exported file and do not change the format type. After clicking OK, the system will process for a moment and then present you with a message whether the import succeeded or failed.
Exporting a Blank Nested Form for an Existing Case
Exporting a blank Nested Form in PDF format allows you to print out additional paper Forms to take into the field to record additional occurrences of the Form contents, such as an additional family member on the Family Details nested form within a CP Case.
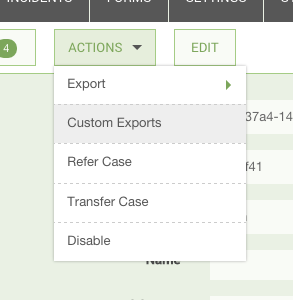
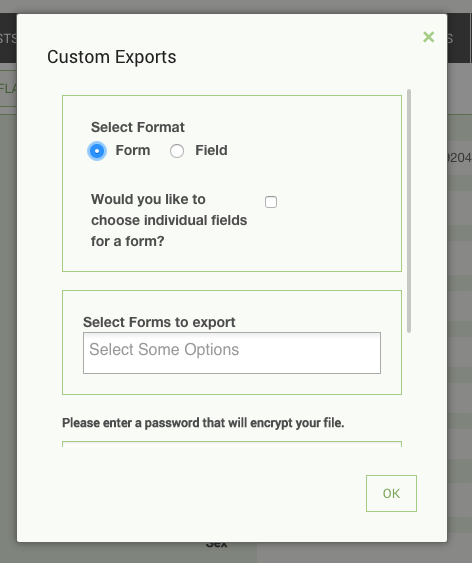
From within the Case use the Export option under the Action button, select Custom Export and then you must select the corresponding “Nested Form Name.” An easy way to do this is to type “nested” in the Select Forms to Export field. This will filter the form list and show those that starts with “Nested” as shown below:
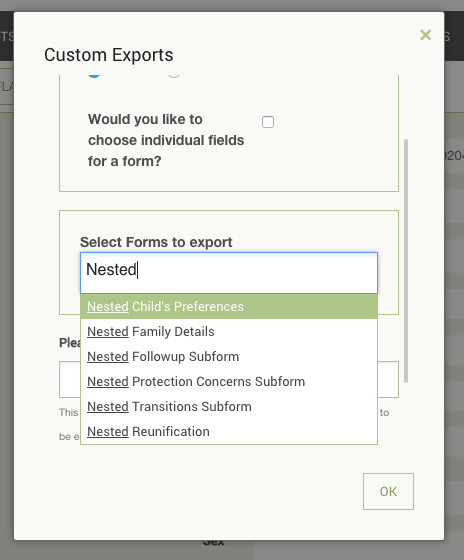
Select the desired nested form and complete the export to PDF format. The PDF will contain all the forms for that case record as well as the blank nested form. Do not select any of the non-nested forms. If you select a non-nested form, you will get all the information for the case without any blank forms.
Testing Administrative Changes and Data Loads
It is recommended to test out on a local instance any large bulk change to the system before applying it to the global production instance. Such risky bulk changes may include:
Applying a customization bundle
Loading large numbers of records
Running migrations
Additionally, experiments with forms, Lookup values, and Report creation can be safely performed on a test instance to minimize any potential disruptions to all Primero users from misconfigured Forms or Reports with poor performance.
Test instance
A test instance can be set up and configured for the express purpose of validating potentially disruptive updates to Primero as follows:
The instance can be a local laptop or desktop installation of Primero. Local instances are quick to set up and isolated from production. To do this, use the Installation instructions listed in a separate document.
Make sure this instance is the same version of Primero as the centrally hosted instance.
This installation of Primero should not be, under any circumstances, configured to be synced with the central Primero server. This will protect the central server from any potential damage and experimentation on the test instance.
The base state of the test instance should be the same as that of the central production instance. To that end make sure that:
The configuration is identical – achievable by an earlier import of the production Configuration Bundle
The underlying data is the same - or reasonably close. This can be accomplished by exporting data as JSON from the central instance and importing into the test instance.
It is recommended that any deployment have at least one test instance for the administrator to validate system-wide changes.
Testing
Once a test instance exists, the administrator can apply the changes and manually validate the expected results. The following are good areas to spot check:
Are all the records loaded? If the import file contains 3000 new records, do we have 3000 new records?
Are all of the expected fields populated? Do we have names, ID numbers, bio data, locations, service information, and so on?
Have the Lookup field values been correctly imported? Primero will not display imported Lookup field values that do not correspond to already configured Lookups or field options for a particular field.
If importing a Configuration Bundle:
Check that expected fields and forms are present.
Check that the expected Lookups and locations are present.
Validate that the expected Roles exist
Try creating or editing a Record. Validate that it can be saved.
Designing Forms and Lookups
It is recommended that configuration design take place on a separate test instance. This will buffer live end users from experiencing potential errors from misconfigured forms and roles. Once the configuration has been successfully modified, it can then be applied to production as an import of the Configuration Bundle.